I used to make these for my shop many years ago... here are some I made earlier :)
As well as putting together a tutorial to show you how to make them, I've drawn up some charts so you can get stitching straight away. Hurrah!
Will you declare yourself a "COFFEE ADDICT", or proclaim "I LOVE TEA"?
Celebrate thriftiness with a "MAKE DO AND MEND" brooch or the joys of reading with a "BOOK NERD" badge?
Or explain to everyone why there's cat hair on your sweater with an "I LOVE CATS" or "CAT LADY" brooch? (There is always cat hair on my sweater).
Or, of course, you can always get out a pencil and some squared paper and design your own stitch-y slogans!
To make a cross stitch brooch you will need...
- the cross stitch charts provided at the bottom of this post (or your own chart)
- aida (I used white, 14 count)
- white sewing thread
- stranded embroidery thread (floss) and matching felt
- white felt
- a brooch clasp
- embroidery scissors
To make each brooch...
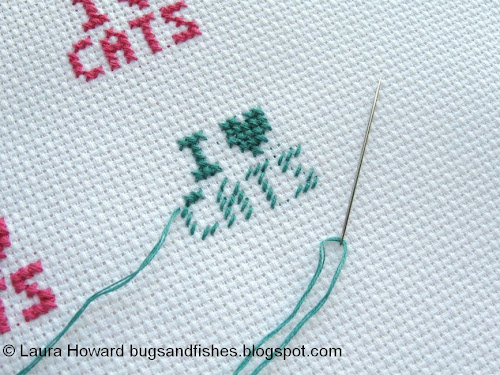
1. Stitch your slogan! I like to stretch my aida in an embroidery hoop to give myself a nice taught surface to stitch on.
If you've never done cross stitch before, I promise it's very easy. There are lots of beginner tutorials available online, but basically you sew two stitches through the holes in your aida to form each X... and gradually build up the design you're stitching.
I usually use half the strands of my thread (floss) when cross stitching - i.e. just using three of the six strands - but for bolder text you can use the whole thread. This isn't the world's most in-focus photo (sorry!) but it shows the difference between using three strands (top) and the whole six-stranded thread (bottom).
Here are some slogans I stitched earlier. Make sure you leave plenty of space to cut them out in the next step.
2. Iron your stitching if you need to, then cut out your slogan(s). Use the holes of the aida as a guide to help cut a neat rectangle, then trim the corners so you get a nice curved shape.
3. Using your piece of aida as a template, cut a matching piece of white felt. This will be the back of your brooch. Set it aside for the moment.
4. Stitch your cross stitch design to a piece of felt in the same colour as your letters. Use white sewing thread and whip stitch to sew the aida to the felt.
Using white thread on white aida is great because your stitches will be almost invisible... but this isn't too helpful for a tutorial! Here's the back so you can see where I've stitched. Make sure you start and finish your stitching behind the aida itself as you'll be trimming the felt in the next step.
5. Use embroidery scissors to trim away the excess felt, creating a neat frame around your stitched design. Remember not to cut too close to the edge of your stitched-on-aida - you don't want to snip your stitching!
Scallop edging looks very cute but can be a bit fiddly. If you want a less frilly look or one that's simpler to cut, just cut a plain border to frame the design.

6. Turn over the piece of white felt you cut out earlier. Sew on a brooch clasp, using a double thickness of white sewing thread.
7. Then place the front and back of your brooch together, lining up the white shapes as carefully as possible. Use small running stitches to sew the layers together (I like to follow the first row of holes in the aida) then finish your stitching neatly at the back.
And you're done! Your finished brooch will look something like this:
Click here to view the template sheet in a new tab or window and print it at 100%
This tutorial is for non commercial use only. You may borrow a couple of photos if you want to blog about this project, but remember to credit me and link back to this page on my blog, and do not reproduce my entire tutorial / share my charts on your site. Thanks!
Enjoyed this free tutorial? Buy me a "coffee" and help support my blog!

Subscribe to my newsletter for a monthly free pattern and visit my crafty tutorial archive for lots more free projects.
Visit my shop to buy my printable PDF sewing patterns:


7 comments:
OOh very very nice!!!
Wonderful - so cute !!!
I want to start at once ;o)
What lovely little brooches. They would make great gifts. Thanks for sharing them with us.
I love cross-stitching!
Thanks guys! I hope you'll have fun stitching them x
Hello Laura, how do you cut aida without unraveling the aida?
Sorry for the slow reply! I just make sure to leave a good amount of space around the design so it it unravels slightly the stitching won't be affected. Then I add lots of white stitches around the edge as I'm sewing it to the felt background to help keep the threads of the Aida from unraveling.
Post a Comment