Thursday 30 November 2017

Tutorial: DIY Reindeer Novelty Christmas Jumper

Today I'm sharing a tutorial for turning a plain jumper into a cute novelty Christmas jumper!


Add some festive fun to your wardrobe this winter with this applique reindeer design, complete with mini jingle bells on the antlers and a fluffy pompom nose and tail. Perfect for Christmas parties and festive selfies!


Don't fancy making a novelty jumper? You could also use this tutorial to decorate the front and back of a cushion (or maybe even a pair of cushions) and add some festive cuteness to your decor.

This tutorial originally appeared in docrafts Creativity magazine.


To make this project, you will need:

- A jumper!
- The templates provided at the bottom of this post
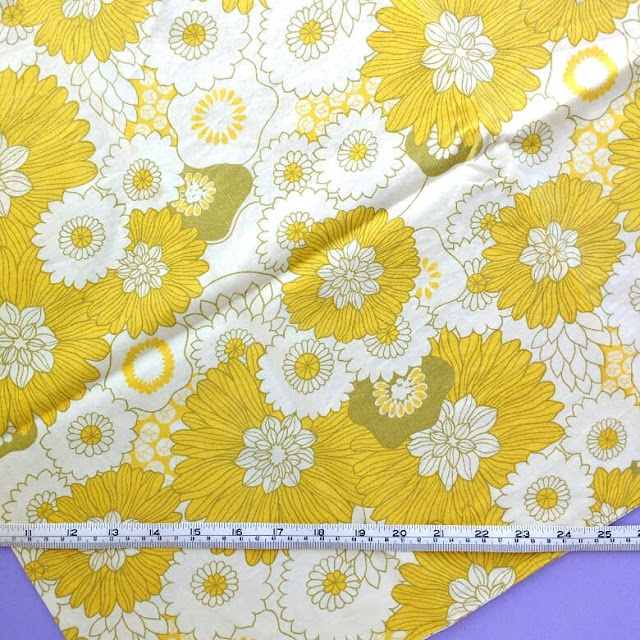
- Felt in the following colours: light brown, dark brown, white, black, and red.
- Matching sewing threads
- Small jingle bells
- A red pompom for the nose, and a large white pompom for the tail
- Sewing scissors
- A sewing needle and pins
- A ruler

Important: Hand wash the finished jumper carefully in lukewarm water. Definitely do not tumble dry!

To decorate the jumper:

1. Use the templates provided to cut the pieces from felt in the colours marked.

2. Position the light brown front body and head and the dark brown antler pieces on the front of the jumper and pin them into place. Use plenty of pins and take care to only pin through the front of the jumper.

Tip: Use a ruler to help you position the reindeer in the centre of the jumper

3. Sew the felt to the jumper, sewing round the edges with whip stitch and matching threads and removing the pins as you sew. Throughout this project take care to only sew through one layer of the jumper and don't sew the front and back together by accident. Check your stitching at regular intervals so you don't have to unstitch a large section if you make a mistake!

4. One by one, position the white ear details, the black eyes and the white belly in position as shown. Pin them in place then stitch around the edges with whip stitch and matching thread. Remove the pins as you sew each piece in place.

5. Construct the red bow by sewing the pieces in the following order: ribbon, right tail, left tail, left and right bow, and centre circle. One by one, pin each shape in place, sew it with whip stitch and red sewing thread, remove the pin(s) then sew the next shape.


6. Turn the jumper over and arrange the back pieces as pictured: the light brown head and neck piece, the light brown body and the two dark brown antlers. The back of the jumper shows the back of the reindeer, so the antlers should be flipped to be a mirror image of the front. Note that unlike the front antlers, the bottom of the back antlers are hidden behind the head shape.

7. Pin the pieces then sew them with whip stitch in matching thread, removing the pins as you sew.


8. Add jingle bells to the front antlers. Use a double thickness of dark brown thread, sewing each bell securely with three or four stitches. To avoid carrying your thread between the bells and creating long, snag-able stitches inside the jumper, finish your stitching after sewing each bell.


9. Sew a red pompom to the reindeer's face to create the nose. Use a double thickness of red thread, sewing a few stitches through the centre of the pompom.


10. Finally, add a large white pompom to the back of the reindeer to create the tail. Sew it securely in place with a few stitches of white thread.


The front of your finished jumper should now look like this...


... and the back like this:


This tutorial is for personal use only: you can use it to make as many jumpers (or cushions!) as you want for yourself or as gifts, but please don't make any for sale. You may borrow a photo or two if you want to blog about this project, but remember to credit me and link back to the original source, and do not reproduce my entire post or share the pattern itself on your site. Thanks!


Enjoyed this free tutorial? Buy me a "coffee" and help support my blog!


Buy Me a Coffee at ko-fi.com

Subscribe to my newsletter for a monthly free pattern and visit my crafty tutorial archive for lots more free projects.

Visit my shop to buy my printable PDF sewing patterns:

Follow the links to open each template sheet in a new window or tab. Download the image or make sure you're viewing it at full size and print at 100%.


Tuesday 28 November 2017

Gift Wrapping with Old Photo Negatives

Do you have a box of old photo negatives from the days before digital cameras?

Strips of negatives from family Christmases, summers holidays and other special memories make quirky and nostalgic gift toppers.


For these pictures I used a gift that was just the right size for the photo negatives, but of course your negatives probably won't perfectly fit your parcel like this! You can trim them to fit smaller gifts, or add several negatives (with thread either side) to larger parcels.

It's really easy to attach the negatives to your gifts. Cut two long pieces of embroidery thread or yarn (one for each side of the negative strip) then use a large sewing needle to thread them through the holes along the edges of the strip.

If you want, you can then add a second thread colour for extra detail. Once your thread is nice and neat, use the excess thread at each end to tie the negatives to your parcel, knotting them securely then trimming any loose threads. You could attach one or two strips, or a whole row for a striped look.

Once the parcel is opened, you can all have fun holding the film up to the light to see the images and explaining to any kids or teens in the vicinity what these strange little dark pictures are and how you all used to take your family snaps with this thing called "film" back in the day.


Don't have any old film negatives, but love the retro photo look? Click here for a how-to on making Polaroid-inspired cards and gift tags featuring your old family photos.


Enjoyed this gift wrapping idea? Buy me a "coffee" and help support my blog!

Buy Me a Coffee at ko-fi.com

Subscribe to my newsletter for a monthly free pattern and visit my crafty tutorial archive for lots more free projects.

Visit my shop to buy my printable PDF sewing patterns:

Thursday 23 November 2017

40% Off Craft Books at MAKEetc!

MAKEetc. (a lovely crafty website run by my publishers) are celebrating their first birthday with a BIG discount.

https://makeetc.com/

You can get 40% off all craft books (including my book, Super-Cute Felt) at makeetc.com tomorrow (Friday 24th November) with the discount code HAPPYBIRTHDAY40.

https://makeetc.com/collections/kids-craft/products/super-cute-felt

Click here to visit MAKEetc and check out their range of crafty books for knitters, crocheters, paper crafters, & more.

Tuesday 21 November 2017

A Trip to Liverpool: Pier Head & The Three Graces

My slow travel blogging continues!

Over the next few weeks I've got lots of photos to share with you from my trip to Liverpool... which may have happened over two years ago but is still well worth blogging about, because Liverpool is pretty awesome.

Holidaying in England in the spring is always a bit of a gamble weather-wise, but you can get some excellent hotel deals and if it chucks it down with rain it just means you (well, I) end up spending more time in museums and cafes which is really no great hardship (regular readers will know how much time I already spend in museums on my trips, rain or no rain).

I was really lucky with my Liverpool trip though, the weather was completely glorious and I got to spend a lot of time going for walks around the city and swooning over the architecture.


The most famous building in Liverpool has got to be the Royal Liver Building (even I'd heard of that and I knew next-to-nothing about Liverpool before I visited). This is one of the "Three Graces" on the city's waterfront: the Royal Liver Building, the Cunard Building (both pictured above), and the Port of Liverpool Building (below).


This is a rather fabulous trio! They create a very striking and impressive skyline, and if you look closer there are loads of interesting decorative details to reward your attention.


The Three Graces are located on Pier Head, which was the landing site for passenger ships travelling to or from Liverpool - including liners crossing the Atlantic. Your first impression of England would definitely be a good one if Liverpool's waterfront was the first thing you saw! You can still catch a ferry from here, albeit to much more local destinations.

There's a fabulous mix of old and new on Pier Head. The way totally different styles of architecture nestle up against each other is one of my favourite things about cities. One of the newest buildings is the Museum of Liverpool, which opened in 2011 (pictured on the left, below). 


The museum is free to visit and, as you might guess from the name, tells the story of Liverpool and its people. I particularly enjoyed the galleries devoted to Liverpool as a global city, and the city's overhead railway. So many fascinating things, all very thoughtfully displayed.

Also on Pier Head you'll find the Church of Our Lady and Saint Nicholas...


... if you walk along the waterfront, make sure you look up to see the church's ship-shaped weather vane and (of course) the two famous Liver Birds on the Royal Liver Building.


It feels a bit weird to write that you "loved" a memorial to a disaster, but I was very struck by this one: the memorial to the "Engine room heroes" of the Titanic.


Apparently this was the first monument in the UK to depict "the working man" and has been rededicated to include all those who died in maritime engine rooms in World War One, as well as the 244 engineers who died on the Titanic. The inscription reads "The brave do not die, their deeds live for ever and call upon us to emulate their courage and devotion to duty."

If you're familiar with the details of the Titanic story, you might be surprised to see a memorial in Liverpool (since the ship sailed from Southampton) but it turns out the White Star Line (which owned the doomed liner) was founded in, and based in Liverpool.

Just round the corner from the Three Graces is the wonderfully stripey Albion House which was built as the headquarters of the White Star Line.


Looking this building up for this blog post I discovered that it's now "a 64 bedroom luxury Titanic-themed hotel" which I honestly find deeply weird. The Titanic disaster is a very interesting, famous bit of history but I'm not sure I'd want to stay in a horrible-maritime-disaster-themed hotel - how about you?

That's enough Liverpool snaps for now... I'll be sharing lots more sometime soon!

For more slow travel blogging jam-packed with museum visits and swooning over architecture, why not read about my trips to Manchester, Leeds and Birmingham.

Thursday 16 November 2017

Faux Leather Mini Notebook Tutorial

UPDATE: my vegan faux leather craft tutorials are now available here on my blog! Make a lightning bolt brooch, a geometric necklace, a star headband, or a mini covered notebook.

----

The second of my vegan leather craft tutorials is up on the Village Haberdashery's blog: a step by step guide to making a mini notebook with a faux leather cover.


These mini notebooks would make fab gifts - and great stocking fillers. (Have you started thinking about your Christmas gifting yet??? Because I totally have - the 25th of December seems to creep up faster every year!).


Click here for the free tutorial.

Fancy some more free tutorials? Subscribe to my newsletter for a monthly free pattern and visit my crafty tutorial archive for lots more free projects.
 

Tuesday 14 November 2017

More Crafty Destashing... and a New Newsletter!

I'm having another crafty clearout!

A whole bunch of stuff has sold already, but there are still lots of bits and pieces available (sorry for not giving you guys a heads up this time round - it was a bit of a spur-of-the-moment thing inspired by a sudden urge to declutter).

Colourful card...

https://www.instagram.com/lauralupinsells/

... old postage stamps...

https://www.instagram.com/lauralupinsells/

 ... double-sided crepe paper...

 https://www.instagram.com/lauralupinsells/

... a vintage pillowcase...

https://www.instagram.com/lauralupinsells/

... snowflake buttons...

https://www.instagram.com/lauralupinsells/

... embroidery threads...

https://www.instagram.com/lauralupinsells/

... beads...

 https://www.instagram.com/lauralupinsells/

... and more! I've also got a few things left over from the last sale, including some bargain craft books:

https://www.instagram.com/lauralupinsells/

Click here to see all the available listings, with more info and photos

You can leave a comment on an item to claim it, but if you don't use Instagram don't worry! If you see things you want to purchase, just send me a message via my contact form to let me know what you're interested in.

I've listed the price and UK postage of each item, but I'll combine the postage for each parcel and only charge what it actually costs to post (in the UK you can send a shoebox sized parcel weighing up to 2 kilos second class for just £2.90).

IN OTHER NEWS, I am finally (after literally years of meaning to get round to it) starting a weekly newsletter.

It won't be a flashy, sales-y thing with lots of embedded pictures and fancy formatting, just an email with updates on stuff I've been making, doing, and blogging about lately... plus links to interesting stuff I've been reading, inspiring Instagram accounts, cool tutorials, etc. Sometimes it'll be long and chatty when I've got lots of stuff to share, sometimes short and sweet.

The first newsletter goes out on Friday. Click here to sign up!


UPDATE: My newsletter has moved! Click here to sign up. 

Thursday 9 November 2017

Faux Leather Star Headband Tutorial

UPDATE: my vegan faux leather craft tutorials are now available here on my blog! Make a lightning bolt brooch, a geometric necklace, a star headband, or a mini covered notebook.

----

Have you ever made anything from faux leather? I hadn't until recently, when the folks at The Village Haberdashery sent me a pack to get crafty with. It turns out to be very fun stuff - and vegan-friendly, too!

I've designed four easy tutorials for things to make with faux leather, which will be popping up on the Village Haberdashery blog in the coming weeks. Click here for the first tutorial: a guide to making a shiny star headband.

Faux Leather Star Headband

This tutorial is perfect for using one of the metallic faux leather sheets...

Star Headband

... isn't that gold just delicious? (I never can resist shiny things).

Gold metallic vegan leather stars

You'll find the free step by step tutorial HERE and the faux leather packs HERE.

Fancy some more free tutorials? Subscribe to my newsletter for a monthly free pattern and visit my crafty tutorial archive for lots more free projects.