Thursday 31 January 2019

Creating Patchwork Cross Stitch from Leftover Embroidery Threads

Look what I finished!!

Scrappy Patchwork Cross Stitch Textile Art

I started this patchwork cross stitch project way back in 2014, as a way to make use of those scrappy bits of leftover embroidery thread (floss) which aren't quite big enough to be worth keeping and winding back on the bobbin but which still have a few stitches left in them.

I saved up the threads in a compartment in my embroidery thread storage box, then would sit and do a whole batch of stitching in one evening - slowly building up the patchwork design in blocks of colour. It was a super relaxing process!

Scrappy Leftover Embroidery Threads
 Scrappy Patchwork Cross Stitch Textile Art

As I wrote when I blogged about this project last year, "I guess I could add a block at a time, each time I have a piece of leftover thread, but I quite like spending a few relaxing hours working on this from time to time. Plus, adding a bunch of colours at once helps me make the randomness of this project more of a controlled randomness - I can spread out the colours more easily, and get a more pleasing mix of tones and shapes than I think I would end up with if I added a block each time I had a scrap of thread to use up.

I like the randomness of this project and how the colour palette (and the speed at which it's growing) is entirely dictated by what other projects I'm working on, and the luck of what size thread scraps I'm left with... but I also want it to be something I love the look of when it's finished!"


To read more about how this piece has developed, click here to read all about how the project has progressed over the years and see lots of in-progress photos.

I'm really pleased with how the finished piece has turned out - someone pointed out that it looks like a tiny quilt, and it totally does! It's about 6 inches (15 cm) square and absolutely jam-packed with colour. Loads of happy hours of stitching have gone into it, but it also represents even more hours of stitching as, of course, these are all just the leftovers from other projects!

Scrappy Patchwork Cross Stitch Textile Art
Geometric Cross Stitch Textile Art

And - to think! - all those threads would otherwise have just gone to waste. It's going to be really hard breaking the habit of keeping my scrappy bits of thread now... maybe I'm going to need to start another leftovers-themed project? Hmm...

Want to make your own patchwork design from leftover threads? Simple! Just start keeping your own leftover threads, stitch them in blocks and just keep on going until you've slooooowly filled up a whole square with colour.

A patchwork design like this is also a great way to use up a whole bunch of embroidery threads from your stash, you don't specifically need to be using leftover threads. Just have fun playing around with colour combinations and shapes!

Last year several people asked me for the pattern for this design, which isn't really something I can properly share as I've used to many random colours making this piece. BUT, I have drawn out a chart of how my design ended up, in case you like how the arrangement of blocks look and fancy replicating it. You can use my photos as guide when picking colours and/or use felt tips or coloured pencils to colour in your printed chart to help guide your stitching.

Click here to view the chart in a new window or tab, make sure you're viewing it full size then print.

Patchwork Cross Stitch Chart

P.S. For even more scrappy goodness, check out my Patchwork Mini Squares blanket, knitted from yarn left over from many years worth of knitting projects.

Subscribe to my newsletter for a monthly free pattern and visit my crafty tutorial archive for lots more free projects.

Visit my shop to buy my printable PDF sewing patterns:


Tuesday 29 January 2019

Design Dilemmas and the Magic of Social Media Feedback

What do you do with designs that go nowhere?

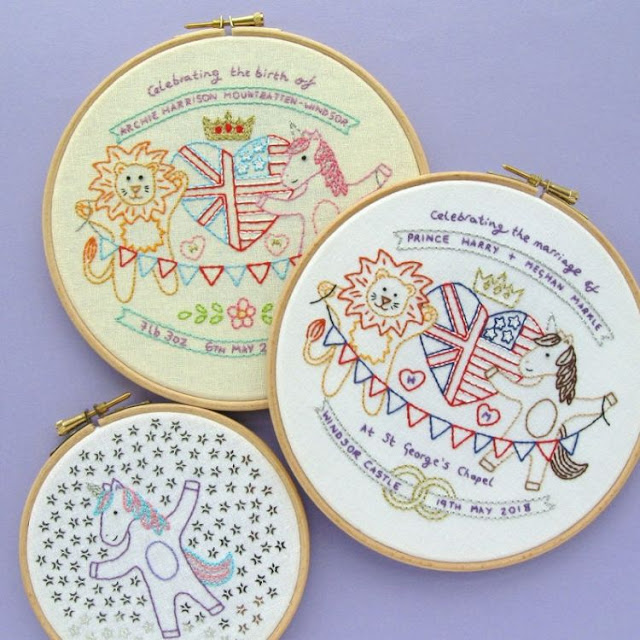
Last spring I started work on a bunch of ideas for possible projects to celebrate the Royal Wedding. I stitched and shared a simple cross stitch sampler pattern and put lots of work into this design for a cute embroidery pattern...

sketch for an embroidery pattern celebrating the Royal Wedding


... but then I ran out of time and it never got made and now I'm not sure what to do with it.

Over the years I've worked on a LOT of sketches, doodles, prototypes and project ideas that never turned into anything. This is just part of the creative process! I usually squirrel them away for the future because you never know what might end up being useful as source material for another project, or what might end up working after all when you revisit it with fresh eyes in the future.

This particular design, however, was so specific that I was convinced that it wouldn't possibly ever be remotely reusable. But I also really liked how it had turned out thus far and didn't want to just chuck it away (and have, as a result, wasted all that work).

So, after finding the pattern in a pile of paperwork this weekend, I posted this pic on Instagram and Facebook and asked everyone: "what the heck could I or should I do with this??? "Should I take the time to neaten it up a bit and share it on my blog in case there are some Harry & Meghan fans out there who'd like to (very belatedly) stitch themselves a wedding souvenir? Or just recycle it??"

And, thank goodness for the magic of getting feedback via social media, because everyone immediately had such great ideas.

Some people suggested sharing it to celebrate their upcoming anniversary, and lots of people suggested updating the pattern slightly so it could celebrate Meghan and Harry's baby, which is due this spring (I had totally forgotten that they're expecting a baby!). This could totally work for the royal baby!

Other people suggested doing something just with the lion and unicorn on their own (maybe even adapting the whole design to be a customisable nursery sampler)... which I had somehow not thought of as a possibility??? I do love those little guys, though, they're just so cheerful and sweet and the unicorn took me absolutely ages to draw (because I am the world's worst person at drawing horses). I'm picturing the lion holding birthday balloons, maybe? Or the unicorn standing next to an awesome rainbow birthday cake? Something happy and fun and colourful, anyway.

What do you guys think? I'd love to hear which of these suggestions you like, and if you have any more ideas for ways I could revisit this design and (finally) turn it into a finished project. 

UPDATE: this embroidery pattern is now finished and available in my shop and my Patreon pattern library.

Subscribe for a small monthly fee and you'll get access to a growing library of PDF patterns and tutorials, with an email whenever I add a new project. You can cancel any time.      

Click here to check out my Patreon page and sign up!

Royal Celebrations Embroidery Pattern
 Royal Celebrations Embroidery Pattern
 Royal Celebrations Embroidery Pattern
 Royal Celebrations Embroidery Pattern
 

Thursday 24 January 2019

My Favourite Pens (and Pencils)

Do you have a favourite pen? I do!

The black Uniball Eye is officially my favourite - I adore writing with them, they're just soooo wonderfully smoooooth.

Uniball Eye fine black pens

The only downsides to these pens is the price (not super expensive but much pricier than a standard biro, and I write a lot so I get through quite a lot of pens) and they're actually so smooth that if I'm not careful sometimes my already slightly wild and loop-filled handwriting gets a bit out of control! Overall though they're an absolute pleasure to write with and I love how my handwriting looks with the lovely solid ink line these create.

I used to use the "fine" Uniball Eye pens for drawing the templates and patterns for all my tutorials, but I recently switched to the thinner "micro" version and don't know why I didn't switch sooner, because the thinner line is perfect. The clear ink lines scan beautifully and I find these pens help me draw really nice smooth curves when I'm inking over my pencil lines. 

Uniball Eye micro black pens

I'm also a big fan of the classic Cristal Bic biro! Usually a blue one, but sometimes only a black one will do - especially when writing on coloured paper.

Bic Cristal Biros and Staedtler Noris Pencil

I use these for everyday notetaking, writing all my To Do lists, updating my planner,* writing postcards, and so on. (*People are always raving to me about their digital calendars and planning apps but I cannot function without a proper paper diary to scribble in).

As for pencils? Well, I used to never have to buy pencils. There were always loads in my stationery stash after years of buying cute pencils as a kid or picking up free ones at conferences and other events in my teens and twenties. I just kept on aquiring random pencils but hardly used them until I started designing stuff for a living. These days I do a lot of sketching, and I've been slooooowly using up all the random pencils in my house... and now there are no more random pencils left and I have to buy pencils on a regular basis.

My favourite pencils are definitely the classic yellow Staedtler Noris (HB/2, without an eraser on the end). They're really nice to both write and draw with, they sharpen easily, and I'm a sucker for a bright colour.

I use them for sketching, of course, but also pencilling things into my planner and sometimes drafting bits of writing because (weirdly) I find that writing in pencil can help ease any pressure I'm putting on myself to write something "perfect". Even though it's just a messy handwritten draft and I'm going to cross bits out and scribble all over it anyway as I edit, knowing I can erase every word if I want to somehow helps free up my brain when it's feeling a bit creatively blocked.

Honestly, though, I will sketch with anything I can lay my hands on when inspiration strikes. Oh, and I also have a pack of plain "stage pencils" in my craft supplies stash which are super cheap and nasty to actually use (they sharpen terribly) but look great as props in photos.

When I shared these pics on my social media they prompted lots of strong pen-related feelings. So, do you love these, too, or loathe them? Tell me your faves!

Tuesday 22 January 2019

Send Happy Snail Mail With Vintage Stamps & DIY Envelopes!

One of my New Year's Resolutions for 2019 is to make time to send more snail mail to my friends and penpals. Maybe that's something you'd like to do more of, too? In this post you'll find two fun and easy ways of making the snail mail you send extra special...

Did you know you can use old-but-not-used Royal Mail postage stamps for sending your post here in the UK? I recently bought a big bundle of old mint stamps for my letters, and using them is proving to be an absolute joy!

colourful envelopes decorated with vintage postage stamps

I bought a big bundle of stamps, giving me lots of different designs and values to choose from when making up the correct postage value and saving me money, too (always a good thing when you send a lot of post - snail mail is wonderful but stamps are rather pricey these days!). I bought my stamps from here.

Sorting through the bundle when it arrived was a huge amount of nerdy fun. So many lovely old stamps! And so many possibilities for getting creative with my letters!

lots of vintage postage stamps

Even if you just selected any old stamps to make up the correct postage the result would be pretty cool: a handful of quirky old stamps (some with ha'penny values!) are always going to be more exciting than just a single modern one. But of course (OF COURSE) I've been playing with colour and themes when putting together the stamp selections for my mail.

Carefully selecting the stamps can be rather a time suck but totally worth it, I think! I described this as "a bit of a waste of time" to a friend recently but, as he immediately pointed out, actually it's not a waste of time at all: I've been enjoying it as a relaxing task while watching TV in the evenings, and the end results can be rather wonderful.

This week I've been playing with colour, matching stamps to a set of fabulous notecards I got for Christmas.

 colourful notecards and coordinating rainbow postage stamps

In case you're admiring the notecards (and why wouldn't you be?), they're the "Pen to Paper Notecards" set by Present & Correct for Chronicle Books. Mine were bought from Waterstones here in the UK, but those of you in the US can buy them direct from Chronicle Books.

Here's a closer look at the cards and the stamps I've used:

colourful notecards and coordinating postage stamps
colourful envelopes and coordinating postage stamps

All that lovely colour makes me very happy indeed.

The second thing I've been doing recently to jazz up my post is making my own handmade envelopes. I've made some from coloured paper, but I've also been making lots from a book of maps and a gorgeous book of British wildflowers.

making DIY envelopes from old books

When you use book pages to make envelopes the end results are so pretty, and totally unique! Oh, and the books only cost me about a quid each at my local charity shop so they're a bargain, too.

If you've never made an envelope before, don't worry: they're so easy to make that you'll wonder why you never tried it before.

Just unfold an envelope that's the size you need (or download and print a free template from the internet - there are loads available), stick it to a bit of card and trace the shape onto the back of whatever nice paper you want to use. Then cut, fold and stick (with glue or double-sided tape) the envelope together and add a plain label for the address when you're ready to send it. Remember to position your template so the paper will be the right way up on the front of the envelope!

Cheap second hand books are perfect for making envelopes, though you may need to use different size envelope templates depending on the size of the pages. If you need to make envelopes of a specific size, simply take the template with you when you go browsing for books to use.

I also love making envelopes from leftover gift wrap and colourful magazine pages. Sometimes my stamps used to fall off my letters en route when I sent "magelopes" as a teen, but with modern postage stamps being like stickers it's much easier to use shiny paper for making your envelopes without worrying about the stamps going AWOL.

I won't be combining these two happy post ideas and using a selection of vintage stamps with my book envelopes - I think the effect would be a little visually cluttered and I'd hate to cover up those lovely flowers and maps! Instead I'll be keeping my eye out for some suitably lovely Special Stamps, or using some of the pictorial definitives, either of which are much prettier options than standard 1st/2nd class stamps, if you care about that sort of thing (which, as you've probably gathered by now, I totally do). 

Thursday 17 January 2019

Weston-super-Mare in Pictures: October, November, & December 2018

Time to look back at my seaside snaps from the final quarter of 2018!

This autumn was full of glorious colour: always such a treat, but particularly on days of sunshine and blue skies.


I spent a lot of sunny afternoons walking around town scouting for nice-looking leaves, and then essentially stalking them: including them in my routes as often as possible until they faded and dropped.

I particularly enjoyed this fabulous door + gate + climber combo...


... and I literally gasped when I turned a corner and found this beauty. 


The previous year, as the nights drew in, I made it a habit to build my schedule around the sunset as much as possible. I timed my trips into town so I'd be walking back along the beach as the light faded, and spent a lot of time gazing at the pastel tints of the sky and filling up my camera roll with (largely terrible) sunset snaps.

I didn't do as much of that this time round, sadly, but the few beach sunsets I did enjoy were pretty magical.


As ever, I've continued to keep my eye out for interesting shapes and textures. I particularly loved this tree...


... and this gleaming seaweed... 


... and this patched-up garage door.


Oh, and I fell in love with a fish and chip shop! Actually going here for fish and chips is on my 2019 Must Do list.


I've started walking a lot more lately - both further and more often - and have to admit that I'm getting a little obsessed with walking! This year I've wanted to get out for walks whatever the weather, and in the autumn and winter that means walking in the cold, the rain and through a lot of mud... and upgrading my wardrobe and footwear accordingly.


I'm still walking a lot on the beach and through town, but I'm also spending as much time as possible out in the nature reserves (Uphill, Walborough, and Bleadon Levels). They're so beautiful!


I'm planning on walking there a lot in 2019, but also trying to get across town more often to walk up Worlebury Hill and through the woods. I walked up the hill late one December afternoon and was rewarded with the most wonderful view:


Watching the sunset as I walked back down the hill and homewards was quite delightful!

Then right at the close of the year, I snapped a strong contender for my 2019 Christmas card (haha)...


 ... and encountered a trio of birds who posed for juuuuust long enough for me to take this photo! Very considerate of them.


Here's to lots more walking in 2019!

Click here to catch up on the rest of my seaside photo round-ups, and here to follow along on Instagram.

Tuesday 15 January 2019

The 10 Year Challenge: Getting Older & Growing into Myself

If you're on Facebook, Twitter or Instagram you've probably seen the 10 Year Challenge popping up a lot in your feed lately, with people posting photos of themselves from 2009 vs 2019.

It's really interesting seeing how much (and how little) people have changed. All those sweet fresh faces! Old friends looking just how they looked when you first met, and new friends looking sort of not yet fully formed, a sort of pre-them from before you knew them and they grew into their wonderful current selves! So many lovely faces! Such fun!

I love looking back at old photos - if you've been reading my blog for a while you might remember that I've been assembling self-portraits to represent each year for a while now - so I thought I'd join in the fun with this challenge. But: could I find a photo of myself from 2009? I absolutely could not. I don't have a lot of photos of myself from around that time anyway and I think that might have been the year my computer died a sudden death when I hadn't backed up my files for months. (Oops). (Always back up your files, you guys!!).

Sooo... here's me in 2008 (modelling a headband I'd made for my shop)...


... and me in 2018 (modelling the denim jacket I customised for Sticker You).


Ten years of taking crafty selfies and sticking them on the internet! Woohoo!

This pair of photos is kind of cheating because the light in the hallway where I took that most recent photo is VERY FLATTERING but apart from my glasses getting bigger I'm not sure how I look has changed that much?

I mean, obviously, I can see time making its mark on me when I look in the mirror in the morning. I've got a lot more wrinkles and crinkles than I had back in 2008, I'm developing a pretty strong frown line right in the middle of my forehead, and my first grey hairs showed up last year (I'm not sure exactly when as I'd not noticed them until my youngest sister helpfully pointed them out to me this summer!). And on mornings when I've not had enough sleep? Oh my goodness. A bad night's sleep ages me about a decade these days.

Mostly though what I see when I look at these photos, and which may not be visible to anyone else but me, is how much happier with myself I am these days. Happier with who I am and how I look, and generally just so much more confident and content to be myself. I'm lucky to be healthier and fitter than I've ever been, too (one of the excellent and unexpected side-effects of falling in love with walking).

People talk (slightly creepily) about girls "blossoming" into young women, but here in my late 30s, with 40 on the rapidly approaching horizon, I feel like I'm in full bloom inside and out.

When we turn 30 (if not even earlier) we start getting hit with so many messages from our youth-focused culture that we, as women, should be freaked out about "losing" our looks as those dreaded "signs of aging" start appearing. We've got over the angst and body confidence issues of our teens, gone through our messy "what am I doing with my life??" twenties, and just as we're starting to relax into ourselves and, I think, beginning to really grow into our power... all of a sudden the world says "woah, settle down there ladies, have you considered that there's all these new ways to hate yourself?"

Well, I refuse. I refuse to hate the gradual way my face and body is changing as I'm aging and I absolutely refuse to hate myself even a tiny bit because of it. I am going to continue to bloom and I hope you guys will, too xxx

Thursday 10 January 2019

A New Felt Flower Pattern: Coming Soon

I'm currently dreaming of spring and busy working on lots of floral things, including this project...

http://eepurl.com/dvfYO1

... which will be January's freebie for my newsletter subscribers.

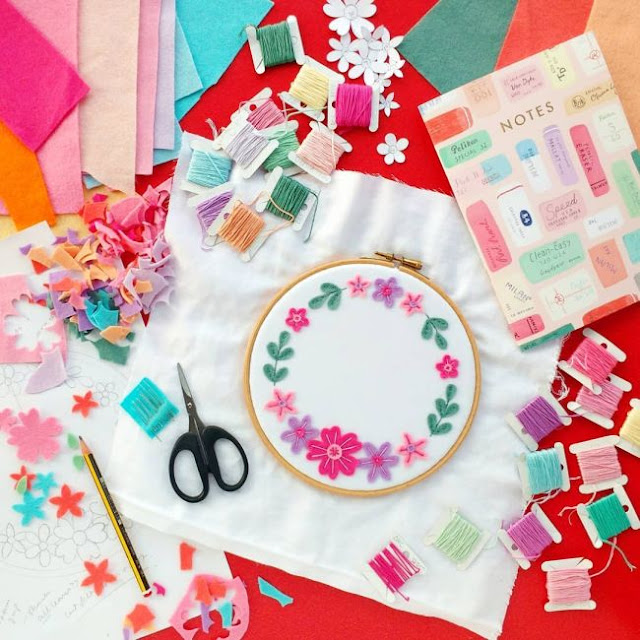
The main project will be a mix of felt and embroidery, but I'll be including an embroidery pattern option too (because you guys know I can never resist a project variation!). I can't wait to share the finished design with you all.

Not yet a subscriber? Follow the link to sign up to my monthly pattern newsletter for a free project in your inbox each month this year, plus a bonus project at some point to make up for the fact that I was too busy to send a newsletter in December (oops!). You can also sign up for updates about what's new here on my blog and over in my shop.

Here's a peek at some of the other floral designs in progress in my studio at the moment - keep your fingers crossed for lots of winter sunshine so I can get these tutorials photographed and in my shop a.s.a.p!

http://eepurl.com/dvfYO1

P.S. Remember you'll also always find lots of free crafty projects in my tutorial archive

Tuesday 8 January 2019

Fifteen Felt Christmas Ornaments Finally Finished!

Oh, hello, what's this? Another blog post about getting things finished?? HURRAH.

If you're a regular reader of my blog you'll know that I was working hard to finish lots of my personal creative projects last year, including a patchwork blanket, a couple of quilts, and a set of felt Christmas ornaments I was making from Alicia Paulson's lovely patterns.

I bought several of Alicia's kits way back in 2012 and 2013 and had really made very little effort to devote any focused time to them... so, unsurprisingly, most of the designs were still sitting in pieces, unstitched, in a drawer in my flat many years later.

Well now, happily, I can say that all fifteen ornaments are finally finished! Woohoo!


Don't they all look fabulous together?

That photo ended up being my most popular Instagram photo from last year - and, indeed, my whole time on Instagram. Watching all the "likes" roll in for this project was a weird and fun way to finish the year!

Fancy a closer look at the ornaments? The first batch was the slowest to finish as they technically took me 5-6 years to complete...


... then it took me just a month to get another four finished this autumn...


... and the final four were ready just in time for Christmas.


I completed the sweet Gingerbread Girl in early December - I probably could have managed it slightly earlier but I wanted to make sure I was super focused and in the zone when I stitched her face to get it juuuuust right. She is so charmingly folksy, I love her.


The next two got finished in the middle of the month, while watching made-for-TV Christmas movies (I love made-for-TV Christmas movies). There's the cute (double-sided) Notevena Mouse (as in "Not a creature was stirring, not even a mouse")...


... and the lovely (single-sided) Lighted Window.


The very last design I stitched was the Whistling Tea Kettle which is the one I took most liberties with when it came to not following the instructions.

There was a lot of satin stitch in Alicia's original design and I a) do not enjoy and b) am terrible at satin stitch, sooo my version looks slightly different to hers while still keeping to the same overall pattern. Could I (should I) have used this project as an opportunity to improve my satin stitching? Probably, but never mind!

I deliberately missed out a row of blanket stitching on the kettle, too, because I was finding it frustrating and honestly just wanted this thing finished. I'm pretty pleased with the end result, though, even with the changes.


Just like the other big projects I finished last year after years of them being just works in progress, it is hugely satisfying getting these ornaments completed! I've been meaning to finish them "in time for Christmas" for so many years (and so many different Christmases) that it felt wonderful finally having them ready in time for one.

Having said that, though, I have a confession to make: although I basked in the glorious feeling of getting these ornaments finally finished (which was an excellent Christmas gift to myself), I didn't actually hang any of them up at Christmas!

My holiday decorating style is, these days, best described as very minimal. I put up a few decorations around my flat along with all the cards I'd received from friends, but I don't put up a Christmas tree... and even if I did, it would have to be a VERY big tree to fit these ornaments on it as they're quite large (though you might not guess it from the photos). The Gingerbread Girl, for example, is about 17cm (almost 7 inches) high.

Also (and it's embarrassing to admit this) there's a bit of me that's a teeny bit worried that I'll have them on display and someone will come round to my house and think I made and designed them and say something nice which ends up feeling not so great. I've had this happen several times before with handmade-but-not-by-me things and honestly hearing "oh wow this is the best thing you've ever made, I love these so much!" about something that isn't your work is super awkward and slightly devastating! (Even if you yourself think they're nicer than your own work, too!) (Ugh, maker feelings are so complicated).

So, I think I'm going to end up giving some of these as gifts to friends and family in the run up to next Christmas and possibly just keeping a few of my favourites to hang on doorknobs and other suitable places in my flat. (If you're a friend of mine please do feel free to drop hints about which ones are your faves!)

I'm going to give myself the year to think about it though - who know, by the time next Christmas rolls round I might have decided that I can't bear to part with any of them and I'll have found the perfect places to display them all! We shall see...

Want to make some of these ornaments for yourself? Click here to find all the patterns (and much more loveliness) over in Alicia's shop.

For lots more Christmas crafting ideas, visit my archive of free tutorials.