
UPDATE: my felt party ring brooch tutorial is now available as a printable PDF pattern over on my Patreon.
Subscribe to get instant access to a growing library of PDF embroidery patterns and craft tutorials, and updates when I add something new!-------
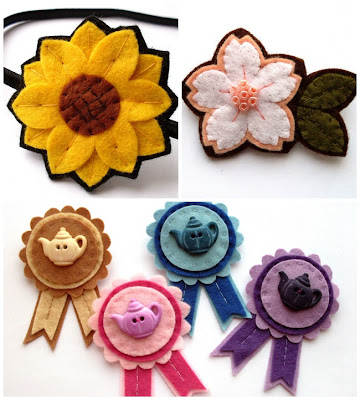
The second tutorial this week is how to make felt iced ring biscuit (cookie) brooches. These are a fun, nostalgic gift for fans of tea & biscuits, or anyone who had these biscuits at their childhood birthday parties.


These biscuits also make cute Christmas ornaments - just add a loop of narrow ribbon instead of adding a clasp. The biscuit design would also look great appliqued on felt gifts like purses, or lavender sachets.

Remember not to give these brooches to / leave them within reach of any small children who may mistake them for actual food!
Subscribe to my newsletter for creative updates, and visit my crafty tutorial archive for lots of free projects.
Visit my shop to buy my printable PDF sewing patterns:
These biscuits also make cute Christmas ornaments - just add a loop of narrow ribbon instead of adding a clasp. The biscuit design would also look great appliqued on felt gifts like purses, or lavender sachets.
Remember not to give these brooches to / leave them within reach of any small children who may mistake them for actual food!
Subscribe to my newsletter for creative updates, and visit my crafty tutorial archive for lots of free projects.
Visit my shop to buy my printable PDF sewing patterns:


