Showing posts with label colourful. Show all posts

Thursday, 31 January 2019

Creating Patchwork Cross Stitch from Leftover Embroidery Threads

Look what I finished!!

Scrappy Patchwork Cross Stitch Textile Art

I started this patchwork cross stitch project way back in 2014, as a way to make use of those scrappy bits of leftover embroidery thread (floss) which aren't quite big enough to be worth keeping and winding back on the bobbin but which still have a few stitches left in them.

I saved up the threads in a compartment in my embroidery thread storage box, then would sit and do a whole batch of stitching in one evening - slowly building up the patchwork design in blocks of colour. It was a super relaxing process!

Scrappy Leftover Embroidery Threads
 Scrappy Patchwork Cross Stitch Textile Art

As I wrote when I blogged about this project last year, "I guess I could add a block at a time, each time I have a piece of leftover thread, but I quite like spending a few relaxing hours working on this from time to time. Plus, adding a bunch of colours at once helps me make the randomness of this project more of a controlled randomness - I can spread out the colours more easily, and get a more pleasing mix of tones and shapes than I think I would end up with if I added a block each time I had a scrap of thread to use up.

I like the randomness of this project and how the colour palette (and the speed at which it's growing) is entirely dictated by what other projects I'm working on, and the luck of what size thread scraps I'm left with... but I also want it to be something I love the look of when it's finished!"


To read more about how this piece has developed, click here to read all about how the project has progressed over the years and see lots of in-progress photos.

I'm really pleased with how the finished piece has turned out - someone pointed out that it looks like a tiny quilt, and it totally does! It's about 6 inches (15 cm) square and absolutely jam-packed with colour. Loads of happy hours of stitching have gone into it, but it also represents even more hours of stitching as, of course, these are all just the leftovers from other projects!

Scrappy Patchwork Cross Stitch Textile Art
Geometric Cross Stitch Textile Art

And - to think! - all those threads would otherwise have just gone to waste. It's going to be really hard breaking the habit of keeping my scrappy bits of thread now... maybe I'm going to need to start another leftovers-themed project? Hmm...

Want to make your own patchwork design from leftover threads? Simple! Just start keeping your own leftover threads, stitch them in blocks and just keep on going until you've slooooowly filled up a whole square with colour.

A patchwork design like this is also a great way to use up a whole bunch of embroidery threads from your stash, you don't specifically need to be using leftover threads. Just have fun playing around with colour combinations and shapes!

Last year several people asked me for the pattern for this design, which isn't really something I can properly share as I've used to many random colours making this piece. BUT, I have drawn out a chart of how my design ended up, in case you like how the arrangement of blocks look and fancy replicating it. You can use my photos as guide when picking colours and/or use felt tips or coloured pencils to colour in your printed chart to help guide your stitching.

Click here to view the chart in a new window or tab, make sure you're viewing it full size then print.

Patchwork Cross Stitch Chart

P.S. For even more scrappy goodness, check out my Patchwork Mini Squares blanket, knitted from yarn left over from many years worth of knitting projects.

Subscribe to my newsletter for a monthly free pattern and visit my crafty tutorial archive for lots more free projects.

Visit my shop to buy my printable PDF sewing patterns:


Tuesday, 1 January 2019

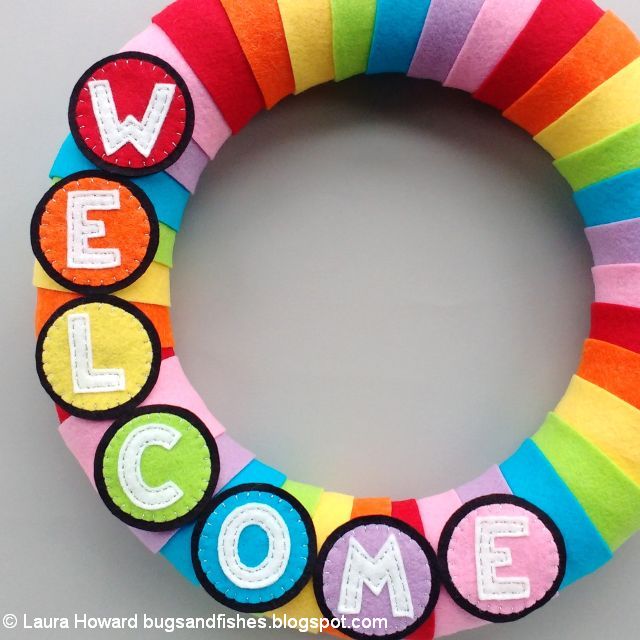
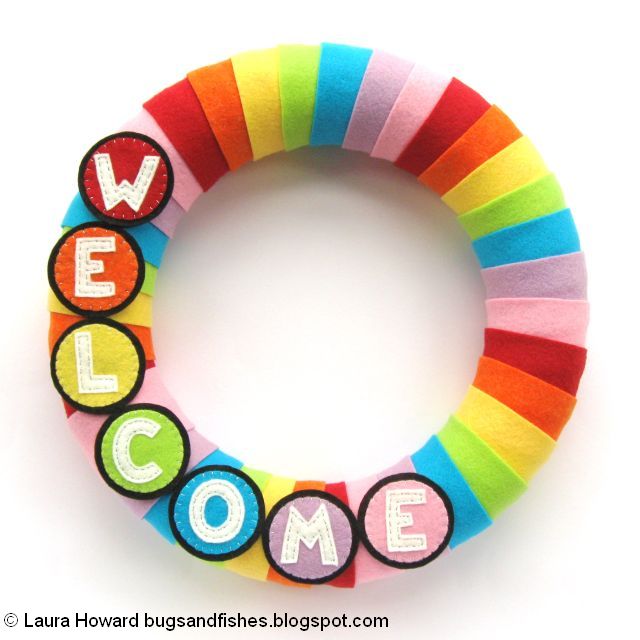
A Year of Wreaths: January Rainbow Wreath Tutorial

UPDATE: this colourful wreath tutorial is now available as a printable PDF pattern over on my Patreon.

Subscribe for a small monthly fee and you'll get access to a growing library of PDF patterns and tutorials, with an email whenever I add a new project. You can cancel any time.    

Click here to check out my Patreon page and sign up!

-------

Banish the January blues with this bright and cheerful rainbow felt wreath!

felt rainbow wreath

These happy colours are perfect for brightening up dull winter days and I’ve added a bit of sparkle too (yay!).

Want to welcome visitors but prefer a more muted colour palette? Just switch in your seven favourite shades in place of the rainbow colours. 

felt rainbow wreath

felt rainbow wreath


Subscribe to my newsletter for a monthly(ish) free pattern and visit my crafty tutorial archive for lots more free projects.

Visit my shop to buy my printable PDF sewing patterns:

Monday, 14 May 2018

The Evolution of a Rainbow Blanket

Blogging about my mini patchwork squares blanket last month made me realise that I never got round to properly photographing my rainbow blanket when I finished it a couple of years ago. I blogged about it being almost finished, and said I'd take photos of it finished "sometime soon" but, alas, never found the time and here we are two years later already.
 
I love my rainbow blanket, and really enjoyed making it so (as with the mini squares blanket last month) so I'm taking a look back at how it's developed over the years before having a "yay! finished blankets!" photo session.


In my teens I knitted a couple of blankets as gifts for my family, and also knitted a whole bunch of squares that never got used for anything. I rediscovered them in my 20s and began very slowly knitting more squares so I could finally turn them into a finished blanket. Or, rather, two blankets, because teen me (by accident? or by design??) had been knitting two different sizes of squares!

I finished the first blanket in 2013 (click to see pictures!), and in 2014 was busy knitting squares in assorted bright colours to add to the second blanket. All the squares were knitted in plain garter stitch, using double knit acrylic yarn and UK size 8 (4mm) knitting needle, casting on 30 stitches to make squares measuring approximately 14cm. 

At this point I had a whole bunch of dark grey squares in the mix (knitted with yarn left over from my sky blanket) and was thinking about putting the squares together in a block design similar to the one I was using for my mini squares blanket.
 

I wasn't totally happy with this layout, though, so I just focused on knitting squares from the yarn I already had and added in a few more colours I thought would blend in well.


In October that year I took out the darker squares and arranged the others in colour order and they just POPPED so the grey definitely had to go (I unravelled them and re-knitted them as mini squares for my patchwork blanket). 


By July 2015 I had 70 squares knitted, but the colour mix was looking a bit imbalanced.


I thought about just adding in some greens to balance out the "hot" reds and pinks, but decided to go for the full spectrum and cram in as many bright, happy colours as possible. So I bought a few more balls of yarn in zingy shades and continued slowly knitting more squares.
    

Frustratingly, when playing around with possible layouts for the blanket, I realised that a whole bunch of the squares were too big! (I guess I must have muddled up my knitting needles at some point?) I unravelled them all and started re-knitting them the correct size in the summer of 2015.


I spent the autumn of that year knitting a lot of blanket squares...


  ... and by November my stash of squares looked like this:


In December 2015 I finally sat down and planned the final layout. I'd been building up my rainbow spectrum stash without any real plan and was very pleasantly surprised by how easy it was to fit all the squares together; I just needed some more green!


I started stitching the outer sections of the blanket together...


... bought a final ball of bright green yarn, and began knitting green squares.
 

I finished knitting the very final square while watching Eurovision in May 2016 (I love Eurovision), then immediately started adding the remaining squares to the blanket.


I couldn't stop smiling while weaving the in the last few yarn ends; those colours just burst with happiness!


I wove in and trimmed the last of the yarn ends on May 25th 2016.


I've used the blanket a lot since then (I'm actually sitting on it right now as I type this) and it brings me joy on a daily basis. I hope I'll have a chance to take lots of snaps to capture that rainbow joy and properly show it off in another blog post sometime soon!

In the meantime... for more blanket-y goodness, follow the links to read about the making of my patchwork mini squares blanket, or my sky blanket.

Friday, 20 April 2018

Knitting a Patchwork Blanket of Mini Squares with Leftover Yarn

I finished my mini patchwork squares blanket this week! Yay!

This project has been a work-in-progress for such a long time, I thought it might be nice to take a look back at how it's developed over the years. 


I started knitting mini squares in September 2011 (the arrival of autumn always makes me want to knit stuff - how about you?).


Each square was ten stitches across, knitted with moss stitch on size 10 (3.25 mm) needles.

I didn't have a plan for what I was going to use them for, I just wanted to make something out of the yarn (in a general spirit of "waste not want not") and thought knitting little squares was a good first step towards turning my leftover yarn into something useful. Every time I had a small ball of yarn left over from a knitting project I'd knit some more little squares, then pop them in a bag with all the others. By July 2012 I'd knitted about 150 squares and the bag continued to fill up.

In the summer of 2014 I decided to use the squares to make a blanket. It was originally going to be a small picnic blanket (inspired by having been to a picnic where everyone but me had lovely picnic blankets) but I soon decided it was going to be a curling-up-on-the-sofa blanket instead.

I decided to build up my blanket gradually, sewing the squares into blocks then sewing the blocks together to make up the blanket. Here are the first few blocks I stitched together:


It was quite exciting finally having a plan for the squares and making a start on sewing them all together.


As the months went on I continued to knit mini squares whenever I had any leftover yarn...

.

... sewing the squares into blocks...


 ... then adding them to the growing blanket.

It was really fun seeing the blanket develop organically as I just went with the flow and used whatever colours I had, adding to the blanket little by little.

By January 2015 I had 270 squares stitched together and the biggest section of the blanket looked like this:


Unsurprisingly, everyone always says this blanket reminds them of the video game Tetris!

I love these blocks of colour. They give the blanket a kind of controlled randomness, showcasing the colours and making the whole design look consistent instead of being just a jumble of individual squares (which I think would have driven me bananas). Really importantly for me, using the blocks meant I felt happy starting sewing the squares together way before I had enough squares for a whole blanket. 

There were, of course, a lot of ends to weave in and trim along the way!


I originally joined the blocks together in a few different sections, so I could spread the colours out more evenly across the blanket. I finally joined them into one big piece in December 2015, when I laid all the pieces out on the floor, worked out the final size I wanted the blanket to be (30 x 30 squares) and decided how the already-knitted pieces would best fit together within it.


Because I am a nerd who enjoys making charts, I decided to use a bit of squared paper and some felt tip pens to make a little chart to track my blanket's progress and get a better idea of how the "design" was developing.


I'm really glad I did this because it ended up inspiring the final design of my blanket!

Instead of spending many years slooooowly knitting another 400+ squares from leftover yarn, I decided to stick with a central sweep of colour and keep the rest of the blanket plain white. I loved how the colour popped against the white but I also loved the idea of actually getting this blanket finished before my 40s.

Of course, this meant I needed to knit a LOT of little white blanket squares. I started knitting them in the spring of 2016, but not yet joining them to the coloured squares in case I wanted to add extra squares to the central sweep.


Knitting the white squares was pretty repetitive (and not particularly photogenic) but it was a great relaxing task to do in front of the TV in the evenings.

By March 2017 I had a big bag of white squares and the main section of the blanket looked like this:


I abandoned the blanket for months at a time, working on the project in fits and starts. Sometimes the idea of it totally bored me and other times I worked on it obsessively. This is the kind of labour-intensive, repetitive project which could easily become infuriating if you worked on it when you weren't in the mood to. I'd added 514 squares to the blanket by the spring of 2017 and that's a lot of hours of knitting and sewing!


I began joining the white squares to the blanket later that year, sewing together the stash of squares I'd knitted so far then gradually adding new squares as I knitted them.

I had to do a bit of unpicking in November 2017, as this dark red block was really bugging me and I decided I could stand it no longer. It didn't fit nicely with the sweep of colour across the blanket and the squares didn't look remotely square, so I cut it out and replaced it with white. Unpicking all that red yarn took forever but it was totally worth it!


I slowly knitted more white squares over the winter, adding them to the blanket as I went along. Then with the end in sight (always an exciting time) I did a big push in March to get to the finish line. It started really looking and feeling like a proper blanket instead of just a big unwieldy yarn shape, and I couldn't wait to get it finished!

Here it is with 52 squares to go in late March.


After a flurry of knitting, I finished the blanket this weekend. The final job was, of course, to weave in a whole bunch of white yarn ends.


I knitted the first few squares in September 2011, and wove in the final yarn ends in April 2018... so it's taken me about six and a half years from start to finish. Is that a long time to be working on a blanket? I don't know. It feels wonderful to finally have it finished, anyway.

Six and a half years. 900 mini squares knitted and sewn together. 1,800 yarn ends woven in. I have no clue how many hours I've spent on this project, but it's a lot!

I'm going to lazily bask in that glorious "finished project" feeling for a bit, then take some nice photos of the finished blanket to share with you guys asap. If you fancy making your own mini squares blanket and have any questions about how I've made mine, do let me know in the comments. 

P.S. Subscribe to my newsletter for a monthly free pattern and visit my crafty tutorial archive for lots more project ideas.

Visit my shop to buy my printable PDF sewing patterns:


Friday, 27 January 2017

Two New Instagram Hashtags for Colour Lovers

If you follow me on Instagram or are a regular reader of my blog, you'll know that I love colour - the brighter the better.

This week I started two new hashtags for people (like me) who take lots of colourful photos. It was surprisingly difficult to find hashtags which no-one had used for a single photo, but which still summed up what I wanted the tags to cover... but I got there eventually!

There's #colorcolourmakers for creatives: crafters, artists and makers creating colourful things. Use this hashtag to share your colourful makes, crafty supplies and creative workspaces.

  https://www.instagram.com/explore/tags/colorcolourmakers/

Then there's #colorcolourseekers for anyone and everyone who can't resist taking photos of colourful stuff! Use this hashtag to share all kinds of bright and colourful things, places and spaces.

 https://www.instagram.com/explore/tags/colorcolourseekers/

If you love to make colourful things, or take colour-filled photos I hope you'll join in with these hashtags!

For more colourful photos, you'll find me on Instagram as lauralupinhoward.