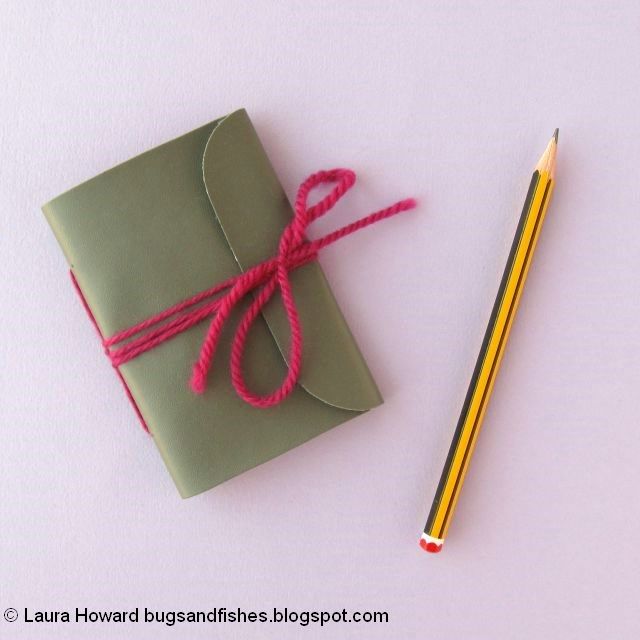
These little notebooks are simple to make, and you can easily remove and reuse the leather cover once the notebook is full.
This tutorial is the last in the series of synthetic leather crafting ideas I've been sharing this week. It originally appeared on the Village Haberdashery's blog and was created using synthetic leather and other craft supplies from their shop. (Here are the other tutorials I've shared this week: a lightning bolt brooch, a geometric necklace & a star headband).
You will need:
- The notebook and notebook cover templates (follow the links to view and download the PDF template sheets).
- Some synthetic leather
- Coloured card
- Plain or scrap paper
- Sewing thread to match the card
- 90 cm yarn in a co-ordinating or contrasting colour (or embroidery thread or narrow ribbon)
- A standard sewing needle and a large, sharp sewing needle for the yarn
- Sewing scissors
- Scissors for cutting paper and card
- A ruler
- An air-erasable fabric marker pen or an ordinary felt tip pen
To make the notebook:
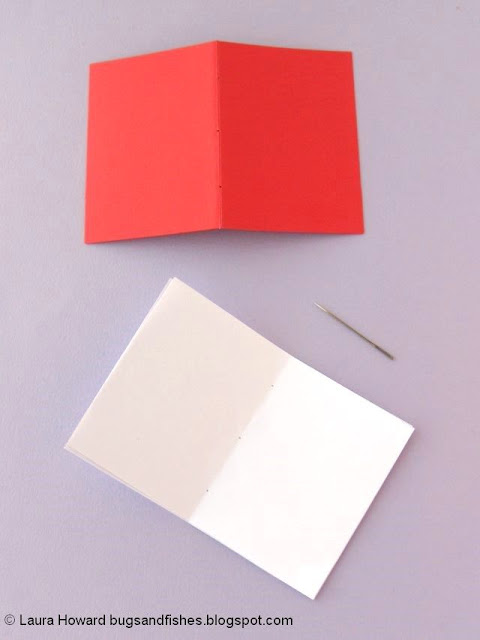
Use the card cover template to cut a piece of blank card, then fold it in half. Then use the page template to cut eight pages from plain or scrap paper and fold these in half as well.
Use a large, sharp needle to poke three holes in the fold of the card, measuring their position with a ruler. Make one hole right in the centre of the fold then one above and one below it, each 3cm from the central hole. Then poke holes in the pieces of paper (two sheets at a time) in the same positions as on the cover.
Line up the pages and the card cover, and sew them together using a double thickness of sewing thread to match the card. I started in the central hole of the card cover, leaving a length of spare thread hanging loose then returned to the centre after stitching the pages and card together, knotting the two ends of thread together securely then trimming away the excess.
Use the leather cover template to cut out a piece of the synthetic leather. Place the paper template on the back of the leather, trace around it with an air-erasable fabric marker pen or a felt tip then cut out the shape with sewing scissors.
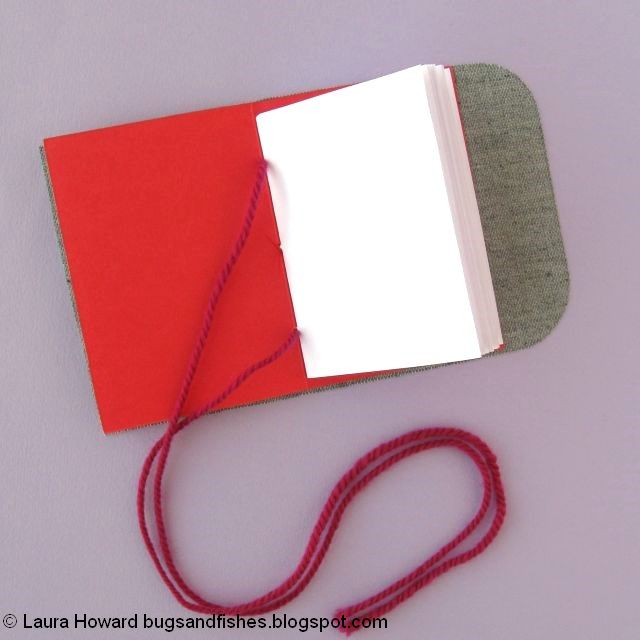
Wrap the cover around the notebook until you’re happy with it, then unfold it and open the notebook to the first page. Use the holes in the card as a guide to pierce three matching holes through the leather.
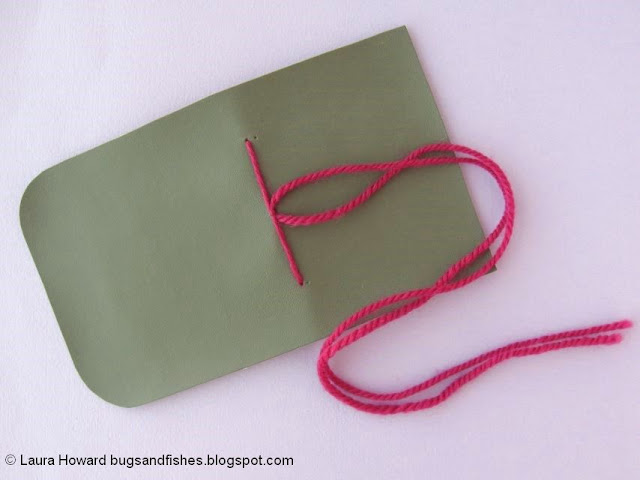
Cut a 90 cm piece of yarn (or embroidery thread or narrow ribbon). Use the large needle to thread the yarn through the two outer holes as shown, threading it through the leather and the card of the notebook. Pull the yarn through the holes so there is an even length of yarn at each side.
Thread both ends through the central hole, pulling the yarn tight. Knot the yarn to secure the notebook and leather cover together.
Close the notebook and leather cover as shown, wrapping the yarn around it and tying a bow to secure it.
This tutorial is for non commercial use only: you can use it to make as many notebooks as you want for yourself or as gifts, but please don't make any for sale. You may borrow a couple of photos if you want to blog about this project, but remember to credit me and link back to this page on my blog, and do not reproduce my entire tutorial / share my templates on your site. Thanks!
Enjoyed this free tutorial? Buy me a "coffee" and help support my blog!

P.S. Subscribe to my newsletter for a monthly free pattern and visit my crafty tutorial archive for lots more free projects.
Visit my shop to buy my printable PDF sewing patterns:


0 comments:
Post a Comment