Tuesday 31 December 2019

Brown Paper Packages Tied Up With... Washi Tape!

This Christmas my gift wrapping was all about decorative tape!   


It's so easy to add simple stripes of washi or glitter tape to plain parcels, and the effect is fantastic. I wrapped all my gifts with brown paper then decorated them with lines of pretty tape: narrow but super sparkly glitter tape, and a trio of green and pink tapes with festive woodland designs on them.

I'd really recommend this as an easy way to wrap special gifts, whatever the occasion. Just choose tape in appropriate colours and designs and get sticking. Everyone was a lot more impressed with the results than my level of effort really deserved!

The glitter tape looked really fabulous against the plain brown parcel paper.


Top tip: if you're adding stripes to the centre of a parcel, start with the line that's in the very centre then work outwards.

Try to keep your lines evenly space and if you're adding two overlapping sets of stripes make sure to take extra care that you're sticking the colours in the same order each time. I wrapped these gifts quite late one night and didn't pay enough attention to the colours and was super annoyed when I realised my mistake.


Of course, this is one of those things where really no-one will notice you've made a mistake unless you point it out to them but if you're a crafty perfectionist like me it will get on your nerves!


The gifts I wrapped with the pretty woodland tape were much more subtle than all that colourful glitter (everything is more subtle than glitter, isn't it?)  but the finished effect was still very lovely.


As you can see I used six stripes per parcel, varying the position of the stripes to give each package a slightly different look. 


I didn't get a chance to take close-up pics of these so you can see just how pretty that tape looked because my camera battery died about 30 seconds after taking the photos in this post... but here's a card I made using tape from the same range. Isn't it charming?

http://bugsandfishes.blogspot.com/2019/12/easy-diy-christmas-card-ideas-washi-tape.html

Click here for lots of ideas for making simple cards with washi tape (this post was originally designed as a Christmas crafting post, but if you use non-Christmassy tape I think these card designs would work all year round), or visit my tutorial archive for lots more card-making and gift wrapping ideas.

Tuesday 24 December 2019

Lots of Sparkly Felt Owl Ornaments!

I've been trawling through my photo archives a lot lately looking for old project photos and a few weeks ago I found a folder of photos from a project I never shared here on my blog!

 
Way back in 2012 I posted a tutorial for making felt owl ornaments, adapted from the plush owl sewing tutorial I'd shared the previous year.

A few years ago I decided to revamp this tutorial, sewing lots of colourful felt owls as samples and taking step by step photos to make the post even more useful.

I stitched a whole batch of sparkly owls and took and edited photos of them...


... but never got round to taking the step photos or writing a new version of the tutorial!

I think I ended up being too busy and deciding that the original tutorial was perfectly good (which it is!) and just selling my finished felt owls and forgetting about them.

Having rediscovered the photos, though, it feels wrong to just let them sit gathering virtual dust so I thought I'd share them with you guys today.


Maybe they'll inspire you to visit my felt owl ornaments tutorial and make some cute and sparkly decorations of your own during the holidays? 


If you're celebrating Christmas tomorrow, I hope you'll have a great one xxx

Tuesday 17 December 2019

How To: Sew Easy Felt Gingerbread Men Christmas Ornaments

I'm squeezing in one more free Christmas craft tutorial before the main event: cute little felt gingerbread men decorations!


Or should that be Gingerbread People??? :)

Whatever you want to call them, these fun felt ornaments are super quick and easy to sew. They'd be perfect for beginners, for sewing with kids, or for those times when you just want a nice, relaxing project to work on.


A set of these would make a lovely Christmas gift, and one ornament would be fab tied to anothe present or slipped into a Christmas card. I think they'd also make cute brooches! Just add a brooch clasp instead of a ribbon loop.


These gingerbread men ornaments are an updated version of a design I stitched for my shops many years ago. Here's the new style...


... and here are the old ones!


As you can see, originally I used black sequins for the eyes and gave my gingerbread fellas big laughing mouths. This time round I've opted for beads for the eyes and a single curved line for the smile but you could copy the old version if you prefer them!


You will need:

- Ginger coloured craft felt (this may be a bit tricky to find in your local craft store if they just stock a small range but there are loads of online craft shops that stock a huge range of felt colours)
- Round sequins in assorted colours
- White sewing thread
- Black sewing thread
- Black seed beads (or small round black sequins)
- Narrow ribbon
- Sewing scissors
- The templates provided at the bottom of this post


To Make a Felt Gingerbread Man Ornament: 

1. Use the template provided to cut out two shapes from ginger coloured felt. Set aside one of the pieces for the moment.


2. Give your gingerbread man two eyes. You could use black seed beads for this, or small black sequins or just sew a couple of large French knots from black embroidery thread (floss).


If you're using seed beads (as shown above), sew each bead flat like an O with three or four stitches of black sewing thread. If you're adding small sequins, sew each sequin in place with two or three stitches of black sewing thread.

3. Now give the gingerbread man a smile! Use backstitch and a double thickness of black sewing thread so sew a small curved line for the smile.


For extra-happy gingerbread men, also sew a straight line across the top of the smile - creating a sideways D shape, and making it look like the gingerbread man is laughing or has a big grin.

4. Add sequins, mini buttons or little felt circles for the gingerbread man's buttons.


I used three different coloured sequins for each of my gingerbread men, sewing them in a row with white sewing thread. I used two stitches to secure each sequin, so all the stitches formed a neat(ish) vertical line. If you're using sequins which are all the same colour, you may prefer to use sewing thread to match them.

5. Cut a piece of narrow ribbon (approx 7 inches / 17.5 cm long) and fold it into a loop. Secure the cut ends to the top of the second gingerbread shape, with whip stitch and any colour sewing thread. Sew into the felt not through it, so your stitches won't be visible on the outside of the ornament.


Tip: the gingerbread template isn't completely symmetrical, so before you add the ribbon make sure you're attaching it to the correct side of the gingerbread shape! You'll want both shapes to line up neatly when you place them together, with the cut ends of the ribbon sandwiched between them.

6. Place the front and back of the gingerbread man together, and sew around the edge with running stitch and white sewing thread. Use small even stitches so the layers are sewn together but you also end up with a nice decorative edging to the ornament.


For a different look (with less visible stitching) you could use matching ginger sewing thread to sew the ornament together.

This tutorial is for non commercial use only: you can use it to make as many gingebread men as you want for yourself or as gifts, but please don't make any for sale. You may borrow a couple of photos if you want to blog about this project, but remember to credit me and link back to this page on my blog, and do not reproduce my entire tutorial / share my templates on your site. Thanks!

Click here to open the template sheet in a new window, make sure you're viewing it full size then print it at 100%.


Enjoyed this free tutorial? Buy me a "coffee" and help support my blog!

Buy Me a Coffee at ko-fi.com

P.S. Subscribe to my newsletter for a monthly free pattern and visit my crafty tutorial archive for loads more free projects (including lots of Christmas crafts!).

Visit my shop to buy my printable PDF sewing patterns:

Sunday 15 December 2019

Felt Greenfinches Tutorial (& a Greenfinch Embroidery Pattern!)

Another week, another new pattern in my shops! I am on a ROLL at the moment.

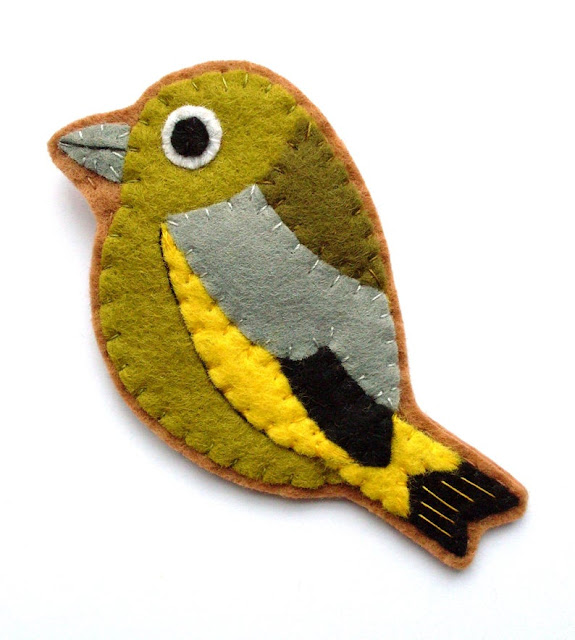
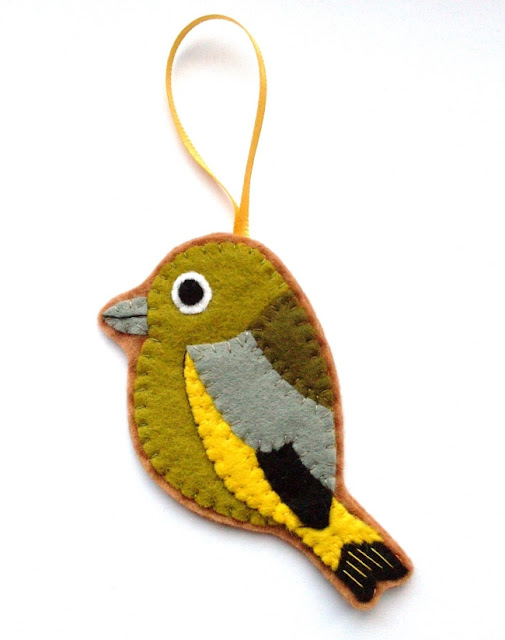
My latest printable PDF pattern is based on a lovely British garden bird: the greenfinch!

https://www.etsy.com/uk/listing/748145216
 https://www.etsy.com/uk/listing/748145216

The PDF file includes detailed step by step instructions for sewing felt greenfinch brooches and ornaments. There are lots of tips, loads of step photos, and three easy-to-print sizes of the templates so you can easily make bigger greenfinches.

https://www.etsy.com/uk/listing/748145216
 https://www.etsy.com/uk/listing/748145216

I've made and sold so many felt birds over the years, I just adore them! Here are a few I stitched along with some robins (also available as a pattern in my shops).

https://www.etsy.com/uk/listing/748145216

When you buy any patterns from my shops you have my permission to use them to make handmade things to sell at craft fairs or online, so maybe you'll be stitching up a whole batch of greenfinches soon?

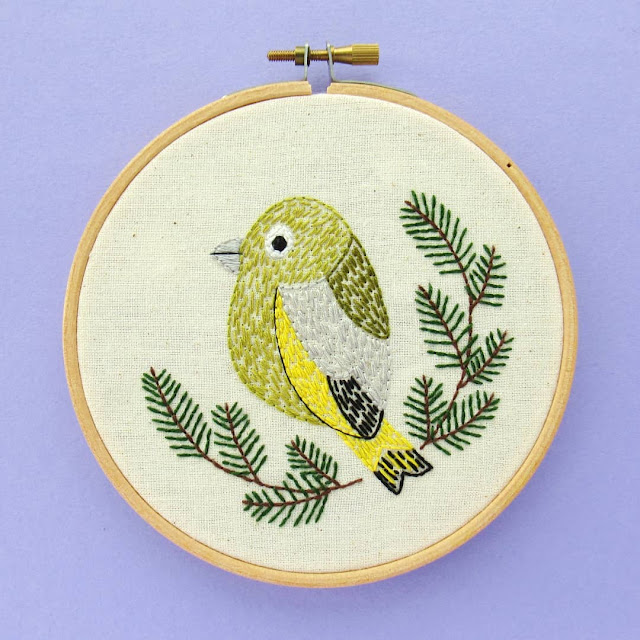
As well as the felt version, I've included a greenfinch embroidery pattern. This is lovely and easy to sew with backstitch and looks fab framed in a 5 inch embroidery hoop.

https://www.etsy.com/uk/listing/748145216

My bird patterns have been works in progress for a while (I shared this in-progress pic of the greenfinch embroidery last spring, I think!), life has rather got in the way of me finishing them but I hope you'll think they're worth the wait. I'm hoping to have lots more added to my shops in 2020!

https://www.etsy.com/uk/listing/748145216
 https://www.lupin.etsy.com

Click here to buy my Greenfinches PDF Pattern from my Etsy shop (the files will be available to download immediately after purchase).

Friday 13 December 2019

Easy DIY Christmas Card Ideas #5: Baubles!

Friday already! Where has this week gone?

For the final project in my crafty Christmas cards series, instead of Christmas trees how about topping your cards with pretty baubles?


Psst - follow the links to find all DIY Christmas card ideas in this series:

1. Washi Tape.
2. Simple Shapes and Crafty Scraps.
3. Simple Lettering.
4. Christmas Trees.
5. And today's tutorial, Baubles.
 
This tutorial originally appeared on The Village Haberdashery's blog - visit their shop for lots of crafty goodness!

Click here to view and download the template sheets for this series, including the bauble shape.

I’ve kept my baubles pretty simple but you could decorate yours however you like! (This would be another great way to use up crafty scraps!) 


For this design I used a fir branch stamp to decorate the blank card, placing the card on some scrap paper so I could stamp over the edges without making a mess.

I wrote “Merry Christmas” on a bit of white card and cut it out, then cut out a bauble from patterned paper and added a bit of gold washi tape for the bauble cap.

Finally I framed both the bauble and the text with contrasting rectangles of paper then stuck them in place on the card.


I did more stamping for this card, covering a piece of brown paper with gold acorns. I layered this over two strips of gold washi tape to create the background for my bauble.

Instead of adding tape to the bauble cap, this time I added a decorative stripe across the middle of the bauble. I cut a small bit of ribbon and tore a piece of washi tape to attach the ribbon near the top of the card, then glued the bauble on top – holding the ribbon firmly in position, and making the bauble look as if it’s hanging from it.

If you’d like your bauble to actually hang from the card make the bauble from patterned card, punch a hole in the cap then thread it with a piece of yarn, baker’s twine or embroidery thread.


I decorated my final card with a symmetrical design of stripes (like the fancy stripey Christmas tree card I shared yesterday) – I just can’t get enough of lovely washi tape!

I decorated the bauble with a bit of gold washi tape on the cap, and a patterned strip of tape across the middle then glued it to a piece of white card. I then cut the bauble out again, leaving a border of white around the shape, and stuck it in position on the card.

Tip: if you’re doing vertical stripes like this, start in the centre and work outwards. I started at one side and ended up with a slightly lopsided pattern!


Enjoyed this free tutorial? Buy me a "coffee" and help support my blog!

Buy Me a Coffee at ko-fi.com

P.S. Subscribe to my newsletter for a monthly free pattern and visit my crafty tutorial archive for lots more free projects.

Visit my shop to buy my printable PDF sewing patterns: