Showing posts with label sewing tutorials. Show all posts

Tuesday, 21 January 2020

Felt Hearts & Kisses Tic Tac Toe Set for Valentine’s Day

Instead of Noughts and Crosses, why not play a game of Hearts and Kisses!


Use colourful wool blend felt to make this felt game board and pieces decorated with hearts and X-shaped “kisses”. For even quicker crafting, glue the felt game pieces together with craft glue and make a board from colourful card.


This project is now available as part of my Patreon pattern library.

Click here to find the Tic Tac Toe tutorial and to sign up to my Patreon. 

Subscribers get full access to a growing library of PDF patterns and tutorials, and emails whenever new projects are added. You can unsubscribe at any time.

P.S. Visit my crafty tutorial archive for lots more crafty projects.

Visit my shop to buy my printable PDF sewing patterns:

Tuesday, 7 January 2020

How To: Sew Some Easy Letter Bunting!

Today I'm sharing a tutorial for sewing pretty bunting!


I designed this project to re-use the WELCOME lettering templates from my rainbow wreath tutorial. I think some welcome bunting would look lovely in a hallway, but you could easily adapt this tutorial by drawing your own letter templates to spell out any word(s) or name(s) you fancy.

This would be a lovely sewing project for a birthday party, wedding, or other special occasion, or for making a decoration for a child's nursery (make sure to hang the bunting well out of reach of little fingers!).

This tutorial was originally designed for The Village Haberdashery's blog - visit their shop for lots of crafty goodness!

You will need:

* The bunting template from my easy papercrafts post.
* The template sheet from my rainbow wreath tutorial.
* Quilting cotton (I used “Posies in Aqua” from Sugar Pie by Lella Boutique for Moda).
* Felt in two contrasting colours (I used a pretty aqua blue and a candy pink).
* Coordinating ribbon, ricrac or mini pompom trim.
* Sewing thread to match the felt lettering and the ribbon / ricrac / pompom trim.
* Coordinating stranded embroidery thread, to contrast with the inner felt circle.
* Sewing needles and pins.
* Sewing scissors.
* Embroidery scissors (these are ideal for cutting out small or fiddly felt shapes!).

To make the bunting:

1. Use the bunting template to cut out seven triangular “flags” from your chosen fabric (one per letter). If you're adding more than one word to your bunting, remember you'll need an extra flag for the gaps between the words.


2. Use the lettering and circle templates to cut out the felt pieces.


3. Sew each small circle to a backing large circle with whip stitch and your chosen embroidery thread (use half the strands only – so for six-stranded thread just use three strands). I used cream embroidery thread to match my pompom trim.

Then add the letters, sewing them in place with running stitch and matching sewing thread.


4. Position each letter on one of the bunting flags, just below the centre of the flag (remember you’ll be adding the ribbon or trim later!). Sew each letter in place with running stitch in matching (pink) sewing thread, sewing flush with the edge of the smaller circle so your stitching is hidden.


5. Add the bunting flags to your chosen ribbon or trim. Leave a length of ribbon/trim unstitched (so you can tie the bunting in place when you come to display it) then add the flags one by one. Pin or hold the ribbon/trim along the top edge of each flag then sew it in place with running stitch and matching sewing thread.

Leave a length of unstitched ribbon/trim at the other end of the bunting then cut away any excess. If you’re using ribbon, cut the ends at an angle to help prevent fraying.


And you're done! Now you just need to hang the bunting up and go put the kettle on and admire your work.

Enjoyed this free tutorial? Buy me a "coffee" and help support my blog!

Buy Me a Coffee at ko-fi.com

P.S. Subscribe to my newsletter for a monthly free pattern and visit my crafty tutorial archive for lots more free projects.

Visit my shop to buy my printable PDF sewing patterns:

Tuesday, 17 December 2019

How To: Sew Easy Felt Gingerbread Men Christmas Ornaments

I'm squeezing in one more free Christmas craft tutorial before the main event: cute little felt gingerbread men decorations!


Or should that be Gingerbread People??? :)

Whatever you want to call them, these fun felt ornaments are super quick and easy to sew. They'd be perfect for beginners, for sewing with kids, or for those times when you just want a nice, relaxing project to work on.


A set of these would make a lovely Christmas gift, and one ornament would be fab tied to anothe present or slipped into a Christmas card. I think they'd also make cute brooches! Just add a brooch clasp instead of a ribbon loop.


These gingerbread men ornaments are an updated version of a design I stitched for my shops many years ago. Here's the new style...


... and here are the old ones!


As you can see, originally I used black sequins for the eyes and gave my gingerbread fellas big laughing mouths. This time round I've opted for beads for the eyes and a single curved line for the smile but you could copy the old version if you prefer them!


You will need:

- Ginger coloured craft felt (this may be a bit tricky to find in your local craft store if they just stock a small range but there are loads of online craft shops that stock a huge range of felt colours)
- Round sequins in assorted colours
- White sewing thread
- Black sewing thread
- Black seed beads (or small round black sequins)
- Narrow ribbon
- Sewing scissors
- The templates provided at the bottom of this post


To Make a Felt Gingerbread Man Ornament: 

1. Use the template provided to cut out two shapes from ginger coloured felt. Set aside one of the pieces for the moment.


2. Give your gingerbread man two eyes. You could use black seed beads for this, or small black sequins or just sew a couple of large French knots from black embroidery thread (floss).


If you're using seed beads (as shown above), sew each bead flat like an O with three or four stitches of black sewing thread. If you're adding small sequins, sew each sequin in place with two or three stitches of black sewing thread.

3. Now give the gingerbread man a smile! Use backstitch and a double thickness of black sewing thread so sew a small curved line for the smile.


For extra-happy gingerbread men, also sew a straight line across the top of the smile - creating a sideways D shape, and making it look like the gingerbread man is laughing or has a big grin.

4. Add sequins, mini buttons or little felt circles for the gingerbread man's buttons.


I used three different coloured sequins for each of my gingerbread men, sewing them in a row with white sewing thread. I used two stitches to secure each sequin, so all the stitches formed a neat(ish) vertical line. If you're using sequins which are all the same colour, you may prefer to use sewing thread to match them.

5. Cut a piece of narrow ribbon (approx 7 inches / 17.5 cm long) and fold it into a loop. Secure the cut ends to the top of the second gingerbread shape, with whip stitch and any colour sewing thread. Sew into the felt not through it, so your stitches won't be visible on the outside of the ornament.


Tip: the gingerbread template isn't completely symmetrical, so before you add the ribbon make sure you're attaching it to the correct side of the gingerbread shape! You'll want both shapes to line up neatly when you place them together, with the cut ends of the ribbon sandwiched between them.

6. Place the front and back of the gingerbread man together, and sew around the edge with running stitch and white sewing thread. Use small even stitches so the layers are sewn together but you also end up with a nice decorative edging to the ornament.


For a different look (with less visible stitching) you could use matching ginger sewing thread to sew the ornament together.

This tutorial is for non commercial use only: you can use it to make as many gingebread men as you want for yourself or as gifts, but please don't make any for sale. You may borrow a couple of photos if you want to blog about this project, but remember to credit me and link back to this page on my blog, and do not reproduce my entire tutorial / share my templates on your site. Thanks!

Click here to open the template sheet in a new window, make sure you're viewing it full size then print it at 100%.


Enjoyed this free tutorial? Buy me a "coffee" and help support my blog!

Buy Me a Coffee at ko-fi.com

P.S. Subscribe to my newsletter for a monthly free pattern and visit my crafty tutorial archive for loads more free projects (including lots of Christmas crafts!).

Visit my shop to buy my printable PDF sewing patterns:

Tuesday, 12 November 2019

How To: Sew Felt Mushrooms & Toadstools!

This week I'm sharing some fun autumnal crafting projects: tutorials for sewing felt mushrooms and toadstools then using them to create an awesome autumn wreath.

-----

UPDATE: my felt autumn wreath tutorial (including templates and instructions for making these fun felt fungi) can now be found as a printable PDF pattern over on my Patreon. 

Subscribe to get instant access to a growing library of PDF embroidery patterns and craft tutorials, and updates when I add something new!

----- 


These felt mushrooms and toadstools are so easy to make! You can use them to decorate larger autumn craft projects, or add brooch clasps or ribbon loops to turn them into brooches or Christmas ornaments.

 
If you're making Christmas decorations why not give them some extra sparkle by adding beads or sequins to the toadstools, or using metallic embroidery thread for the mushrooms. You could also decorate the backs of your toadstools as well as the fronts, or use the space on the back to embroider the year you stitched them.
 
 
Subscribe to my newsletter for a creative updates, and visit my crafty tutorial archive for lots of free projects.

Visit my shop to buy my printable PDF sewing patterns:

Sunday, 21 July 2019

Felt Fox Brooch Tutorial

UPDATE: this tutorial is now available in my shop and my Patreon pattern library.

Subscribe for a small monthly fee and you'll get access to a growing library of PDF patterns and tutorials, with an email whenever I add a new project. You can cancel any time.      

Click here to check out my Patreon page and sign up! 

----- 

I've just sent out this month's newsletter project - a tutorial for sewing a felt fox brooch.

Felt Fox Brooch Cute Woodland Animal Sewing Tutorial

This is another old design that I used to sell in my shop which I'm now sharing as a pattern. I'm really enjoying revisiting these old projects and I hope you guys are enjoying sewing them!

Felt Fox Brooch Cute Woodland Animal Sewing Tutorial


Click here to visit my tutorial archive for lots of free patterns and project ideas.

Wednesday, 17 July 2019

Plant Lady Brooches: Felt Cactus Brooch Tutorial

UPDATE: My plant lady brooch tutorials can now be found in my Patreon pattern library!

Joining my Patreon gives you access to a growing library of felt crafting tutorials and embroidery patterns while helping to support all my creative work. You'll get an email whenever I add a new project, and you can cancel at any time xxx

Sew a Plant Lady, Cactus, or Monstera Leaf brooch.

-------

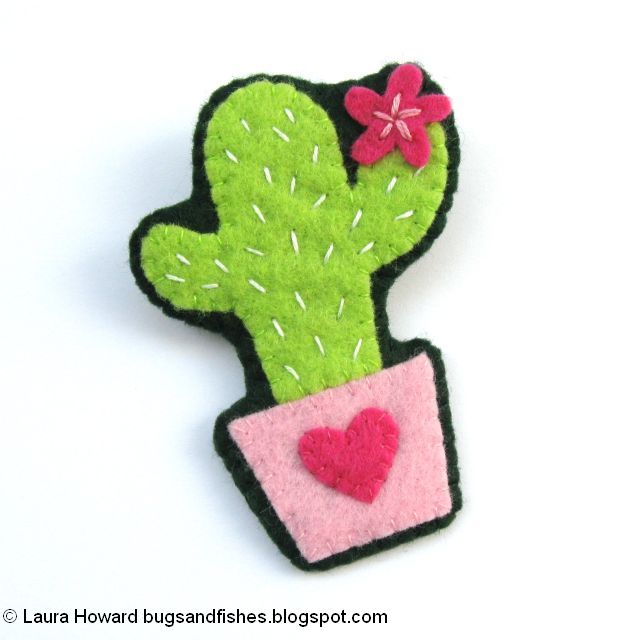
Sew a fun felt cactus brooch with the second of my plant lady brooch tutorials!

Plant Lady Brooches: Felt Cactus Brooch Tutorial
Sewing Tutorial: Plant Lady Brooches

These leafy designs would make great gifts for the plant-lovers in your life! You could also leave off the brooch backs and use the designs as patches to sew on your rucksack, jacket, or other items that don’t need regular washing.

The tutorials originally appeared on the Village Haberdashery's blog and were created using felt and other craft supplies from their shop.

Plant Lady Brooches: Felt Cactus Brooch Tutorial

Click here to check out my Patreon!

Thursday, 13 June 2019

Felt Badger Brooch Tutorial

UPDATE: this tutorial is now available in my shop and in my Patreon pattern library.

Subscribe for a small monthly fee and you'll get access to a growing library of PDF patterns and tutorials, with an email whenever I add a new project. You can cancel any time.     

Click here to check out my Patreon page and sign up! 

---

This month's freebie for my newsletter subscribers will be a tutorial for sewing a cute felt badger brooch!

felt badger brooch tutorial
 felt badger brooch tutorial

I stitched lots of these badgers for my online shops a decade ago (how time flies, huh?!) and am really looking forward to revisiting this pattern to share it with you guys.

I've always loved badgers but have had a particular fondness for them in recent years after getting to see lots in real life, visiting my parents' garden for some peanut snacks. 

felt badger brooch tutorial


Click here to visit my tutorial archive for lots of free patterns and project ideas.

Monday, 10 June 2019

Crafting With Felt Flowers: Felt Brooches Tutorial

Add a pop of colour to any outfit with a felt flower brooch! 

Felt Flower Brooches Tutorial

This week I'm sharing four easy ideas for using the templates from my April Felt Flowers Wreath tutorial, kicking off with some pretty flower brooches.

 Felt Flower Wreath Tutorial

This tutorial was originally designed for The Village Haberdashery's blog, using felt and other craft supplies from their shop.

You will need:

- The flower templates from April's wreath tutorial
- Felt in assorted colours
- Matching sewing thread
- Contrasting or coordinating embroidery thread
- One button per flower
- Brooch clasps
- Sewing needles and pins
- Sewing scissors or embroidery scissors (embroidery scissors are great for cutting out detailed felt shapes!)

 Felt Flower Brooches Tutorial

To make the brooches: 

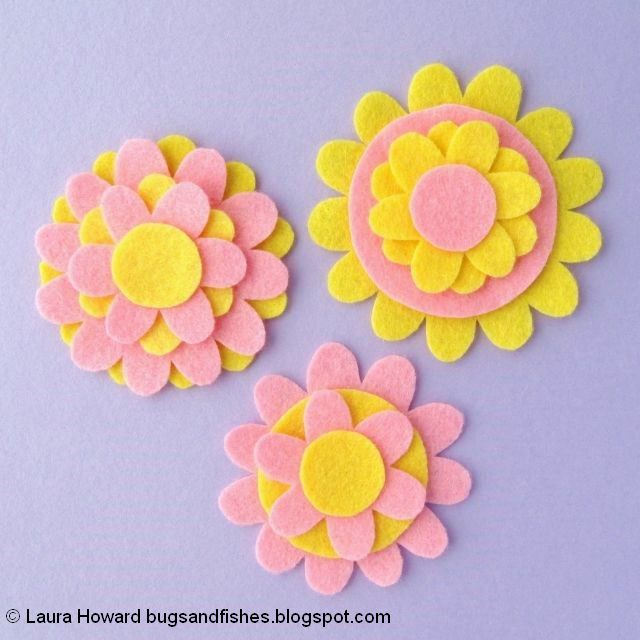
Use the flower templates, mixing and matching shapes to create layered flowers. I used two colours but you could use as many as you like. Top each flower with a small circle cut using template H.

Felt Flower Brooches Tutorial: layer the felt pieces

Sew the layers together with a small X of two stitches, using sewing thread to match the felt (or the buttons you’ll be adding later).

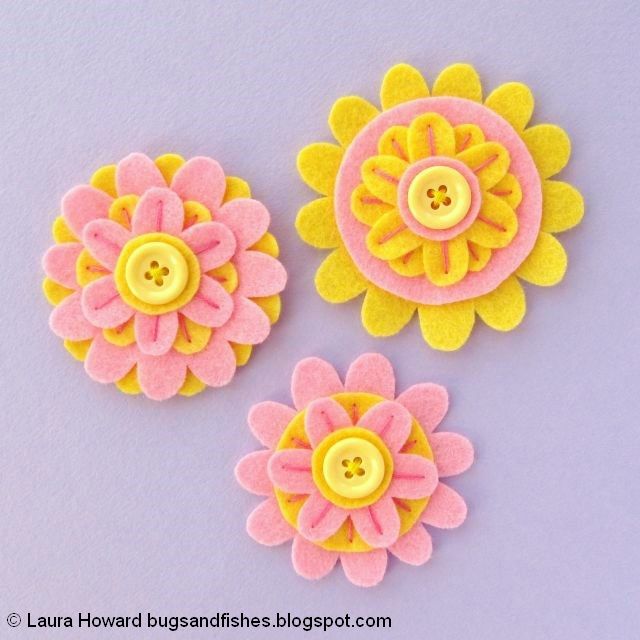
Then use half strands of embroidery thread (so, for six-stranded thread just use three strands) to decorate the flowers. Sew single stitches along the inner petals, starting each stitch from under the central felt circle. Use a contrasting or coordinating colour for this - I used dark pink.

Felt Flower Brooches Tutorial: embroider the flowers

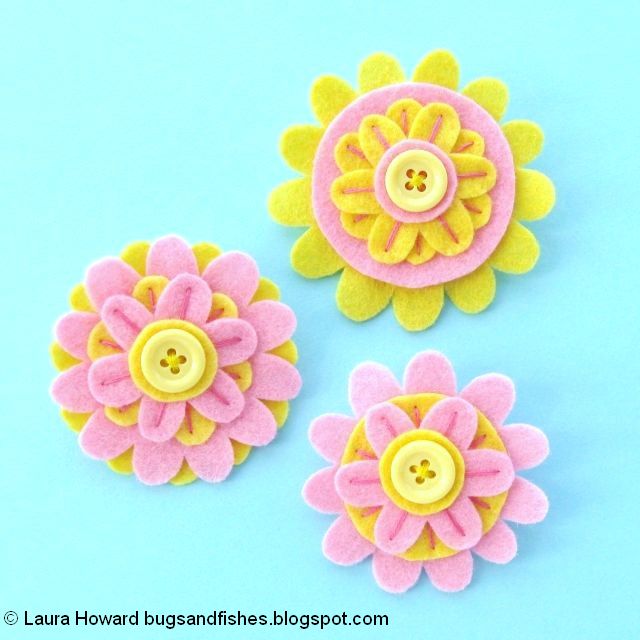
Add a button to the centre of each flower, sewing them securely in position with a double thickness of matching sewing thread.

Felt Flower Brooches Tutorial: add a button to each flower

Use the templates to cut a backing circle for each brooch, small enough to fit within the largest flower shape. I cut these from purple felt but any colour will do as it won’t be visible when worn.

Position a brooch clasp just above the centre of each circle, sewing them in place with a double thickness of matching sewing thread.

Felt Flower Brooches Tutorial: prepare the back of the brooches

Place the circles on the backs of the flowers, as shown. Sew them into position with whip stitch and matching sewing thread, sewing into the layers of felt but not through them – so the circles are secured but the stitching isn’t visible at the front of the brooch.

Felt Flower Brooches Tutorial: sew on the brooch backs
 Felt Flower Brooches Tutorial: the finished brooches
  
This tutorial is for non commercial use only: you can use it to make as many brooches as you want for yourself or as gifts, but please don't make any for sale. You may borrow a couple of photos if you want to blog about this project, but remember to credit me and link back to this page on my blog, and do not reproduce my entire tutorial / share my templates on your site. Thanks!

Enjoyed this free tutorial? Buy me a "coffee" and help support my blog!

Buy Me a Coffee at ko-fi.com

P.S. Subscribe to my newsletter for a monthly free pattern and visit my crafty tutorial archive for lots more free projects.

Visit my shop to buy my printable PDF sewing patterns: