Showing posts with label craft tutorial. Show all posts

Monday, 2 October 2023

The Sycamore Gap Tree - Free Felt Ornament Tutorial

Sew a felt ornament to commemorate the beautiful (and now sadly felled) Sycamore Gap tree on Hadrian's Wall!


The shocking news has prompted such an outpouring of love for the tree, and for our connections with nature and the landscapes that mean so much to us.

I thought it would be nice to design a felt ornament to celebrate and remember that specialness!


The step by step sewing tutorial includes templates and instructions for making three different Sycamore Gap ornaments - a sunny summer's day, a sunset scene, and a night-time scene with a starry sky.


Choose the design you prefer, or make the whole set!

Click here to find the free downloadable Sycamore Gap pattern on my Patreon.


Thursday, 18 May 2023

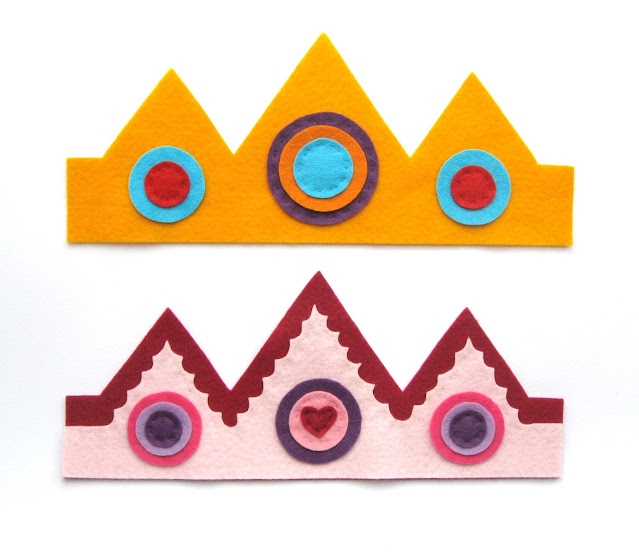
Coronation Crowns + Jewelled Crowns, Felt Crown Tutorials

As promised, here are some more fun felt crown tutorials!

fun felt crown tutorials


These easy sewing patterns available on my Patreon will guide you through making four different styles of felt crown - as mementos of the Coronation of King Charles III, or just for dressing up as a King, Queen, Prince, or Princess whenever you fancy!

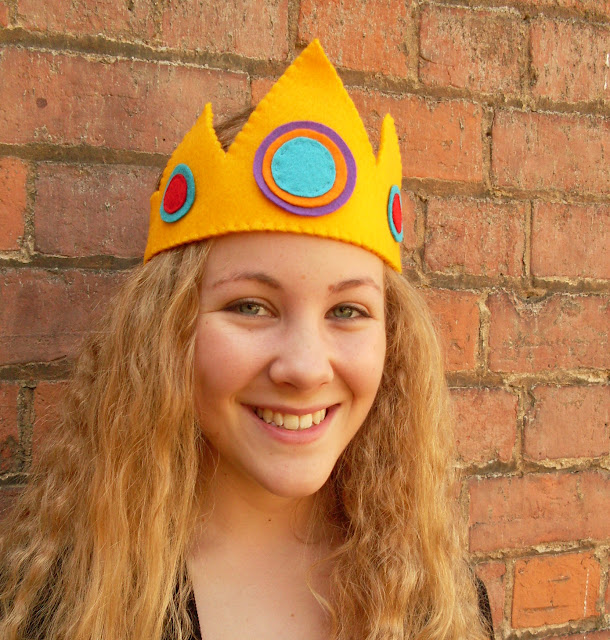
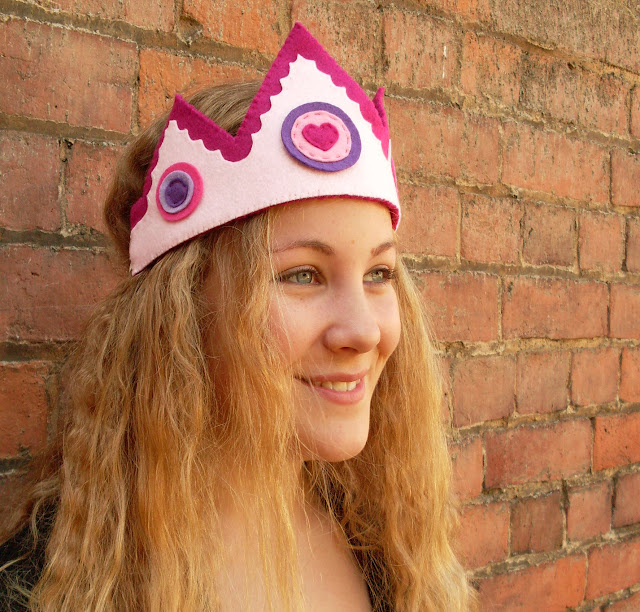
Coronation crowns felt sewing tutorial

jewelled felt crowns sewing tutorial

These tutorials are based on the basic felt crowns tutorial I shared earlier, with four different variations to try...

 .... a simple patriotic crown in red, white, and blue (great for Royal events here in the UK, or the 4th of July in the USA!)

red white and blue felt crown tutorial


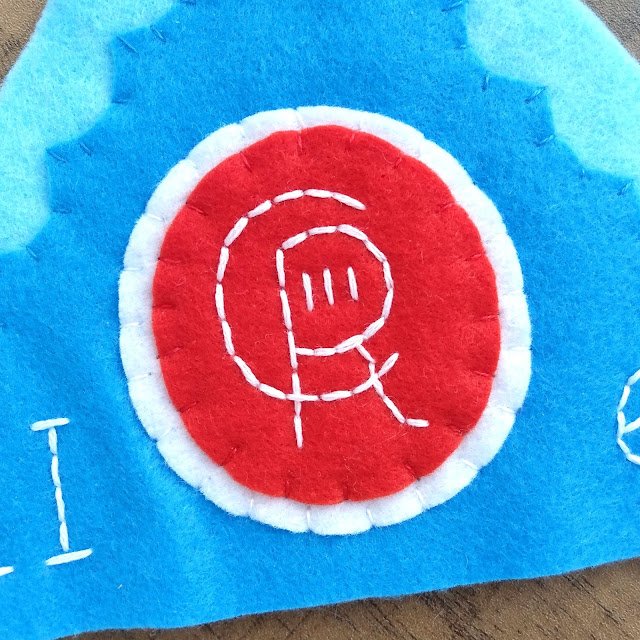
.... an embroidered commemorative crown celebrating the Coronation of King Charles III.

Coronation of King Charles III felt crown tutorial


... a sparkly crown decorated with beads and sequins.

sparkly jewelled felt crown tutorial


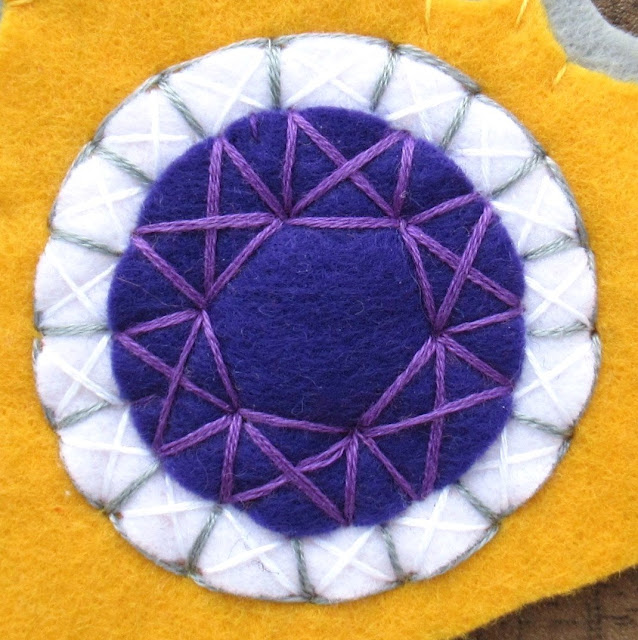
.... and a crown decorated with embroidered felt "gems", with step by step instructions and diagrams for the embroidery.

felt crown tutorial with embroidered gems


I'm particularly delighted by the embroidered gems and want to sew them on everything now.

I think one on its own would totally work as a fabulous felt brooch!

felt embroidered gemstones jewels tutorial


The CRIII monogram / cypher would also look great embroidered onto a felt bauble as a quick-to-sew memento of the Coronation year!

King Charles III monogram embroidery pattern
 

Easy Felt Crowns Sewing Tutorial

Today I'm sharing a whole flurry of Coronation-themed craft projects over on my Patreon: starting with a step by step tutorial for sewing two styles of simple felt crowns...

Easy Felt Crown Sewing Tutorial

Felt Princess Crown Sewing Tutorial

Most of the projects I'll be sharing today are things that would make nice or fun mementos of the Coronation (if you're a fan of the Royals or just enjoyed watching the big spectacle!)... but felt crowns are obviously for LIFE not just for Coronation celebrations!

These felt crowns are designs I used to sell in my Etsy shop many years ago. I shared the tutorial here on my blog at one point, but it's now exclusively available as a printable PDF pattern for my Patreon subscribers. 

Felt Crown Sewing Tutorials

The crowns are super easy to make, and are great for costume parties, Halloween, and all kinds of other fancy dress occasions. 

You can also easily customise them with different colours and decorative details - and I'll be sharing four ideas for that (on a Coronation-them, of course!) shortly. 

P.S. Yes I know the Coronation was a couple of weeks ago - I wish I'd had the time and energy to get all these projects sorted earlier, but I hope you'll enjoy them all anyway xxx

Click here to find the Felt Crowns tutorial over on my Patreon!

Click here to read more about my Patreon, get a preview of the many projects included in the pattern library, and to subscribe!

Saturday, 17 September 2022

A Portrait of Queen Elizabeth II, Felt Ornament Tutorial

Sew a felt portrait of the Queen, to commemorate her long life and reign!


This step by step project includes templates, instructions, and several text options for the embroidery - including "Thank you, Ma'am, for everything" for the Paddington fans among you. 

Don't want to make an ornament? Sew the finished portrait onto a larger piece of felt or fabric and frame it instead. 

CLICK HERE to find the printable PDF pattern over on my Patreon.

In case you missed it - here's the embroidery pattern I shared earlier. 

I'm sharing these patterns for free, but if you'd like to support my work you can sign up to become a Patron, buy me a coffee, or visit my shop. 

If you'd prefer to make a donation to a charity in memory of the Queen that would also be lovely!

Friday, 11 March 2022

Tutorial: Sew Felt Spring Tree Brooches

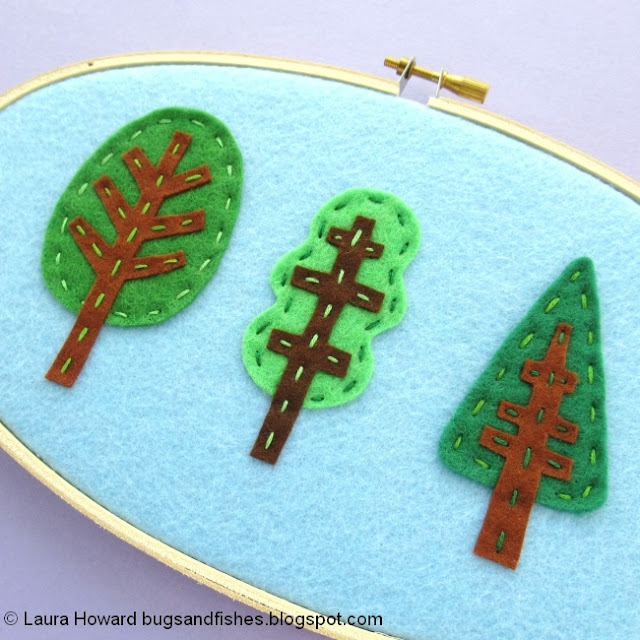
Spring is coming! Celebrate the return of all things green and glorious - or just your love of trees - with today's sewing tutorial: a step by step guide to making a felt tree brooch.


These trees started off life as part of a tutorial for some autumn leaf and tree cards...

... then I couldn't resist doing a spring version, so I made some spring tree textile art...


... and shared some spring tree embroidery patterns:


Obviously I had to make some felt tree brooches, too! :)

You could also add ribbon loops to create little tree ornaments, or sew lots of trees for a spring forest garland. These would also make sweet motifs or patches to add to larger projects.


How to make a felt tree brooch:

1. Follow the steps in my spring tree textile art tutorial to sew your chosen tree design, using the templates linked to in that post. 

Instead of sewing the tree pieces to a piece of felt in an embroidery hoop you can just sew them to a piece of loose backing felt, but you may find having the felt held in the hoop makes it easier for you to add the embroidered details. If you're sewing your tree on loose felt there's no need to use tacking stitches to hold the tree shape in position, just use a pin instead.

If you're planning on making a few trees, try it one way then the other and see which method works best for you!

2. Remove the felt from your embroidery hoop (if you've used one) then cut out the tree shape, leaving a narrow border of the backing felt.


3. Use the tree shape as a template to cut out a matching matching shape from more of the backing felt. This plain shape will become the back of your brooch (or ornament, etc).


4. Turn the back of your brooch over, and add a brooch clasp. Sew it with a double thickness of sewing thread to match the backing felt.


5. Then hold the front and back of the brooch together and use more of the same thread to join them together, sewing flush around the tree shape with running stitch. And you're done! Arboreal felt goodness to pin to your jumper (sweater) or jacket this spring.


This tutorial is for non commercial use only: you can use it to stitch as many trees as you want for yourself or as gifts, but please don't make any for sale. Thanks xx

Enjoyed this free tutorial? Buy me a "coffee" and help support my blog!

Buy Me a Coffee at ko-fi.com

P.S. Subscribe to my newsletter (currently taking a break but hopefully back soooon) for free patterns and visit my crafty tutorial archive for lots more creative projects.

Visit my shop to buy my printable PDF sewing patterns and lots more:


Monday, 7 March 2022

Tutorial: Sew Easy Peasy Felt Flower Brooches!

Today I'm sharing a super simple felt flower tutorial which is perfect for beginners, crafting as a family, or just for when you want a quick and easy make. 
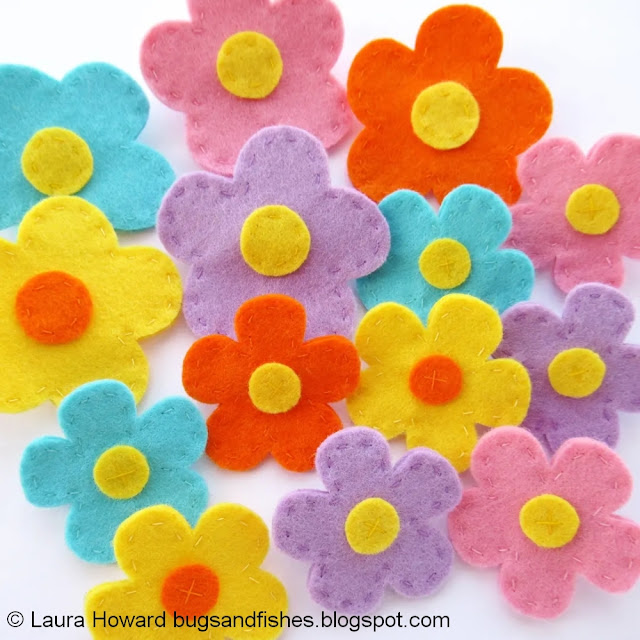

I've made my flowers into brooches, which always make lovely gifts, but they'd also be great for decorating a spring or summer wreath or for adding to lots of crafty projects. 


You could also add a hairclip to the back instead of a brooch clasp, or sew each flower onto a piece of ribbon to make bookmarks - like these I made years ago:

You can make small flowers...


 ... or large flowers...


 ... or a selection of both sizes.

I've sewn my flowers in a pretty spring / early summer palette: orange, yellow, pale pink, lilac, and aqua blue. I've used yellow felt for the flower centres except for the yellow flowers which have orange centres.


I chose to use matching thread throughout - yellow thread to sew yellow felt, pink thread to sew pink felt, etc - so the thread almost disappears against the felt, but you could choose contrasting colours to add detail and make your stitching part of the design. Here's a batch of these flowers I made years ago, all sewn with yellow thread:

For more detail and variety, why not add a sequin, small button, or some seed beads to the flower centres? Or play around with embroidery thread and some simple stitches to add lines or simple patterns to the petals?

It would be really fun to make these flowers in colours to match a favourite outfit - maybe a trio of flowers, each picking out different colours from a dress you love? Or in shades that really pop against a favourite jumper?


For each flower, you will need:

- Felt in two colours

- Matching sewing thread

- A sewing needle, and a pin

- Sewing scissors (embroidery scissors are great for cutting out small shapes!)

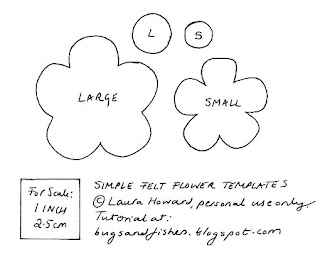
- The templates included at the bottom of this post

- A brooch clasp or a safety pin


To make a simple flower brooch:

1. Use the templates provided to cut out one flower centre, and two flower shapes. Hold or pin the paper templates to the felt as you cut out each shape.

If you're making a large flower, cut a large (L) centre circle. If you're making a small flower, cut a small (S) centre circle.


2. Position the centre circle in the middle of one of the flower pieces, and sew it in place with matching sewing thread. For the small flowers I stitched the circles in place with an X of two single stitches. For the larger flowers I used running stitch. 

I've marked this stitching on the photo with black to make things clearer as it's hard to see yellow stitching on yellow felt!


3. Now take the other flower shape and turn it over.

If you're adding a brooch clasp or hairclip, sew it in place with a double thickness of matching thread and lots of stitches to make things nice and secure.
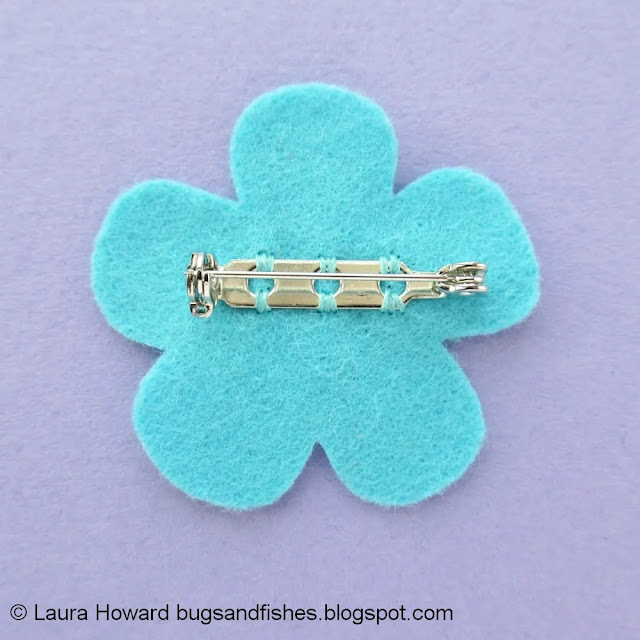

If you're using a safety pin, use matching thread to sew a small rectangle of felt over the fixed bar of the pin, holding it in place. I used running stitch for this, sewing two horizontal lines as close as possible to the pin then three vertical lines, as shown.


4. Finally, place the front and back flower pieces together and sew around the edge with running stitch and matching thread. Start your stitching inside the flower so your knot will be hidden between the felt layers, then finish your stitching as neatly as possible at the back.


Then repeat these steps as many times as you like! :)

This tutorial is for personal (non-commercial) use only. You may borrow a couple of photos if you want to blog about this project, but remember to credit me and link back to this page on my blog, and do not reproduce my entire tutorial / share my templates on your site. Thanks!

Enjoyed this free tutorial? Buy me a "coffee" and help support my blog!

Buy Me a Coffee at ko-fi.com

P.S. Subscribe to my newsletter (currently taking a break but hopefully back v soon!) for free patterns and visit my crafty tutorial archive for lots more free projects.

Visit my shop to buy my printable PDF sewing patterns:

Click here to open the templates in a new window, then print them at 100%.
Friday, 8 October 2021

Sew a Felt Panda Mask for Halloween

Time to add another project to my Patreon pattern library! 

This week I've shared a tutorial for sewing a cute felt panda mask - great for Halloween, fancy dress parties, or just cheering up a trip to the supermarket :)


This tutorial is part of a series of old newsletter projects I'm now making available for my Patreon supporters.

Want to sew your own felt panda mask? Click here to check out my new Patreon page and sign up.

Subscribe for a small monthly fee and you'll get access to a growing library of PDF patterns and tutorials, with an email whenever I add a new project. You can cancel any time. 


P.S. Subscribe to my newsletter for a monthly(ish) free pattern or visit my crafty tutorial archive for lots more free projects.

Visit my shop to buy my printable PDF sewing patterns:


Friday, 3 September 2021

Sew a Felt Bird Mask for Halloween

I've started a Patreon page!

Patreon is a bit like a blog, but you can set different membership levels and offer subscriber-only content to people who are interested in your work. My plan for my page is to gradually build up a pattern library, turning all the crafty projects on my blog into easy-to-print PDF files with hi-res templates / easily printable patterns.

Subscribers will get access to all the PDFs I've added to the library so far, and be notified by email when I add new ones.

It's going to take me a good while to work through my whole archive, but I'll also be adding PDF versions of all the new patterns/templates I share here on my blog over the coming months.

I'll also be posting some of my old newsletter projects exclusively for my Patreon subscribers... starting with a whole bunch of fun felt masks to sew for Halloween :)

First up: a tutorial for sewing a felt bird mask!

This was the first felt mask I made back in the early days of my online shop - look how young and fresh-faced I look in that photo!!! How time flies when you're busy sewing stuff from felt!

Want to sew your own bird mask? Click here to check out my new Patreon page and sign up.


P.S. Subscribe to my newsletter for a monthly(ish) free pattern and visit my crafty tutorial archive for lots more free projects.

Visit my shop to buy my printable PDF sewing patterns:


Monday, 11 January 2021

DIY Geometric Felt Cushion Tutorial

This week's free tutorial is based on a project I've had "in progress" (i.e. been neglecting) for years: a hand-sewn felt cushion with a geometric pattern. This felt like a perfect project to share during lockdown while we're all stuck and home and (judging from my Instagram feed) doing lots of home improvements!

This was such a lovely relaxing project to work on, and I'm so pleased with how it turned out.

It turned out to be a big hit with my dad, too. I took it round to his house (we're in a support bubble together so I'm allowed to visit at the moment) to take some photos of it and he wouldn't let me leave with it... it now lives on one of the grey sofas in what I think of as his den :)

(Can we talk about how tricky it is taking interior shots with no special lighting in the middle of a gloomy winter??!?! Such a headache! I really need to learn to prep my winter tutorials in the summer!)


Want to make your own hand-stitched geometric cushion?
 
This is a time-consuming project but not a difficult one. It would be perfect to work on while watching TV in the evenings this winter. You could use your favourite colours, or maybe make a random patchwork of colours using up felt scraps from your stash!

First you need to pick a tessellating shape. You can use the same chevron shape I did (you'll find the template at the bottom of this post) or draw your own shape. Remember the smaller your shape the more pieces you'll need to cut out and sew around so the more time your cushion will take to sew!

 
Work out how many shapes you'll need to fill the front of your cushion and plan your colours. I used some graph paper to plan my arrangement, then cut out the number of pieces I needed. 
 
Start building up your pattern, pinning then tacking some of your pieces in place on a piece of felt that's a bit larger than your finished cushion front will be (I used a large piece off-white felt because that's what I happened to have lying around, left-over from another project!). Use a ruler to help make sure your lines are nice and straight.


Begin sewing your felt shapes in place, using whip stitch and matching sewing thread. Don't sew around what will be the outside of your cushion - only sew the interior lines.

 
Gradually build up the design, sewing the pieces flush with each other. As you can see, I trimmed the pieces at the ends of each row to create a nicely squared off edge. 


You may find it helpful to use a ruler and an air-erasable marker pen to help you cut these edge pieces to be completely straight.


Here's how the front of my cushion looked when I'd added all the shapes:

 
As  you can see I still had a line of tacking stitches in place at the very top and bottom of the cushion to help keep the edges of those shapes in position. If you're using larger shapes than me you may also want to add some stitches to the sides as well, to help with the next step.


Now your cushion front is completed it's time to trim away the excess felt - do this carefully to avoid snipping any of your stitching!


For the back of the cushion you'll need a big bit of felt to coordinate with your chosen colours. Cut two large pieces approx two-thirds the size of your cushion, and pin them to the back ("wrong") side of the  of the cushion front so they overlap in the middle, like so:


Sew around the edge of the cushion with blanket stitch, sewing through all the layers. 
 
I used dark grey sewing thread to match the backing felt and co-ordinate nicely with the colours on the front. Remove the pins as you sew around the edge then remove any remaining tacking stitches.


Finally, add your cushion pad and sit back and admire your magnificent masterpiece!
 

This pattern is for non commercial use only: you can use it to stitch as many cushions as you want for yourself or as gifts, but please don't make any for sale. You may borrow a couple of photos if you want to blog about this project, but remember to credit me and link back to this page on my blog, and do not reproduce my entire post or share my template on your site. Thanks!

Enjoyed this free tutorial? Buy me a "coffee" and help support my blog!

Buy Me a Coffee at ko-fi.com

P.S. Subscribe to my newsletter for a monthly free pattern and visit my crafty tutorial archive for lots more free projects.

Visit my shop to buy my printable PDF sewing patterns:


Click here to open the template in a new window, make sure you're viewing it full size then print it at 100%.