Showing posts with label spring flowers. Show all posts

Tuesday, 17 January 2023

Tulips: Spring Flower Embroidery Patterns

Hello friends!

I've been busy behind the scenes this month working on lots of loveliness to share with my Patreon subscribers and here on my blog over the coming year, I'm so excited to get started! 

The first new addition to my Patreon pattern library? A pair of tulip embroidery patterns. 


These floral designs would look great framed in 5 inch embroidery hoops, or sewn onto a small sewing project.

I've designed them to match another set of spring flower patterns which are also available over on my Patreon: daffodils & narcissi.


Click here to find the tulip embroidery patterns, and to sign up to my Patreon. Subscribers get full access to a growing library of PDF patterns and tutorials, and emails whenever new projects are added. You can unsubscribe at any time.

P.S. Visit my crafty tutorial archive to find more creative projects. You'll also find printable PDF sewing patterns over in my shop along with lots of vintage goodness:


Monday, 7 March 2022

Tutorial: Sew Easy Peasy Felt Flower Brooches!

Today I'm sharing a super simple felt flower tutorial which is perfect for beginners, crafting as a family, or just for when you want a quick and easy make. 


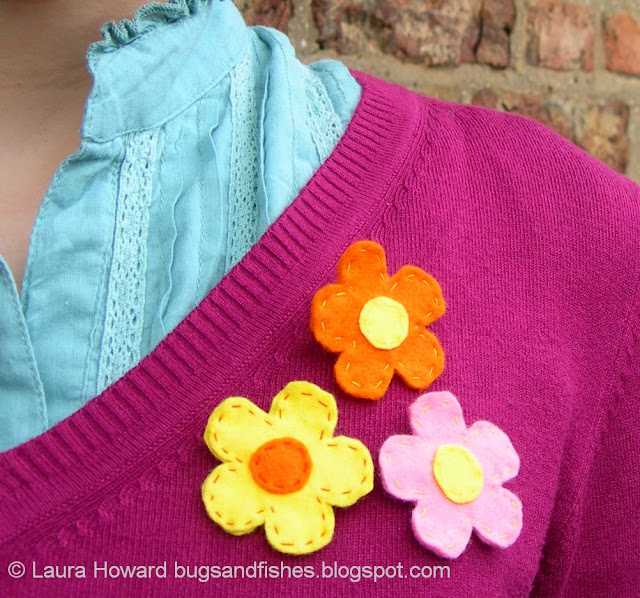
I've made my flowers into brooches, which always make lovely gifts, but they'd also be great for decorating a spring or summer wreath or for adding to lots of crafty projects. 


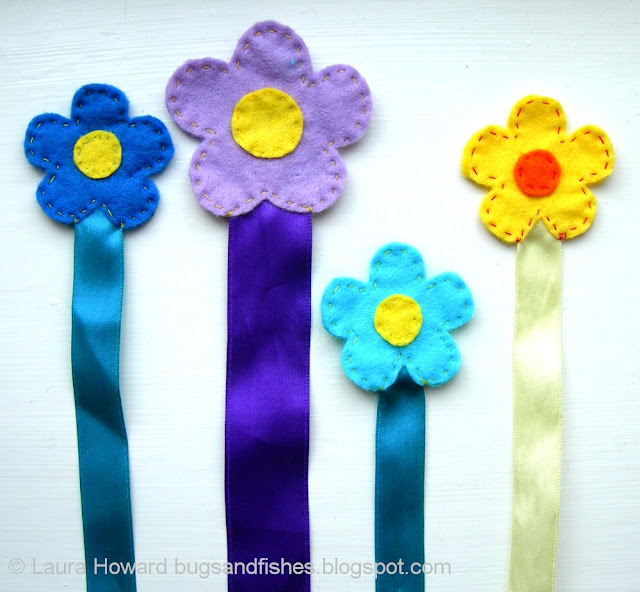
You could also add a hairclip to the back instead of a brooch clasp, or sew each flower onto a piece of ribbon to make bookmarks - like these I made years ago:

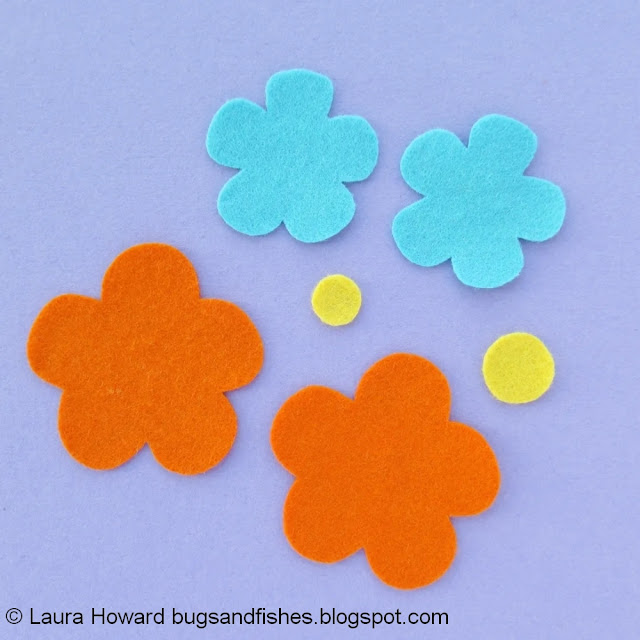
You can make small flowers...


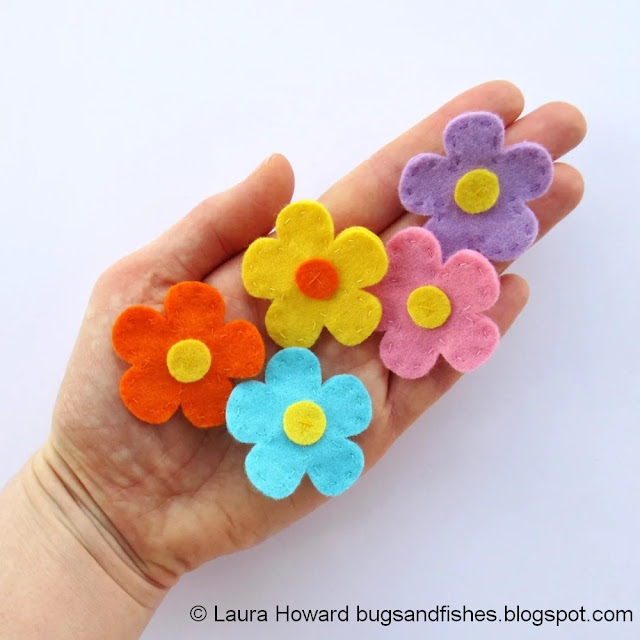
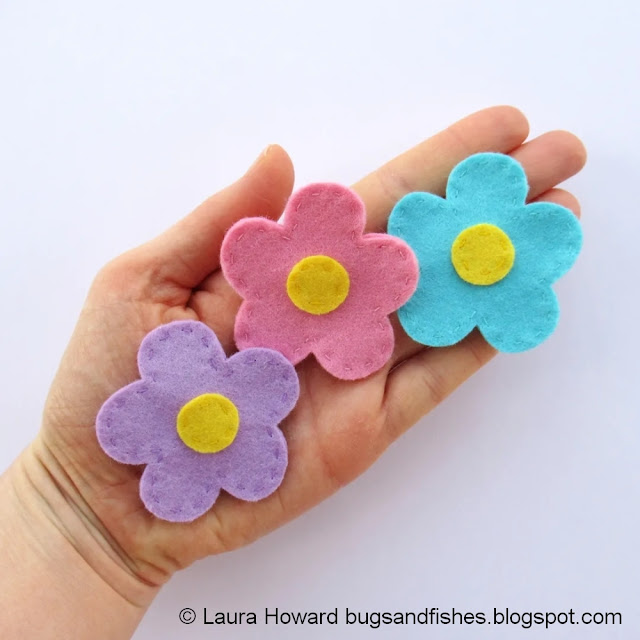
 ... or large flowers...


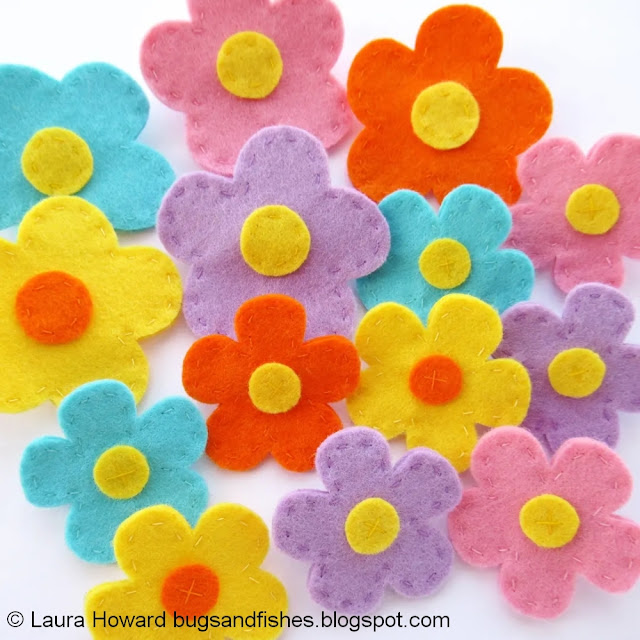
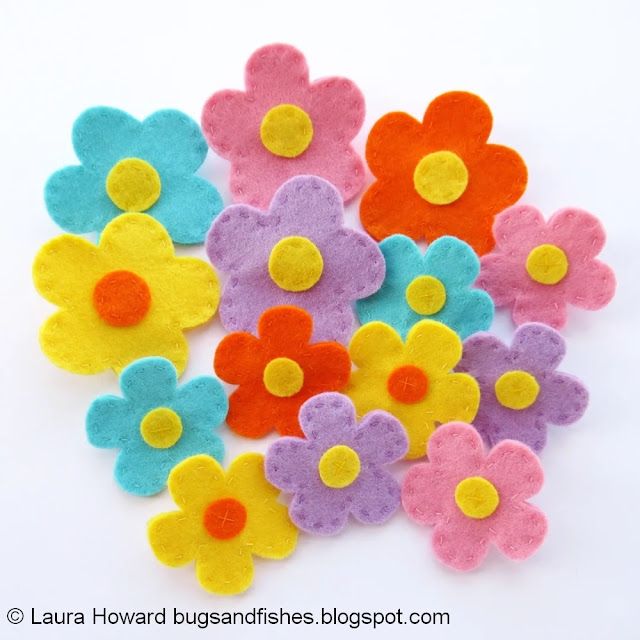
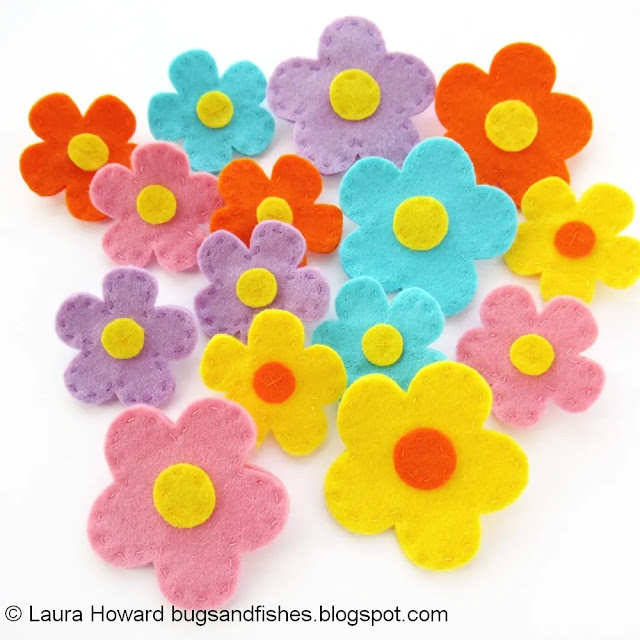
 ... or a selection of both sizes.

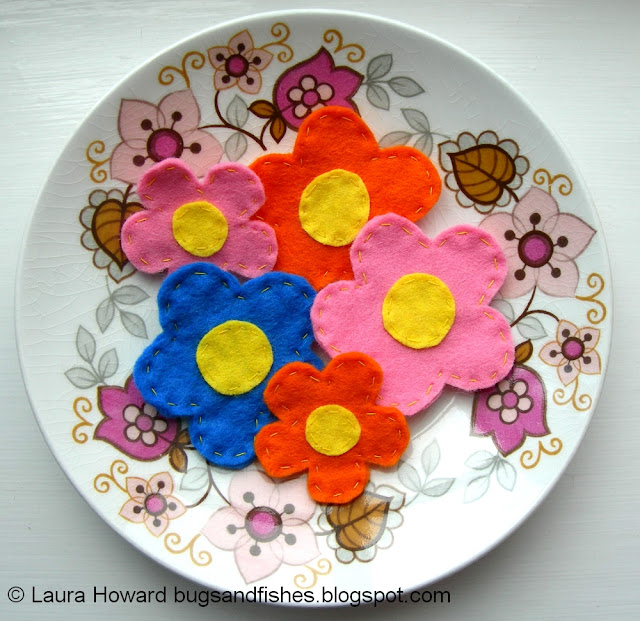
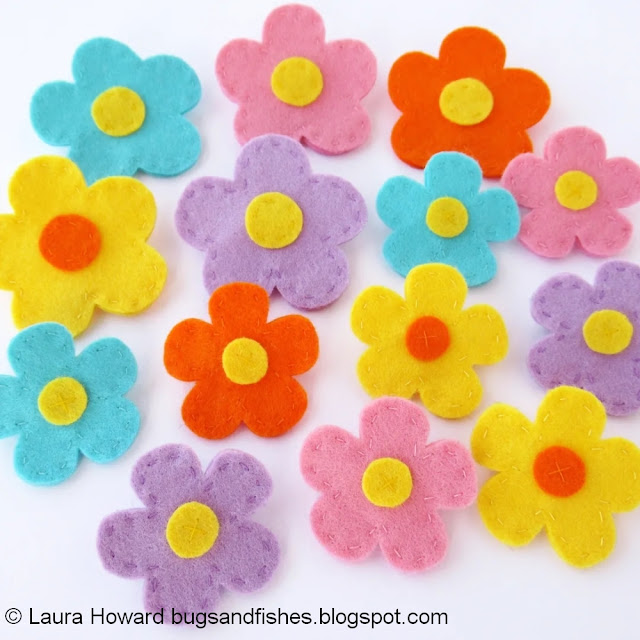
I've sewn my flowers in a pretty spring / early summer palette: orange, yellow, pale pink, lilac, and aqua blue. I've used yellow felt for the flower centres except for the yellow flowers which have orange centres.


I chose to use matching thread throughout - yellow thread to sew yellow felt, pink thread to sew pink felt, etc - so the thread almost disappears against the felt, but you could choose contrasting colours to add detail and make your stitching part of the design. Here's a batch of these flowers I made years ago, all sewn with yellow thread:

For more detail and variety, why not add a sequin, small button, or some seed beads to the flower centres? Or play around with embroidery thread and some simple stitches to add lines or simple patterns to the petals?

It would be really fun to make these flowers in colours to match a favourite outfit - maybe a trio of flowers, each picking out different colours from a dress you love? Or in shades that really pop against a favourite jumper?


For each flower, you will need:

- Felt in two colours

- Matching sewing thread

- A sewing needle, and a pin

- Sewing scissors (embroidery scissors are great for cutting out small shapes!)

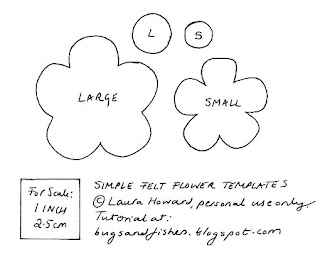
- The templates included at the bottom of this post

- A brooch clasp or a safety pin


To make a simple flower brooch:

1. Use the templates provided to cut out one flower centre, and two flower shapes. Hold or pin the paper templates to the felt as you cut out each shape.

If you're making a large flower, cut a large (L) centre circle. If you're making a small flower, cut a small (S) centre circle.


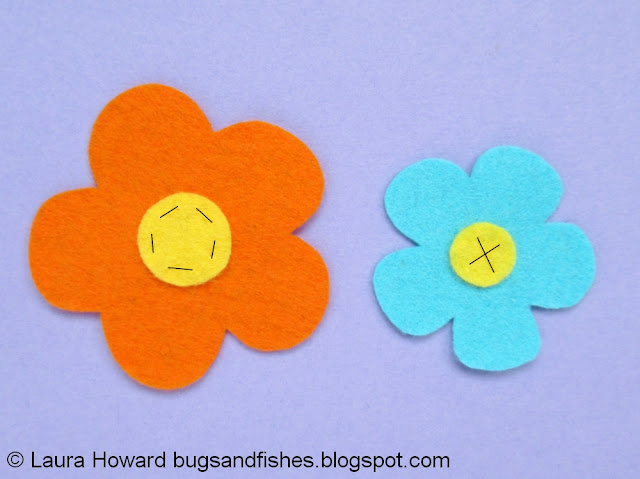
2. Position the centre circle in the middle of one of the flower pieces, and sew it in place with matching sewing thread. For the small flowers I stitched the circles in place with an X of two single stitches. For the larger flowers I used running stitch. 

I've marked this stitching on the photo with black to make things clearer as it's hard to see yellow stitching on yellow felt!


3. Now take the other flower shape and turn it over.

If you're adding a brooch clasp or hairclip, sew it in place with a double thickness of matching thread and lots of stitches to make things nice and secure.


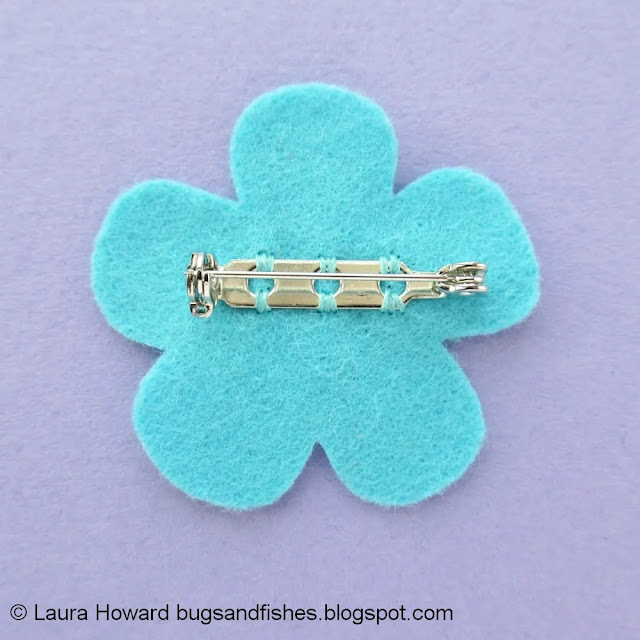
If you're using a safety pin, use matching thread to sew a small rectangle of felt over the fixed bar of the pin, holding it in place. I used running stitch for this, sewing two horizontal lines as close as possible to the pin then three vertical lines, as shown.


4. Finally, place the front and back flower pieces together and sew around the edge with running stitch and matching thread. Start your stitching inside the flower so your knot will be hidden between the felt layers, then finish your stitching as neatly as possible at the back.


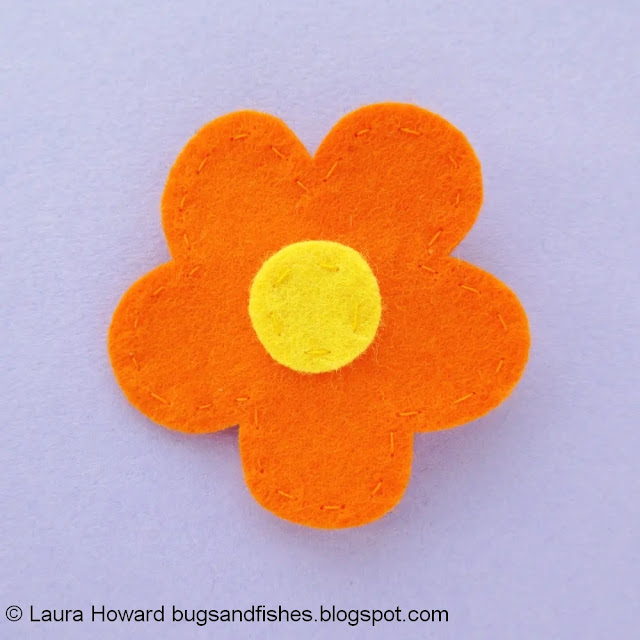
Then repeat these steps as many times as you like! :)

This tutorial is for personal (non-commercial) use only. You may borrow a couple of photos if you want to blog about this project, but remember to credit me and link back to this page on my blog, and do not reproduce my entire tutorial / share my templates on your site. Thanks!

Enjoyed this free tutorial? Buy me a "coffee" and help support my blog!

Buy Me a Coffee at ko-fi.com

P.S. Subscribe to my newsletter (currently taking a break but hopefully back v soon!) for free patterns and visit my crafty tutorial archive for lots more free projects.

Visit my shop to buy my printable PDF sewing patterns:

Click here to open the templates in a new window, then print them at 100%.

Tuesday, 3 March 2020

Daffodils Headband: Felt Spring Flowers Tutorial

Get crafty with felt flowers with today's free tutorial!


This colourful felt daffodil headband (or hairband, whatever word you prefer!) is fun and easy to make and would make a fab addition to a spring outfit.

The templates are from my felt daffodils wreath tutorial. Even if you don't fancy making the whole wreath, the felt flowers are perfect for using in different spring craft projects like this one.

https://bugsandfishes.blogspot.com/2019/03/march-felt-daffodils-spring-flowers-wreath-tutorial.html

Both of these tutorials originally appeared on The Village Haberdashery's blog - visit their shop for lots of crafty goodness!

To make this cute and colourful felt headband you will need:

* The template sheet from the daffodil wreath tutorial.
* Orange and yellow felt.
* Orange stranded embroidery thread (floss).
* A plastic headband / hairband / Alice band.
* Yellow sewing thread
* Sewing scissors
* Embroidery scissors (these are great for cutting out small or fiddly shapes!)
* Sewing needles and pins
* A glue gun and glue
* A heat-proof mat for the glue gun
* Newspaper to protect your workspace from any glue drips
* Optional: pinking shears 

To make the headband: 

1. Use the Narcissi templates from the daffodil wreath templates to cut out the following felt pieces: ten yellow petal pieces, five orange trumpet pieces and five orange circles.

When you cut each trumpet cut along three sides of the template with sewing scissors and along the remaining (long) side with pinking shears – just above the edge of the paper template. If you don’t have any pinking shears you could use embroidery scissors to cut a zigzagged edge, or just cut a straight edge.

2. Follow steps 3, 4 and 5 from the daffodil wreath tutorial to sew the trumpet and petals together.


3. Use a glue gun to stick the flower pieces to a plastic headband: first the petals, then the trumpets. Start with the central flower and work outwards, adding a small amount of glue to the felt pieces and pressing them in place very carefully.

IMPORTANT: take care when working with the glue gun as the glue gets very hot! Always place it on a heat-proof mat when not in use, and use newspaper or other scrap paper to protect your workspace. Work slowly, squeezing the gun with care to control the amount of glue you’re using and keeping your fingers out of the way of the hot glue.


Cute, huh? Now it's time to go take some daffodil selfies...

Enjoyed this free tutorial? Buy me a "coffee" and help support my blog!

Buy Me a Coffee at ko-fi.com

This tutorial is for non commercial use only: you can use it to make as many headbands as you want for yourself or as gifts, but please don't make any for sale. You may borrow a couple of photos if you want to blog about this project, but remember to credit me and link back to this page on my blog, and do not reproduce my entire tutorial / share my templates on your site. Thanks!

P.S. Subscribe to my newsletter for a monthly free pattern and visit my crafty tutorial archive for lots more free projects.

Visit my shop to buy my printable PDF sewing patterns:

Tuesday, 2 April 2019

A Year of Wreaths: April Felt Flowers Wreath Tutorial

UPDATE: this floral wreath tutorial is now available as a printable PDF pattern over on my Patreon.

Subscribe for a small monthly fee and you'll get access to a growing library of PDF patterns and tutorials, with an email whenever I add a new project. You can cancel any time.    

Click here to check out my Patreon page and sign up!

-------

This month’s wreath is all about bright and zingy spring colours! The layered felt flowers and embroidered green leaves really pop against a wreath base wrapped in neutral linen-blend fabric.

make a wreath decorated with felt flowers and leaves


You could easily adapt this design by adding more flowers and leaves, or by using different shades of wool blend felt to change the mood of the wreath. 

The individual felt flowers would also make great brooches or hairclips.


add the felt flowers to the wreath


Subscribe to my newsletter for a monthly(ish) free pattern and visit my crafty tutorial archive for lots more free projects.

Visit my shop to buy my printable PDF sewing patterns:


Tuesday, 12 March 2019

Daffodils and Narcissi: Spring Flower Embroidery Patterns

UPDATE: these patterns are now available in my Patreon pattern library.

Subscribe for a small monthly fee and you'll get access to a growing library of PDF patterns and tutorials, with an email whenever I add a new project. You can cancel any time.      

Click here to check out my Patreon page and sign up!

---

February's free project for my newsletter subscribers? A pair of little floral embroidery patterns!

Subscribe to my newsletter to receive these free spring flower embroidery patterns

These sweet, easy-to-stitch little flowers are designed to be framed in 4 inch embroidery hoops but they'd also be great for embellishing all kinds of spring projects.

There's a large, solo daffodil...

Subscribe to my newsletter to receive this free spring flower embroidery pattern
  Subscribe to my newsletter to receive this free spring flower embroidery pattern
 Subscribe to my newsletter to receive this free spring flower embroidery pattern

... and a trio of narcissi (or daffs, I guess, if you stitched them with yellow thread instead of white!)

 Subscribe to my newsletter to receive this free spring flower embroidery pattern
Subscribe to my newsletter to receive this free spring flower embroidery pattern
 Subscribe to my newsletter to receive this free spring flower embroidery pattern


Stitch your fave, or embroider them both as a pair! They'd make lovely gifts for Mother's Day or Easter.

 
Click here to visit my tutorial archive for lots of free patterns, including more embroidery patterns and lots of ideas for spring craft projects.

Thursday, 7 March 2019

Sew Felt Spring Flower Brooches With My Primroses Pattern!

Do you know what the absolute best part of my job is? It's seeing things people have made from my patterns!

This fabulous photo Daniela, aka ivyarch, shared of the brooches she's been making from my Primroses & Auriculas pattern has brought me such joy this week:

https://www.instagram.com/ivyarch/

I love the bright colours Daniela has chosen and I adore how the brooches look when worn together like that.

Want to sew your own version of these brooches? My Primroses and Auriculas pattern is available as a printable PDF from my Etsy shop as an instant download.

https://www.etsy.com/uk/listing/587158987/primroses-auriculas-pdf-pattern-felt

The tutorial includes templates and step by step instructions for sewing primroses and auriculas, floral trios and single flowers (with or without leaves), and lots of ideas for different colour combos.

As well as using it to make brooches (perfect for adorning your jackets and cardigans this spring) you could also use these patterns to make spring flowers for decorating anything you fancy. Hair clips! Floral crowns! Purses! Pincushions! Even cushions!

https://www.etsy.com/uk/listing/587158987/primroses-auriculas-pdf-pattern-felt

For even more spring flowers, check out my tutorial archive for loads of free floral projects and sign up to my pattern newsletter - the next free project I'll be sharing is two little daffodil / narcissi embroidery patterns! Here's a sneak peek of one of them...


... I'm just waiting for a delivery of 4 inch embroidery hoops so I can frame both designs and take some decent photos of them, then I'll be sending out the newsletter asap.

Tuesday, 5 March 2019

A Year of Wreaths: March Felt Daffodils Wreath Tutorial

UPDATE: my Spring Daffodils wreath tutorial is now available as a printable PDF pattern over on my Patreon.

Subscribe for a small monthly fee and you'll get access to a growing library of PDF patterns and tutorials, with an email whenever I add a new project. You can cancel any time.    

Click here to check out my Patreon page and sign up!

-------

This month’s wreath is all about joyful spring colour: fresh spring green yarn paired with bright felt daffodils and narcissi.

spring flowers wreath

Just like real daffofils, the felt version will add a vibrant pop of cheerful colour to wherever you hang this wreath!

As well as making a wreath decorated with felt flowers, you could adapt this tutorial to make floral brooches or headbands, or add stems to the flowers to create a felt bouquet.

felt daffodils and narcissi


Subscribe to my newsletter for a monthly(ish) free pattern and visit my crafty tutorial archive for lots more free projects.

Visit my shop to buy my printable PDF sewing patterns:

Monday, 9 April 2018

Kew Gardens in April: Magnificent Magnolias

Magnolias are one of those gloriously fleeting seasonal pleasures - they often seem to blossom overnight and fade just as quickly, but if you catch them when they're in full opulent bloom they can be breathtaking.


If you've not had your fill of magnolias already via Instagram (they're an Insta-cliche for a good reason!) I'd definitely recommend visiting Kew Gardens to see their collection.

There are so many magnolia trees dotted around the grounds you can spend ages studying the subtle differences between all the varieties, or just get lost among all that pink and white loveliness.


There are individual magnolia trees of varying ages dotted about the gardens, but the centrepiece of the collection is the large grove of magnolias where you'll find the biggest trees and some really breathtaking vistas. 


You'll also likely bump into lots of other magnolia-admirers along the way, all looking slightly dazed and filling up their camera rolls with tiny snippets of the beauty in front of them.

I took a ridiculous quantity of photos the day I visited - I didn't come remotely close to capturing how lovely it all was, but I'm glad I have these photos to help remind me of it!