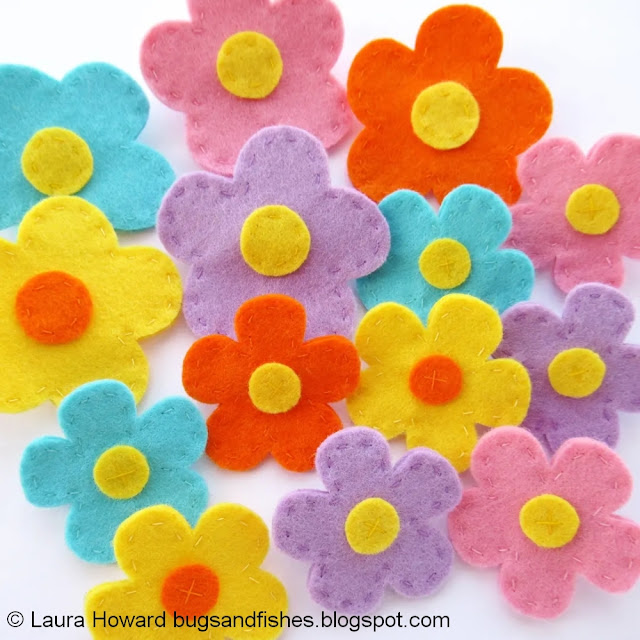
Today I'm sharing a super simple felt flower tutorial which is perfect for beginners, crafting as a family, or just for when you want a quick and easy make.
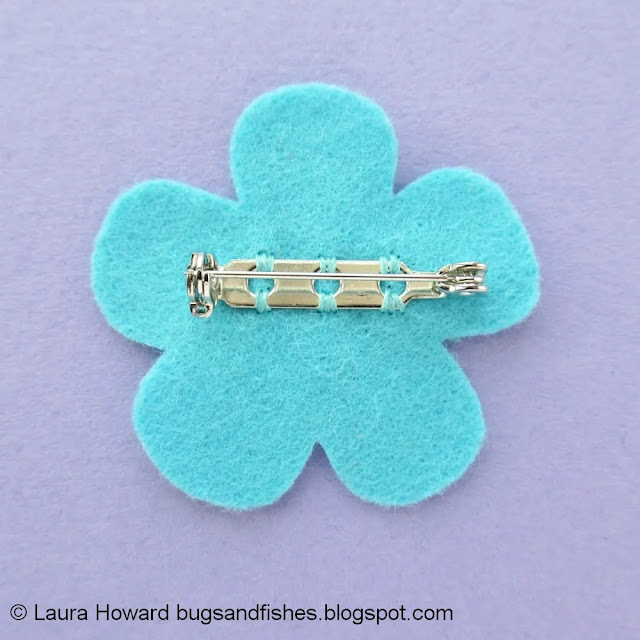
I've made my flowers into brooches, which always make lovely gifts, but they'd also be great for decorating a spring or summer wreath or for adding to lots of crafty projects.
You could also add a hairclip to the back instead of a brooch clasp, or sew each flower onto a piece of ribbon to make bookmarks - like these I made years ago:
You can make small flowers...
... or large flowers...
... or a selection of both sizes.
I've sewn my flowers in a pretty spring / early summer palette: orange, yellow, pale pink, lilac, and aqua blue. I've used yellow felt for the flower centres except for the yellow flowers which have orange centres.
I chose to use matching thread throughout - yellow thread to sew yellow felt, pink thread to sew pink felt, etc - so the thread almost disappears against the felt, but you could choose contrasting colours to add detail and make your stitching part of the design. Here's a batch of these flowers I made years ago, all sewn with yellow thread:
For more detail and variety, why not add a sequin, small button, or some seed beads to the flower centres? Or play around with embroidery thread and some simple stitches to add lines or simple patterns to the petals?
It would be really fun to make these flowers in colours to match a favourite outfit - maybe a trio of flowers, each picking out different colours from a dress you love? Or in shades that really pop against a favourite jumper?
For each flower, you will need:
- Felt in two colours
- Matching sewing thread
- A sewing needle, and a pin
- Sewing scissors (embroidery scissors are great for cutting out small shapes!)
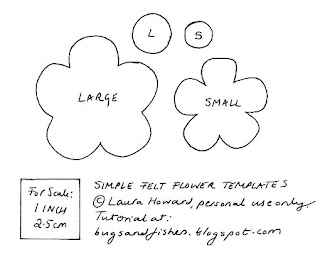
- The templates included at the bottom of this post
- A brooch clasp or a safety pin
1. Use the templates provided to cut out one flower centre, and two flower shapes. Hold or pin the paper templates to the felt as you cut out each shape.
If you're making a large flower, cut a large (L) centre circle. If you're making a small flower, cut a small (S) centre circle.
2. Position the centre circle in the middle of one of the flower pieces, and sew it in place with matching sewing thread. For the small flowers I stitched the circles in place with an X of two single stitches. For the larger flowers I used running stitch.
I've marked this stitching on the photo with black to make things clearer as it's hard to see yellow stitching on yellow felt!
3. Now take the other flower shape and turn it over.
If you're adding a brooch clasp or hairclip, sew it in place with a double thickness of matching thread and lots of stitches to make things nice and secure.
If you're using a safety pin, use matching thread to sew a small rectangle of felt over the fixed bar of the pin, holding it in place. I used running stitch for this, sewing two horizontal lines as close as possible to the pin then three vertical lines, as shown.
4. Finally, place the front and back flower pieces together and sew around the edge with running stitch and matching thread. Start your stitching inside the flower so your knot will be hidden between the felt layers, then finish your stitching as neatly as possible at the back.
Then repeat these steps as many times as you like! :)
Enjoyed this free tutorial? Buy me a "coffee" and help support my blog!

P.S. Subscribe to my newsletter (currently taking a break but hopefully back v soon!) for free patterns and visit my crafty tutorial archive for lots more free projects.
Visit my shop to buy my printable PDF sewing patterns:
Click here to open the templates in a new window, then print them at 100%.


0 comments:
Post a Comment