Showing posts with label rainbow. Show all posts

Monday, 4 January 2021

Free Rainbow Border Pattern for Embroidery Hoop Art

Happy Monday! 

Mondays are going to be extra special around here this year because I'm planning (HOPING) to have a new, free, crafty project to share with you guys at the start of every week. There'll be lots of free embroidery patterns, free felt sewing tutorials, and probably some other crafty projects too! I hope you guys will love making them...

First up: a free rainbow embroidery pattern!

This pattern is designed to be used as a joyful and colourful border for a bit of embroidery hoop art. 

I have some text planned for the centre of mine but you can add any text you fancy. A rainbow border would be particularly perfect for your favourite positive motto, or something with an LGBTQ+ theme. 

The basic idea of this pattern is that you stitch each line of the circular border in a different colour to build up your rainbow (Red, Orange, Yellow, Green, Blue, Purple, & Pink). As you can see, I used a mix of different stitches for my lines but you can choose any stitch you prefer.

I chose bright rainbow colours but you could use pastel shades for a softer look. You could also use this pattern to stitch an ombre border in different shades of one colour!

Don't have any text you fancy sewing? This pattern also makes a great stitch sampler! Using the central point marked on the pattern as a guide, divide your pattern into sections and embroider each area with different stitches! Or do what I did and just go freestyle, stitching as much of each stitch as you want to.

Printed at 100% this pattern fits nicely in a 7 inch embroidery hoop but you can of course resize it to fit different hoops if you'd like! 

This pattern is for non commercial use only: you can use it to stitch as many rainbow borders as you want for yourself or as gifts, but please don't use them to make items for sale. You may borrow a couple of photos if you want to blog about this project, but remember to credit me and link back to this page on my blog, and do not reproduce my entire  post or share my pattern on your site. Thanks!

Enjoyed this free pattern? Buy me a "coffee" and help support my blog!

Buy Me a Coffee at ko-fi.com

P.S. Subscribe to my newsletter for a monthly free pattern and visit my crafty tutorial archive for lots more free projects.

Visit my shop to buy my printable PDF sewing patterns:


Click here to open the pattern in a new window, make sure you're viewing it full size then print it at 100%. 

For an easier to print, high resolution version of this pattern subscribe to my new Patreon page!


Friday, 15 May 2020

Lockdown Crafting: 12 tutorials for these troubled times

I got a really wonderful email last week from someone who'd been browsing my blog, stumbled on my box of sunshine tutorial and made a whole bunch of them as gifts for her friends and family. Such a lovely thing to do!

http://bugsandfishes.blogspot.com/2015/04/how-to-make-box-of-sunshine.html

It feels particularly appropriate for this weird moment we're all in right now as rainbows have become such a powerful symbol of hope and care here in the UK. Sending a little rainbow box full of love to a friend or loved one you can't see in person seems to me to be a very powerful, wonderful thing.

Handmade gifts are wonderful things under ordinary circumstances, but at the moment they feel extra special. The power of a craft project to sooth and calm and distract and entertain also seems stronger and more important than ever while we're stuck at home amidst such stressful events.

So, here's a little round-up of projects from my blog that you guys might want to make right now. Click on the links or the photos to visit each tutorial. You'll also find lots more free crafty goodness in my tutorial archive and I share special freebies with my pattern newsletter subscribers, too.

Make a box of sunshine.

My box of sunshine tutorial includes templates and a step by step tutorial for making and assembling a rainbow box, and sewing a felt heart to go inside it. You could also use this box for gifting other things like a small brooch. This would be a great project to make with your kids, as there's lots of colouring involved and the sewing is very simple.

http://bugsandfishes.blogspot.com/2015/04/how-to-make-box-of-sunshine.html

Sew a felt rainbow.

I shared this felt rainbow tutorial just a few weeks ago as part of a tutorial for making a weather-themed baby mobile, but I think the rainbows are a lovely project on their own. You could make these as brooches or ornaments, or sew them as they are and pop them inside a card to send to a friend.

http://bugsandfishes.blogspot.com/2020/04/felt-rainbow-tutorial-weather-mobile.html

Stay home and stitch a cute house.

I find embroidery so relaxing and really enjoyed stitching my recent Stay Home pattern. Stay home, sew stuff, save lives.

https://bugsandfishes.blogspot.com/2020/04/stay-home-cute-house-embroidery-pattern.html

Or sew a felt house!
If embroidery's not your thing, why not sew a felt house instead? I think these would be a really sweet thing to send to a friend (from your house to theirs), or to commemorate our year of staying at home.

https://bugsandfishes.blogspot.com/2016/07/how-to-sew-cute-felt-houses.html

Embroider some self-care and positivity: be kind to yourself...

This is something I struggle with, especially when things get stressful! Stitch my Be Kind embroidery pattern for yourself, or send it to a friend who needs a reminder to look after themselves as well as other people.
http://bugsandfishes.blogspot.com/2014/09/be-kind-to-yourself-free-embroidery.html

 ... and remember that you're stronger than you know.

I bet you know someone who needs to hear this, too.

http://bugsandfishes.blogspot.com/2016/05/you-are-stronger-than-you-know-free.html

If you're spending a lot of time on Zoom lately, maybe you need some cute new brooches to accessorise with?

How about some plant lady brooches?

http://bugsandfishes.blogspot.com/2019/07/plant-lady-felt-monstera-leaf-brooch-tutorial.html

Or some fun cross stitch brooches?

http://bugsandfishes.blogspot.com/2014/06/how-to-cross-stitch-sampler-brooches.html

You could also make a headband!

Bring spring to FaceTime with felt flowers...

http://bugsandfishes.blogspot.com/2020/03/daffodils-headband-spring-flowers-craft-tutorial.html

... or go for more of a "I can't go to a party so I'm going to have one in my house" vibe.

http://bugsandfishes.blogspot.com/2019/05/diy-festival-hairbands-headbands-crowns-tutorial.html

Finally: sew a heart for someone you love.

There are lots of heart-themed projects in my tutorial archives for you to choose from but I think a heart brooch would be a particularly nice thing to make and send to a friend right now. They're small and easy to post, and your pal can pin them to their sweater or something in their house and think of you whenever they see it.

How about a mini cross stitch brooch?

http://bugsandfishes.blogspot.com/2012/02/how-to-cross-stitch-heart-brooch.html

Or a pretty layered heart, which I seem to have shared at a time when I was posting TINY photos on my blog. This sequinned heart would also make a cute brooch!

http://bugsandfishes.blogspot.com/2010/02/how-to-felt-heart-brooch.html


Enjoyed these free projects? Buy me a "coffee" and help support my blog!

Buy Me a Coffee at ko-fi.com

P.S. Subscribe to my newsletter for a monthly(ish) free pattern and visit my crafty tutorial archive for lots more free projects.

Visit my shop to buy my printable PDF sewing patterns:


Thursday, 23 April 2020

Felt Weather Mobile Tutorial: Assembling the Mobile

UPDATE: this project is now available as part of my Patreon pattern library.

Click here to find the Felt Weather Mobile Tutorial and to sign up to my Patreon. 

Subscribers get full access to a growing library of PDF patterns and tutorials, and emails whenever new projects are added. You can unsubscribe at any time. 

-------


P.S. Visit my crafty tutorial archive for lots of free projects.

Visit my shop to buy my printable PDF sewing patterns:

Thursday, 16 April 2020

Felt Weather Mobile Tutorial: Sew a Rainbow!

UPDATE: this project is now available as part of my Patreon pattern library.

Click here to find the Felt Weather Mobile Tutorial and to sign up to my Patreon. 

Subscribers get full access to a growing library of PDF patterns and tutorials, and emails whenever new projects are added. You can unsubscribe at any time. 

-------


The weather mobile would make a lovely gift for a new baby. Remember: as with all mobiles, this is a decoration not a toy so make sure you hang the finished project well out of reach of little fingers.

As well as using the tutorials to make the mobile, you can also make individual felt brooches or ornaments. The rainbow would also make a fab patch, or look lovely sewn onto projects like a coin purse or a needlebook.


P.S. Visit my crafty tutorial archive for lots of free projects.

Visit my shop to buy my printable PDF sewing patterns:

Tuesday, 10 March 2020

Lucky Pants! Fun Embroidery Pattern

Hello friends!

The latest project in my "oooh, I wonder if any of my old designs would make cute embroidery patterns?" series is this fun rainbow LUCKY PANTS embroidery pattern:


Years ago I used to make and sell silly little felt underpants badges (click here for the free tutorial to make your own!)...


... and I made a colourful bit of lucky pants themed textile art, too! I had that piece very much in mind when designing my lucky pants embroidery pattern.


You'll find the lucky pants embroidery pattern over on my Patreon.

Subscribe for a small monthly fee and you'll get access to a growing library of PDF patterns and tutorials, with an email whenever I add a new project. You can cancel any time.   

Click here to check out my Patreon page and sign up!


I stitched most of my lucky pants design with backstitch, using three strands from six-stranded embroidery thread (floss). It's possible that I only used two strands for the lettering but I have helpfully forgotten to write this down! (Oops). I also added a single French knot for the dot of the exclamation mark.

The pattern is designed so you can stitch the lines in six rainbow colours, but you could use different shades if you'd prefer. I stitched the lettering in black and the pants themselves with sparkly gold thread. Metallic embroidery thread can be a bit of a faff to stitch with but it's totally worth it, just take your time. For extra sparkle, why not add some sequins?


I stitched the design in a 5 inch embroidery hoop then framed it in a 4 inch hoop so the embroidery goes right up to the edge of the hoop. If you decide to do this, learn from my mistake and make sure you don't leave any knots right at the ends of the lines as they'll bulge against the wood of the hoop and make your finished piece look less neat.


Missed the earlier designs in this series?


Click here for the folk flowers embroidery pattern, and click here for the cute owl embroidery pattern.


P.S. Subscribe to my newsletter for a monthly free pattern and visit my crafty tutorial archive for lots of free projects.

Visit my shop to buy my printable PDF sewing patterns:


Tuesday, 1 January 2019

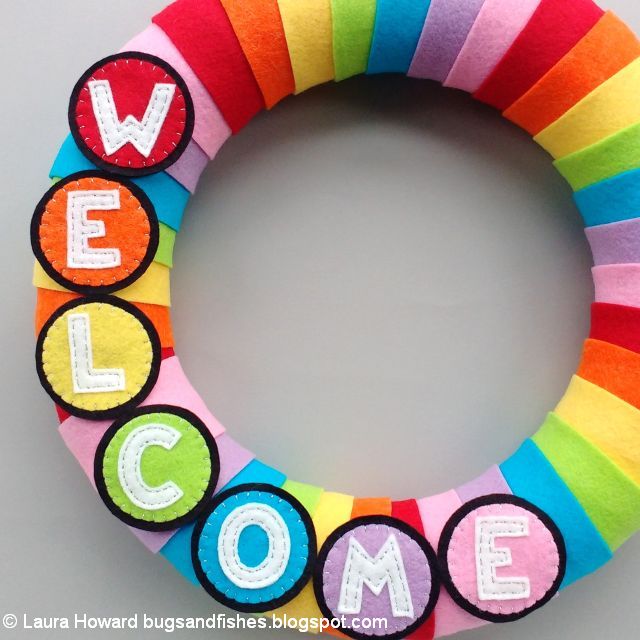
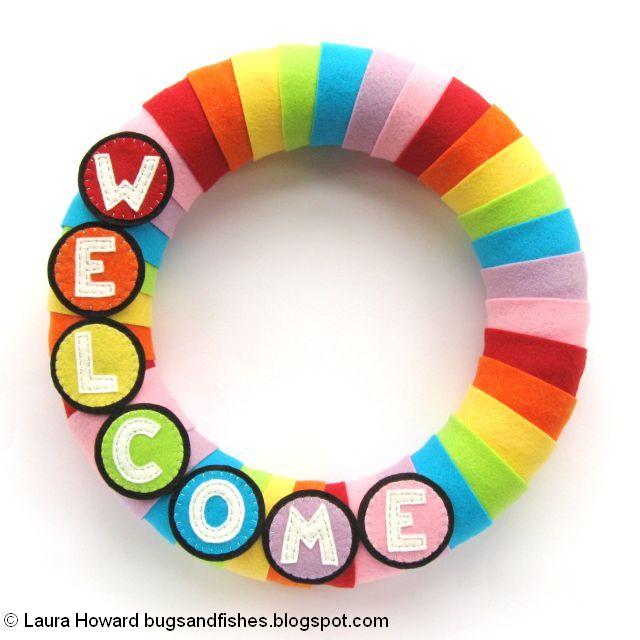
A Year of Wreaths: January Rainbow Wreath Tutorial

UPDATE: this colourful wreath tutorial is now available as a printable PDF pattern over on my Patreon.

Subscribe for a small monthly fee and you'll get access to a growing library of PDF patterns and tutorials, with an email whenever I add a new project. You can cancel any time.    

Click here to check out my Patreon page and sign up!

-------

Banish the January blues with this bright and cheerful rainbow felt wreath!

felt rainbow wreath

These happy colours are perfect for brightening up dull winter days and I’ve added a bit of sparkle too (yay!).

Want to welcome visitors but prefer a more muted colour palette? Just switch in your seven favourite shades in place of the rainbow colours. 

felt rainbow wreath

felt rainbow wreath


Subscribe to my newsletter for a monthly(ish) free pattern and visit my crafty tutorial archive for lots more free projects.

Visit my shop to buy my printable PDF sewing patterns:

Monday, 14 May 2018

The Evolution of a Rainbow Blanket

Blogging about my mini patchwork squares blanket last month made me realise that I never got round to properly photographing my rainbow blanket when I finished it a couple of years ago. I blogged about it being almost finished, and said I'd take photos of it finished "sometime soon" but, alas, never found the time and here we are two years later already.
 
I love my rainbow blanket, and really enjoyed making it so (as with the mini squares blanket last month) so I'm taking a look back at how it's developed over the years before having a "yay! finished blankets!" photo session.


In my teens I knitted a couple of blankets as gifts for my family, and also knitted a whole bunch of squares that never got used for anything. I rediscovered them in my 20s and began very slowly knitting more squares so I could finally turn them into a finished blanket. Or, rather, two blankets, because teen me (by accident? or by design??) had been knitting two different sizes of squares!

I finished the first blanket in 2013 (click to see pictures!), and in 2014 was busy knitting squares in assorted bright colours to add to the second blanket. All the squares were knitted in plain garter stitch, using double knit acrylic yarn and UK size 8 (4mm) knitting needle, casting on 30 stitches to make squares measuring approximately 14cm. 

At this point I had a whole bunch of dark grey squares in the mix (knitted with yarn left over from my sky blanket) and was thinking about putting the squares together in a block design similar to the one I was using for my mini squares blanket.
 

I wasn't totally happy with this layout, though, so I just focused on knitting squares from the yarn I already had and added in a few more colours I thought would blend in well.


In October that year I took out the darker squares and arranged the others in colour order and they just POPPED so the grey definitely had to go (I unravelled them and re-knitted them as mini squares for my patchwork blanket). 


By July 2015 I had 70 squares knitted, but the colour mix was looking a bit imbalanced.


I thought about just adding in some greens to balance out the "hot" reds and pinks, but decided to go for the full spectrum and cram in as many bright, happy colours as possible. So I bought a few more balls of yarn in zingy shades and continued slowly knitting more squares.
    

Frustratingly, when playing around with possible layouts for the blanket, I realised that a whole bunch of the squares were too big! (I guess I must have muddled up my knitting needles at some point?) I unravelled them all and started re-knitting them the correct size in the summer of 2015.


I spent the autumn of that year knitting a lot of blanket squares...


  ... and by November my stash of squares looked like this:


In December 2015 I finally sat down and planned the final layout. I'd been building up my rainbow spectrum stash without any real plan and was very pleasantly surprised by how easy it was to fit all the squares together; I just needed some more green!


I started stitching the outer sections of the blanket together...


... bought a final ball of bright green yarn, and began knitting green squares.
 

I finished knitting the very final square while watching Eurovision in May 2016 (I love Eurovision), then immediately started adding the remaining squares to the blanket.


I couldn't stop smiling while weaving the in the last few yarn ends; those colours just burst with happiness!


I wove in and trimmed the last of the yarn ends on May 25th 2016.


I've used the blanket a lot since then (I'm actually sitting on it right now as I type this) and it brings me joy on a daily basis. I hope I'll have a chance to take lots of snaps to capture that rainbow joy and properly show it off in another blog post sometime soon!

In the meantime... for more blanket-y goodness, follow the links to read about the making of my patchwork mini squares blanket, or my sky blanket.