Showing posts with label crafty tutorial. Show all posts

Thursday, 18 May 2023

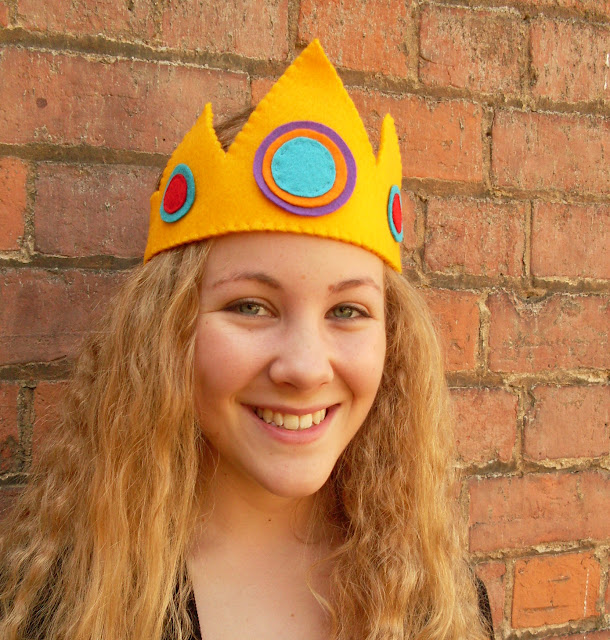
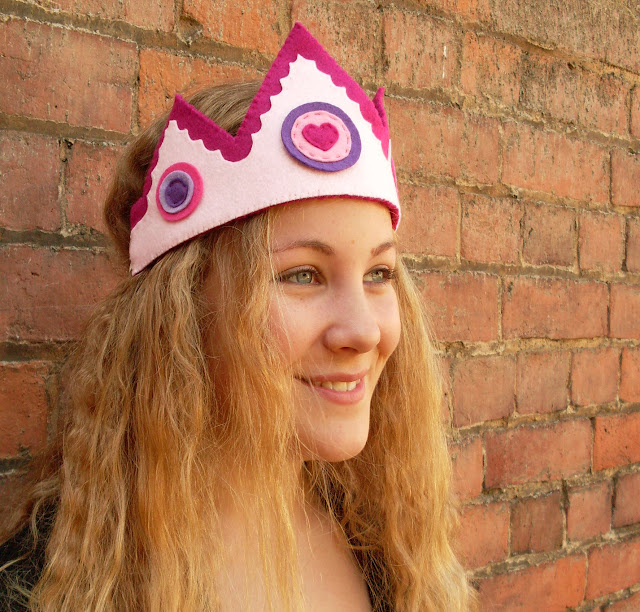
Easy Felt Crowns Sewing Tutorial

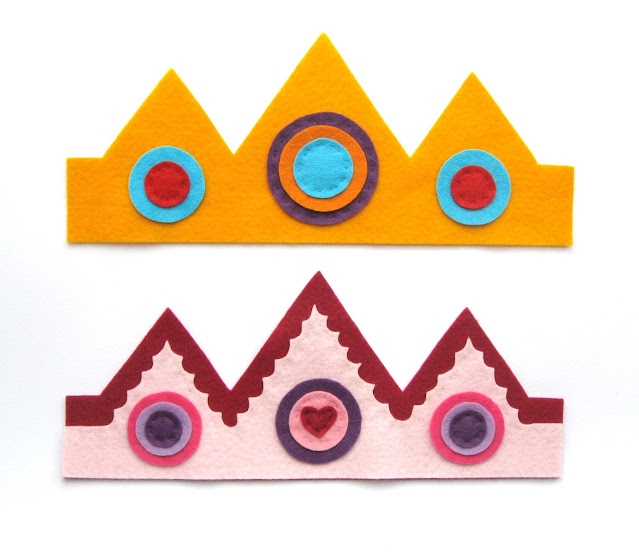
Today I'm sharing a whole flurry of Coronation-themed craft projects over on my Patreon: starting with a step by step tutorial for sewing two styles of simple felt crowns...

Easy Felt Crown Sewing Tutorial

Felt Princess Crown Sewing Tutorial

Most of the projects I'll be sharing today are things that would make nice or fun mementos of the Coronation (if you're a fan of the Royals or just enjoyed watching the big spectacle!)... but felt crowns are obviously for LIFE not just for Coronation celebrations!

These felt crowns are designs I used to sell in my Etsy shop many years ago. I shared the tutorial here on my blog at one point, but it's now exclusively available as a printable PDF pattern for my Patreon subscribers. 

Felt Crown Sewing Tutorials

The crowns are super easy to make, and are great for costume parties, Halloween, and all kinds of other fancy dress occasions. 

You can also easily customise them with different colours and decorative details - and I'll be sharing four ideas for that (on a Coronation-them, of course!) shortly. 

P.S. Yes I know the Coronation was a couple of weeks ago - I wish I'd had the time and energy to get all these projects sorted earlier, but I hope you'll enjoy them all anyway xxx

Click here to find the Felt Crowns tutorial over on my Patreon!

Click here to read more about my Patreon, get a preview of the many projects included in the pattern library, and to subscribe!

Monday, 11 January 2021

DIY Geometric Felt Cushion Tutorial

This week's free tutorial is based on a project I've had "in progress" (i.e. been neglecting) for years: a hand-sewn felt cushion with a geometric pattern. This felt like a perfect project to share during lockdown while we're all stuck and home and (judging from my Instagram feed) doing lots of home improvements!

This was such a lovely relaxing project to work on, and I'm so pleased with how it turned out.

It turned out to be a big hit with my dad, too. I took it round to his house (we're in a support bubble together so I'm allowed to visit at the moment) to take some photos of it and he wouldn't let me leave with it... it now lives on one of the grey sofas in what I think of as his den :)

(Can we talk about how tricky it is taking interior shots with no special lighting in the middle of a gloomy winter??!?! Such a headache! I really need to learn to prep my winter tutorials in the summer!)


Want to make your own hand-stitched geometric cushion?
 
This is a time-consuming project but not a difficult one. It would be perfect to work on while watching TV in the evenings this winter. You could use your favourite colours, or maybe make a random patchwork of colours using up felt scraps from your stash!

First you need to pick a tessellating shape. You can use the same chevron shape I did (you'll find the template at the bottom of this post) or draw your own shape. Remember the smaller your shape the more pieces you'll need to cut out and sew around so the more time your cushion will take to sew!

 
Work out how many shapes you'll need to fill the front of your cushion and plan your colours. I used some graph paper to plan my arrangement, then cut out the number of pieces I needed. 
 
Start building up your pattern, pinning then tacking some of your pieces in place on a piece of felt that's a bit larger than your finished cushion front will be (I used a large piece off-white felt because that's what I happened to have lying around, left-over from another project!). Use a ruler to help make sure your lines are nice and straight.


Begin sewing your felt shapes in place, using whip stitch and matching sewing thread. Don't sew around what will be the outside of your cushion - only sew the interior lines.

 
Gradually build up the design, sewing the pieces flush with each other. As you can see, I trimmed the pieces at the ends of each row to create a nicely squared off edge. 


You may find it helpful to use a ruler and an air-erasable marker pen to help you cut these edge pieces to be completely straight.


Here's how the front of my cushion looked when I'd added all the shapes:

 
As  you can see I still had a line of tacking stitches in place at the very top and bottom of the cushion to help keep the edges of those shapes in position. If you're using larger shapes than me you may also want to add some stitches to the sides as well, to help with the next step.


Now your cushion front is completed it's time to trim away the excess felt - do this carefully to avoid snipping any of your stitching!


For the back of the cushion you'll need a big bit of felt to coordinate with your chosen colours. Cut two large pieces approx two-thirds the size of your cushion, and pin them to the back ("wrong") side of the  of the cushion front so they overlap in the middle, like so:


Sew around the edge of the cushion with blanket stitch, sewing through all the layers. 
 
I used dark grey sewing thread to match the backing felt and co-ordinate nicely with the colours on the front. Remove the pins as you sew around the edge then remove any remaining tacking stitches.


Finally, add your cushion pad and sit back and admire your magnificent masterpiece!
 

This pattern is for non commercial use only: you can use it to stitch as many cushions as you want for yourself or as gifts, but please don't make any for sale. You may borrow a couple of photos if you want to blog about this project, but remember to credit me and link back to this page on my blog, and do not reproduce my entire post or share my template on your site. Thanks!

Enjoyed this free tutorial? Buy me a "coffee" and help support my blog!

Buy Me a Coffee at ko-fi.com

P.S. Subscribe to my newsletter for a monthly free pattern and visit my crafty tutorial archive for lots more free projects.

Visit my shop to buy my printable PDF sewing patterns:


Click here to open the template in a new window, make sure you're viewing it full size then print it at 100%.

Thursday, 16 April 2020

Felt Weather Mobile Tutorial: Sew a Rainbow!

UPDATE: this project is now available as part of my Patreon pattern library.

Click here to find the Felt Weather Mobile Tutorial and to sign up to my Patreon. 

Subscribers get full access to a growing library of PDF patterns and tutorials, and emails whenever new projects are added. You can unsubscribe at any time. 

-------


The weather mobile would make a lovely gift for a new baby. Remember: as with all mobiles, this is a decoration not a toy so make sure you hang the finished project well out of reach of little fingers.

As well as using the tutorials to make the mobile, you can also make individual felt brooches or ornaments. The rainbow would also make a fab patch, or look lovely sewn onto projects like a coin purse or a needlebook.


P.S. Visit my crafty tutorial archive for lots of free projects.

Visit my shop to buy my printable PDF sewing patterns:

Thursday, 13 June 2019

Felt Badger Brooch Tutorial

UPDATE: this tutorial is now available in my shop and in my Patreon pattern library.

Subscribe for a small monthly fee and you'll get access to a growing library of PDF patterns and tutorials, with an email whenever I add a new project. You can cancel any time.     

Click here to check out my Patreon page and sign up! 

---

This month's freebie for my newsletter subscribers will be a tutorial for sewing a cute felt badger brooch!

felt badger brooch tutorial
 felt badger brooch tutorial

I stitched lots of these badgers for my online shops a decade ago (how time flies, huh?!) and am really looking forward to revisiting this pattern to share it with you guys.

I've always loved badgers but have had a particular fondness for them in recent years after getting to see lots in real life, visiting my parents' garden for some peanut snacks. 

felt badger brooch tutorial


Click here to visit my tutorial archive for lots of free patterns and project ideas.

Saturday, 31 May 2014

Make All The Things! Felt Cushion / Pillow Tutorial

Last weekend my To Do list read "MAKE ALL THE THINGS!!!"

I took this a bit literally, and decided to decorate a cushion with this exact phrase ... to help me remember to make more time for being creative, to not let admin take over my schedule, to do more making and less faffing about worrying about what project I should start next... and, well, just generally to encourage myself to make all the things.

Here's the finished cushion...


... I love it! Honestly this cushion makes me smile every time I see it, it's an awesome addition to my studio. 


To make your own, you will need....

- A plain cushion (pillow) cover.  I used a canvas cushion cover bought at H&M (affordable and available in lots of different colours, hurrah!) that measures 40 x 40 cm (16 x 16 inches).

If you want to you can, of course, make the cushion cover from scratch. There are plenty of cushion-making tutorials available online or in sewing books :)

- Felt in a constrasting colour to your cushion (you'll need two or three sheets/squares of felt)
- Sewing thread to match the felt, and a contrasting shade for tacking
- A needle and pins
- Sewing scissors (I used embroidery scissors, which are great for cutting out felt shapes)
- The templates provided at the bottom of this post. If your cushion is larger or smaller than mine just enlarge or shrink the templates as needed.


To decorate the cushion...

1. Use the templates provided to cut out the felt letters. 


2. Arrange the letters on the front of the cushion cover (or the fabric you'll be using to make your cushion) and carefully pin them in place. Note how I've left space around the edge of the letters, to allow for the 3D shape of the cushion.

Take care not to pin the front and back of the cushion cover together when pinning on your letters!


3. Use a contrasting shade of thread and large stitches to tack the felt letters in place, removing the pins as you sew. The tacking stitches will hold the letters in place and make the cushion much easier to handle (no getting pricked by pins when sewing!). Make sure you don't sew through both layers of the cushion.


4. Use matching thread and whip stitch to sew the felt letters to the cushion cover. This is nice and easy if you're sewing onto fabric-to-be-turned-into-a-cushion but sewing on the front of an already-sewn-together cushion can be a bit fiddly so take your time... and, again, make sure you're sewing through just the front layer of the cushion!


5. If you're making your own cushion, now's the time to take your appliqued fabric and follow the cushion-making instructions. If you've used a ready-made cover like me, all you need to do now is add the cushion insert and ta da...


... one slightly bossy cushion to put on your sofa to remind you to make stuff! :)


Click on each template sheet to view it in another tab or window. Make sure you're viewing the image at full size, then print it at 100%.


This tutorial is for non commercial use only: you can use it to make as many crafty cushions as you want for yourself and as gifts, but please don't make any for sale. You may borrow a couple of photos if you want to blog about this project, but remember to credit me and link back to this page on my blog, and do not reproduce my entire tutorial / share my templates on your site. Thanks!

Enjoyed this free tutorial? Buy me a "coffee" and help support my blog!

Buy Me a Coffee at ko-fi.com

Subscribe to my newsletter for a monthly free pattern and visit my crafty tutorial archive for lots more free projects.

Visit my shop to buy my printable PDF sewing patterns:

Friday, 18 April 2014

Guest Post: Embroidered Felt Cat Hoop Tutorial

Today I'm sharing a cute sewing tutorial from Rebecca, who blogs at Hugs are Fun.

---


To make this embroidered felt cat hoop you'll need -

Wool felt - I used mustard yellow and tan for the cat, but feel free to customize to match your own furry friend!
Matching embroidery floss (thread)
6" wooden embroidery hoop
Background fabric


Print out the template and cut out all the pieces. Stitch each piece in place with a whip stitch around the edge, using three strands of embroidery floss.


Using a backstitch, stitch whiskers and a mouth.


Tighten the fabric onto the hoop and position your cat onto the fabric. I found it easier to pin the cat so it didn't shift, but it's not absolutely necessary.


Trim away the excess fabric, trimming the fabric as close to the edge of the hoop as possible. You can cut a circle of felt to glue to the hoop, but this also isn't absolutely necessary. Add a ribbon for hanging or just hang the hoop directly on the wall.

Click here to view the template sheet full size and print at 100%.   


---

Rebecca blogs at www.hugsarefun.com about her cross stitching and other craft exploits. She is the mom of two young girls and has a background in illustration and design. 

---

Want more free tutorials? Subscribe to my newsletter for a monthly free pattern and visit my crafty tutorial archive for lots more free projects.

Visit my shop to buy my printable PDF sewing patterns: