Time for another crafty guest post! Today's post is a great tutorial for sewing your own pillowcases, from Susie of Flower Press.
Susie is based in Sydney, Australia where she her sells her original screenprinted textiles through her business Flower Press. These include tea towels, cushion covers and yardage. She loves textiles, vintage, colour, art, printing, gardening, books and crafting. Lately she's been seeing patterns in her sleep and she's hoping to turn some of these into actual fabric soon!
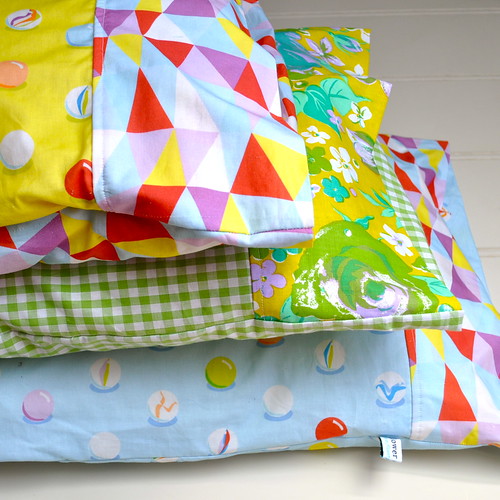
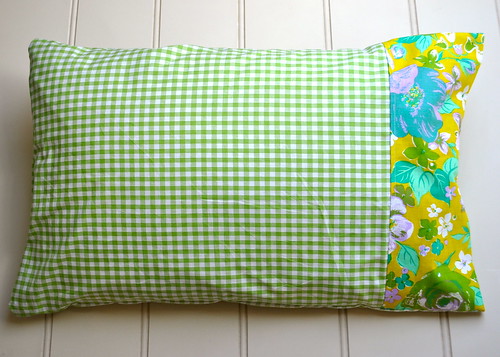
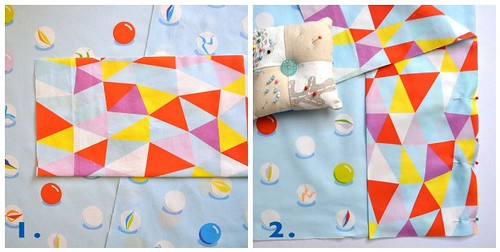
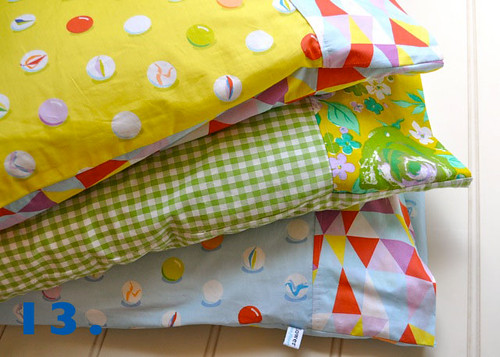
I'm a big fan of all textiles so I love bed linen and I love to mix and match my prints and patterns. I find pillowcases are a great way to change a look. They are also a wonderfully simple sewing project - simple and a bit addictive. And its a great way to use and admire your stash! I whipped up the gingham case this morning with its vintage sheet trim to test my tutorial, the other cases are made from my
Marbles and Triangle Twist fabrics.
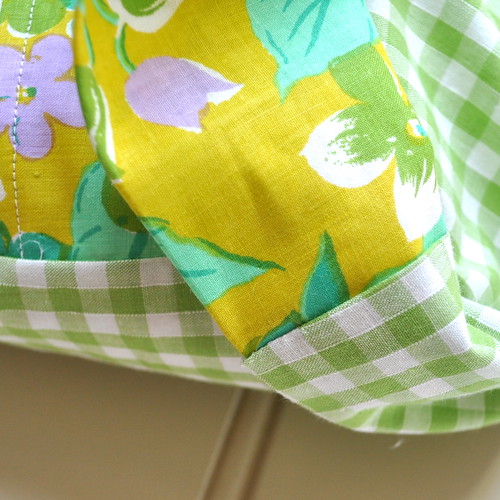
When I looked for a tutorial I couldn't find one that had the features I wanted and that was for local sizes, so I've made my own. I hope you find it useful. This pattern has a double thickness cuff, which you can sew in a contrasting print like I have here, and an internal flap to keep the pillow inside hidden. Also a bit of trickiness at the end hides all the seams at the opening and gives a lovely neat finish (photo above).
Pillowcase Tutorial
Fabric
All measurements are in inches as I used my quilting ruler and rotary cutter to cut the pattern pieces. All seams are 1/2 inch unless otherwise stated.
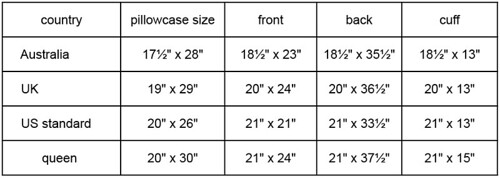
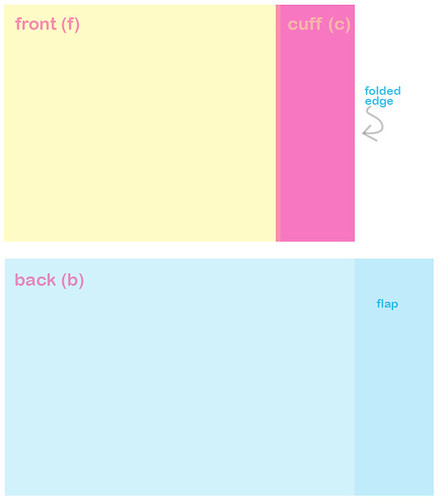
You will need three pattern pieces, Front, Back and Cuff. Measurements below. Keep in mind the final positioning before cutting if your fabrics are directional, like some of mine. I've used measurements for standard Australian pillows (finished size ends up as 28 x 17
1⁄
2) but I've done some research on the standard sizes in the US and UK too, so you can adapt the tutorial to where you live. However, best to check your own pillowcases before you start to see if these are relevant. Its not too hard to adapt if not.
Method
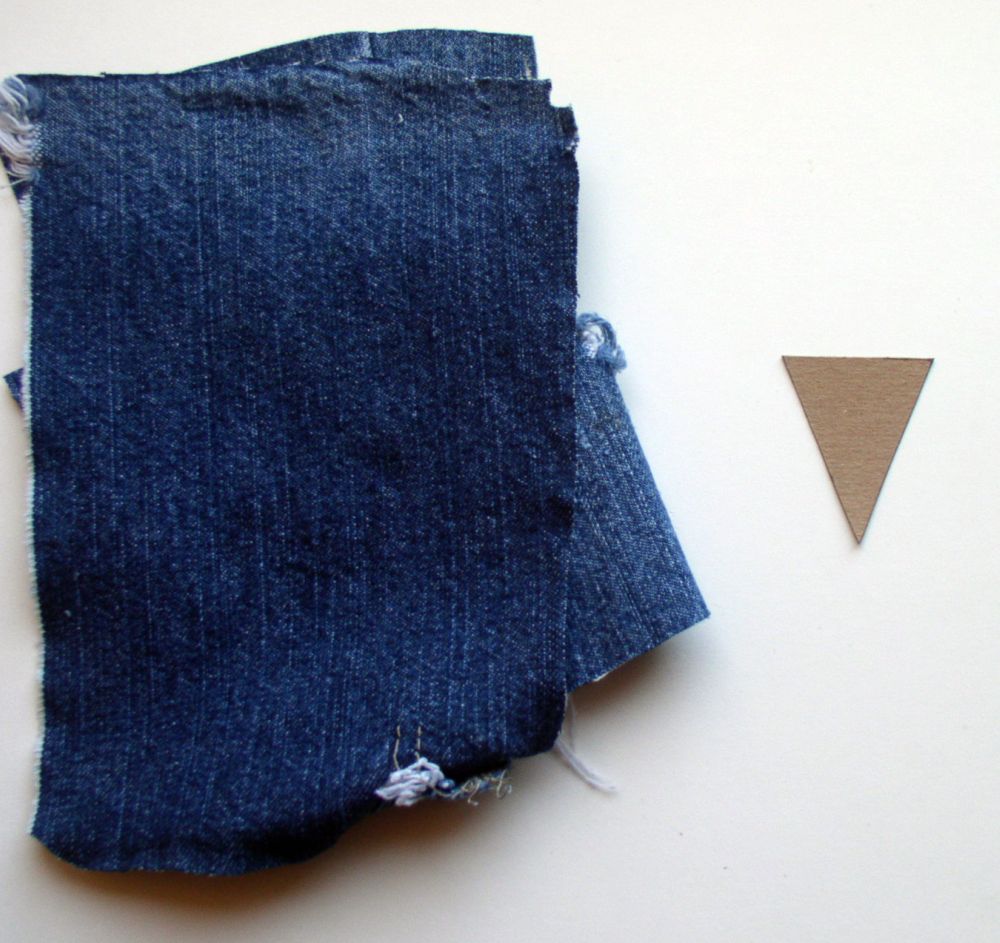
1. Cut three pattern pieces - Front, Back and Cuff.
Fold Cuff fabric in half lengthwise, right sides out and press.
2. Lay Front piece of fabric right side up (directional print in final position). Place Cuff fabric with fold on the left on top of the Front piece with right (cut) sides aligned. Pin.
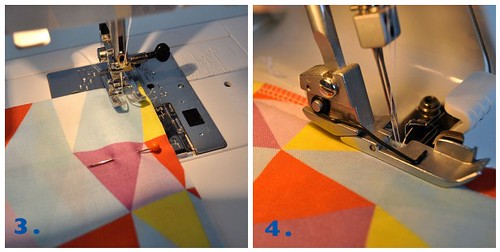
3. Sew along seam.
4. If you have an overlocker, overlock or serge the seam. Alternatively zig zag along the raw edge.
5. Open out cuff and press flat. Press seam towards Cuff side.
6. Overstitch along cuff fabric (I use my 1/4 inch foot against the fold to get a neat straight seam.
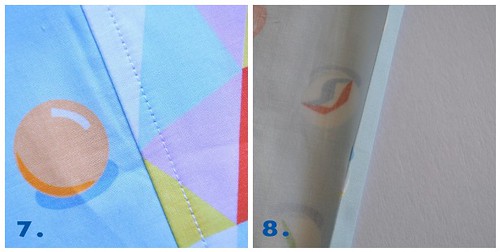
7. The finished overstitching gives a neat look.
8. Take the back piece and press over a 1/2 inch seam, then turn and press again. Sew. This is the flap hem.
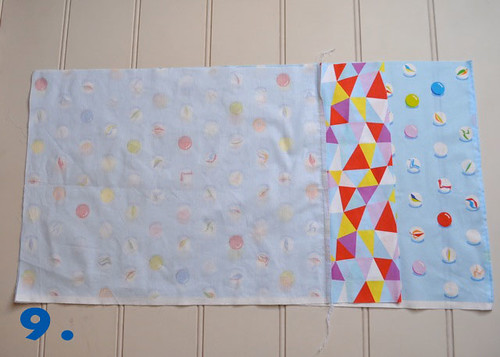
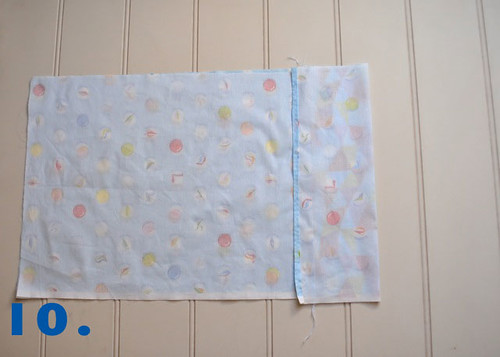
9. Take the back piece and lay it down, right side up with the flap hem you've just sewn on the far right. Lay the front, right side down on top of it, left edges aligned and with the cuff fabric on the right.
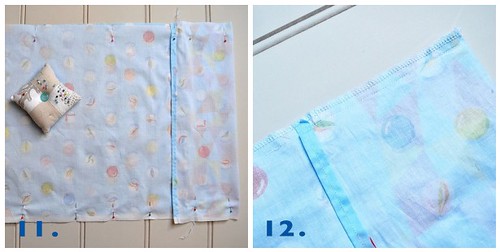
10. Fold the extra length of the Back piece over the Front piece to form the flap. This is the trickiness which hides this seam in the final pillowcase. Try and make sure it is square and fold hard against the cuff underneath.
11. Pin the seams on the bottom, left and top.
12. Sew around side and bottom edges with 1/2 inch seam and then overlock or zigzag around the raw seam to finish.
13. Turn the pillowcase out the right way and voila, all done!
I hope this tutorial inspires you to make some pillowcases! They would be a great way to add some spring freshness to the house. I bought the gingham for about $3 a metre on special, the vintage is a swap so it doesn't need to be expensive.
---
You can buy Susie's designs (including that cute marble print fabric) from her
Etsy shop, or read more about her and her work
over on her blog.
Subscribe to my newsletter for a monthly free pattern and visit my crafty tutorial archive for lots more free projects.
Visit my shop to buy my printable PDF sewing patterns:


 In other news... you can now "look inside" my book, Super-Cute Felt, over on Amazon UK. I love using this feature when buying craft books online as it enables you to get a much better idea of the mix of projects in a book before you buy it.