Sunday 25 August 2019

Faux Leather Crafts: Mini Covered Notebook Tutorial

Make a mini notebook with a vegan leather cover to keep it protected in your bag or pocket!

vegan leather mini notebook tutorial

These little notebooks are simple to make, and you can easily remove and reuse the leather cover once the notebook is full.

This tutorial is the last in the series of synthetic leather crafting ideas I've been sharing this week. It originally appeared on the Village Haberdashery's blog and was created using synthetic leather and other craft supplies from their shop. (Here are the other tutorials I've shared this week: a lightning bolt brooch, a geometric necklace & a star headband). 

You will need:

- The notebook and notebook cover templates (follow the links to view and download the PDF template sheets).
- Some synthetic leather
- Coloured card
- Plain or scrap paper
- Sewing thread to match the card
- 90 cm yarn in a co-ordinating or contrasting colour (or embroidery thread or narrow ribbon)
- A standard sewing needle and a large, sharp sewing needle for the yarn
- Sewing scissors
- Scissors for cutting paper and card
- A ruler
- An air-erasable fabric marker pen or an ordinary felt tip pen

To make the notebook: 

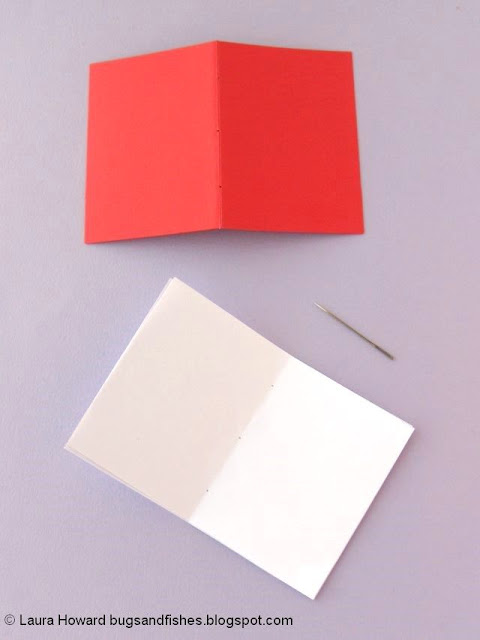
Use the card cover template to cut a piece of blank card, then fold it in half. Then use the page template to cut eight pages from plain or scrap paper and fold these in half as well.

Use a large, sharp needle to poke three holes in the fold of the card, measuring their position with a ruler. Make one hole right in the centre of the fold then one above and one below it, each 3cm from the central hole. Then poke holes in the pieces of paper (two sheets at a time) in the same positions as on the cover.

vegan leather mini notebook tutorial: cut out the pages

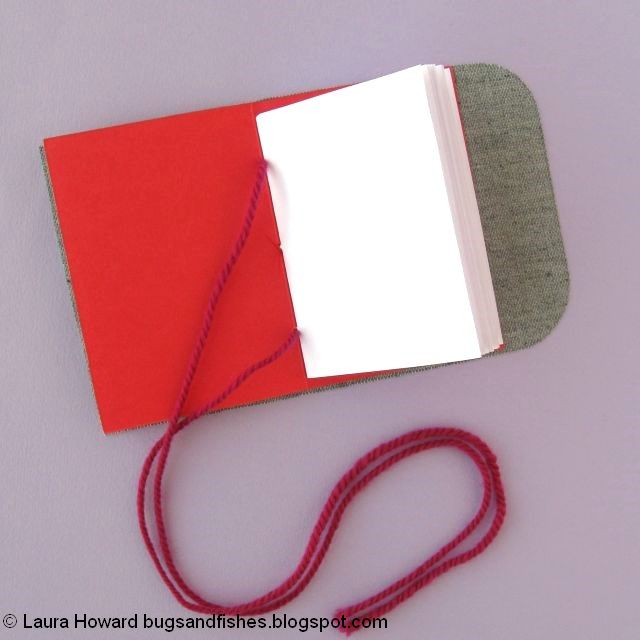
Line up the pages and the card cover, and sew them together using a double thickness of sewing thread to match the card. I started in the central hole of the card cover, leaving a length of spare thread hanging loose then returned to the centre after stitching the pages and card together, knotting the two ends of thread together securely then trimming away the excess.

vegan leather mini notebook tutorial: assemble the notebook

Use the leather cover template to cut out a piece of the synthetic leather. Place the paper template on the back of the leather, trace around it with an air-erasable fabric marker pen or a felt tip then cut out the shape with sewing scissors.

Wrap the cover around the notebook until you’re happy with it, then unfold it and open the notebook to the first page. Use the holes in the card as a guide to pierce three matching holes through the leather.

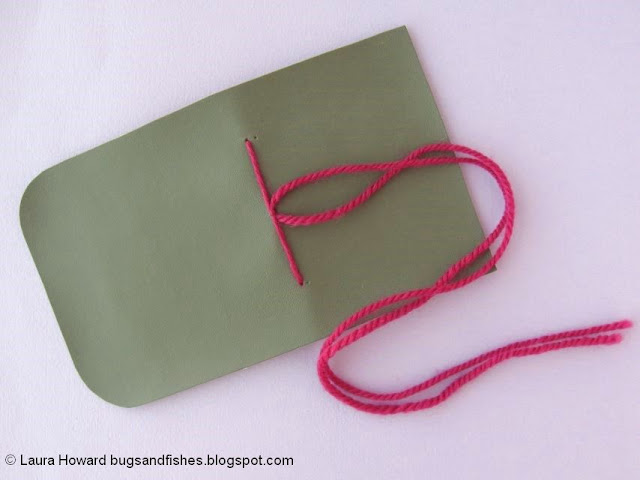
Cut a 90 cm piece of yarn (or embroidery thread or narrow ribbon). Use the large needle to thread the yarn through the two outer holes as shown, threading it through the leather and the card of the notebook. Pull the yarn through the holes so there is an even length of yarn at each side.

vegan leather mini notebook tutorial: attach the notebook to the cover

Thread both ends through the central hole, pulling the yarn tight. Knot the yarn to secure the notebook and leather cover together.

vegan leather mini notebook tutorial: knot the yarn

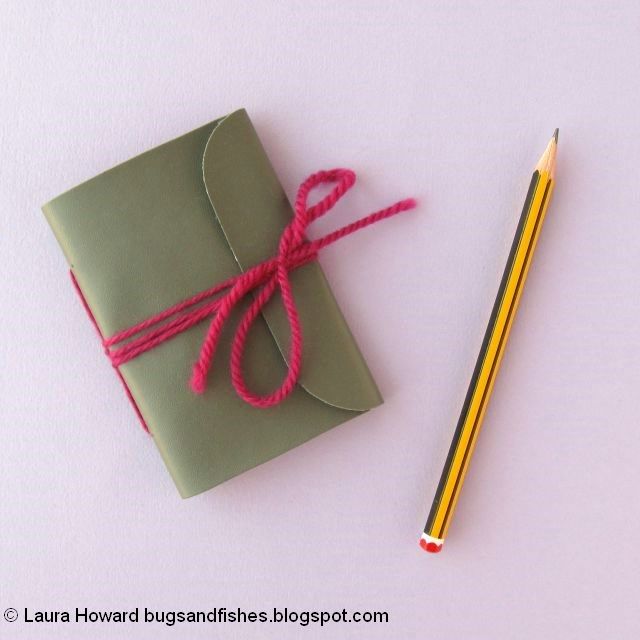
Close the notebook and leather cover as shown, wrapping the yarn around it and tying a bow to secure it.

vegan leather mini notebook tutorial: the front of the notebook
vegan leather mini notebook tutorial: the back of the notebook


This tutorial is for non commercial use only: you can use it to make as many notebooks as you want for yourself or as gifts, but please don't make any for sale. You may borrow a couple of photos if you want to blog about this project, but remember to credit me and link back to this page on my blog, and do not reproduce my entire tutorial / share my templates on your site. Thanks!

Enjoyed this free tutorial? Buy me a "coffee" and help support my blog!

Buy Me a Coffee at ko-fi.com

P.S. Subscribe to my newsletter for a monthly free pattern and visit my crafty tutorial archive for lots more free projects.

Visit my shop to buy my printable PDF sewing patterns:


Friday 23 August 2019

Faux Leather Crafts: Geometric Necklace Tutorial

The third tutorial in my mini "crafting with vegan leather is awesome" series is... a geometric necklace!

geometric vegan leather necklace tutorial

Use a chain from an old necklace, or a length of ribbon, to make a bold geometric necklace. Use the templates provided or get creative and draw your own design! You could also make this necklace from felt instead of faux leather.

This tutorial originally appeared on the Village Haberdashery's blog and was created using synthetic leather and other craft supplies from their shop.

geometric vegan leather necklace tutorial

You will need:

- The necklace templates (follow the link to view and download the PDF template sheet)
- Some synthetic leather
- Matching felt and sewing thread
- A necklace chain or length of ribbon
- A sewing needle
- Sewing scissors
- An air-erasable fabric marker pen or an ordinary felt tip pen

To make the necklace:

Use the templates provided to cut out pieces A to F from the synthetic leather. Place the paper templates on the back of the leather, trace around them using an air-erasable fabric marker or a felt tip pen then cut out the shape using sewing scissors.

geometric vegan leather necklace tutorial: cut out the pieces

Sew the pieces together using whip stitch and matching sewing thread (I used blue thread throughout). Start with the smallest pieces, sewing piece A to piece B then piece B to piece C and so on, so you’re only stitching through two layers of the leather at a time.

geometric vegan leather necklace tutorial: sew the pieces together

Once you’ve sewn all the pieces together, use the leather shape as a template to cut out a matching piece of felt for the back of the necklace.

geometric vegan leather necklace tutorial: cut a felt backing piece

Place the felt and leather together then use sewing thread (in the same colour as before) to sew along the top edge, joining the layers together. Place the middle of your necklace chain (or ribbon) between the two layers, so it will be held in place when you sew around the rest of the necklace shape. Make sure there are even lengths of chain (or ribbon) sticking out from each side of the necklace.

geometric vegan leather necklace tutorial: add the chain

Blanket stitch around the rest of the necklace – making sure you don’t let the chain or ribbon slip out as you sew.

P.S. here are the other tutorials in this series: a faux leather star headband tutorial, a faux leather lightning bolt necklace tutorial, and a tutorial for making a mini notebook with a reusable faux leather cover.


This tutorial is for non commercial use only: you can use it to make as many necklaces as you want for yourself or as gifts, but please don't make any for sale. You may borrow a couple of photos if you want to blog about this project, but remember to credit me and link back to this page on my blog, and do not reproduce my entire tutorial / share my templates on your site. Thanks!

Enjoyed this free tutorial? Buy me a "coffee" and help support my blog!

Buy Me a Coffee at ko-fi.com

P.S. Subscribe to my newsletter for a monthly free pattern and visit my crafty tutorial archive for lots more free projects.

Visit my shop to buy my printable PDF sewing patterns:

Wednesday 21 August 2019

Faux Leather Crafts: Star Headband Tutorial

Today's vegan leather craft project? Making a star headband from gorgeous metallic leather!

vegan leather star headband tutorial
 
Add lots of stars to make a super star crown, or just add a couple of stars for a bit of subtle glamour. I think this headband would also be fab made from glitter felt.

This tutorial originally appeared on the Village Haberdashery's blog and was created using synthetic leather and other craft supplies from their shop.

vegan leather star headband tutorial

You will need:

- The star templates (follow the link to view and download the PDF)
- Some synthetic leather
- Coordinating felt (I used black to match the headband) 
- A plastic headband
- Craft glue
- Sewing scissors
- An air-erasable fabric marker pen or an ordinary felt tip pen
- A glue gun and glue
- A heatproof mat for the glue gun
- Newspaper or scrap paper to protect your workspace

To make the headband: 

Use the templates provided to cut out as many stars as you want – I cut one large star and four small stars. Trace the star shapes onto the back of the leather using a pen then cut them out with sewing scissors.

vegan leather star headband tutorial: cutting out the stars

Cut pieces of felt slightly bigger than each star. Turn the stars over and place them on some newspaper or scrap paper. One by one, cover the back of each star with a layer of craft glue and then firmly press a piece of felt on top covering the star completely. Turn the felt and attached stars over and set them aside to dry.

vegan leather star headband tutorial: add the felt backing

Once the glue has completely dried cut away the excess felt, leaving stars which are leather on one side and felt on the other.

vegan leather star headband tutorial: glue the stars together

Use a glue gun to stick the stars to a headband. Add a line of glue down the centre of one of the stars, on the felt side. Carefully press the star into position on the headband, holding it in place until the glue has dried enough to stick it firmly. Repeat to add the rest of the stars

IMPORTANT: take care when working with the glue gun as the glue gets very hot! Always place it on a heat-proof mat when not in use, and use newspaper or other scrap paper to protect your workspace. Work slowly, squeezing the gun with care to control the amount of glue you’re using and keeping your fingers out of the way of the hot glue.

vegan leather star headband tutorial

Want to make more fun things from faux leather? Try my tutorials for making a lightning bolt brooch, a mini covered notebook, and a geometric necklace.


This tutorial is for non commercial use only: you can use it to make as many headbands as you want for yourself or as gifts, but please don't make any for sale. You may borrow a couple of photos if you want to blog about this project, but remember to credit me and link back to this page on my blog, and do not reproduce my entire tutorial / share my templates on your site. Thanks!

Enjoyed this free tutorial? Buy me a "coffee" and help support my blog!

Buy Me a Coffee at ko-fi.com

P.S. Subscribe to my newsletter for a monthly free pattern and visit my crafty tutorial archive for lots more free projects.

Visit my shop to buy my printable PDF sewing patterns:

Monday 19 August 2019

Faux Leather Crafts: Lightning Bolt Brooch Tutorial

This week I'm sharing four tutorials for making stuff using synthetic (vegan) leather.

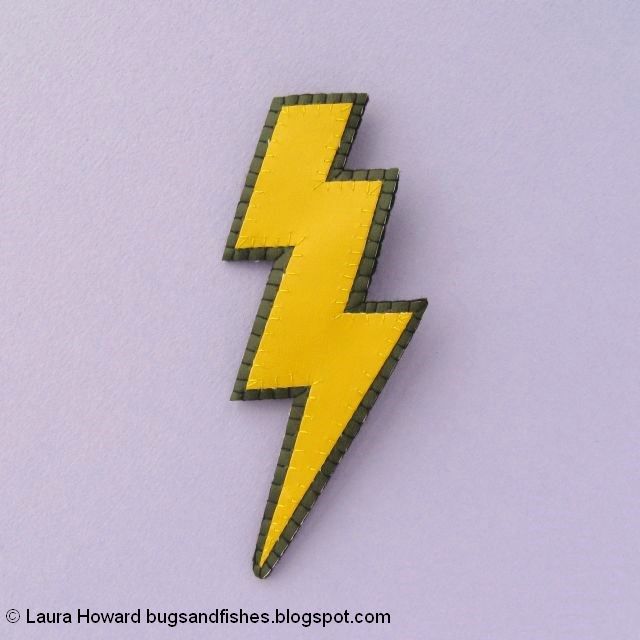
First up, sewing a bold lightning bolt brooch:

vegan leather lightning bolt brooch tutorial

This brooch would look particularly fab pinned to a black coat or sweater, and would make a fun gift for a Harry Potter fan.

Synthetic leather looks great and is really easy to cut and sew... but if you don't have any faux leather, don't worry! You can use felt for making this lightning bolt brooch instead! The template sheet also includes star templates which you could use to make star brooches (these would look awesome cut from metallic faux leather or glitter felt).

This tutorial originally appeared on the Village Haberdashery's blog and was created using synthetic leather and other craft supplies from their shop.

vegan leather lightning bolt brooch tutorial

You will need:

- The lightning bolt template (follow the link to view and download the PDF)
- Some synthetic leather
- Coordinating felt
- Matching sewing threads
- A brooch clasp
- A sewing needle
- Sewing scissors
- An air-erasable fabric marker pen or an ordinary felt tip pen

To make a lightning bolt brooch:

Use the template provided to cut out the bolt shape from yellow or metallic leather. Turn the template over and place it on the back of the leather, draw around it with a pen then cut it out with sewing scissors. Then place the bolt on a backing piece of contrasting leather.

vegan leather lightning bolt brooch tutorial: cut out the lightning bolt

Use whip stitch and matching sewing thread to sew the bolt to the backing leather.

vegan leather lightning bolt brooch tutorial: sew the pieces together

Cut out the bolt, leaving a border framing the shape.

vegan leather lightning bolt brooch tutorial: cut out the brooch shape

Use the shape you’ve just cut out as a template to cut a matching piece of felt. Turn the felt shape over and add a brooch clasp. Sew the clasp in place securely with a double thickness of matching sewing thread.

 vegan leather lightning bolt brooch tutorial: add the brooch clasp

Place the front and back of the brooch together and sew the edges together with blanket stitch and matching sewing thread.

UPDATE: for more faux leather goodness, why not make a star headband, a geometric necklace, or a mini covered notebook.


This tutorial is for non commercial use only: you can use it to make as many brooches as you want for yourself or as gifts, but please don't make any for sale. You may borrow a couple of photos if you want to blog about this project, but remember to credit me and link back to this page on my blog, and do not reproduce my entire tutorial / share my templates on your site. Thanks!

Enjoyed this free tutorial? Buy me a "coffee" and help support my blog!

Buy Me a Coffee at ko-fi.com

P.S. Subscribe to my newsletter for a monthly free pattern and visit my crafty tutorial archive for lots more free projects.

Visit my shop to buy my printable PDF sewing patterns:


Thursday 1 August 2019

A Year of Wreaths: August Felt Ice Cream Wreath Tutorial

UPDATE: my ice cream wreath tutorial is now available as a printable PDF pattern on Patreon.

Subscribe for a small monthly fee and you'll get access to a growing library of PDF patterns and tutorials, with an email whenever I add a new project. You can cancel any time.    

Click here to check out my Patreon page and sign up!

------- 

This month’s wreath design is inspired by delicious ice cream, the trend for Instagram-friendly “unicorn food”, and the way we all share our holiday snaps on social media.

The wreath features a large, colourful felt ice cream topped with sequin and bead “sprinkles”, a pair of heart-eye emojis, an “OMG!” speech bubble, and lots of felt hearts.

a felt wreath inspired by Instagram unicorn food

If you don’t fancy making the whole wreath, the ice cream would look fab appliqued to a cushion cover or a bag, or worn as an awesome statement brooch. 

The emojis and speech bubble would also make cute brooches or patches - as well as stitching “OMG!” in the speech bubble you could also stitch “WOW!” or “YAY!” or other short words.

felt ice cream, hearts and heart-eye emojis


Subscribe to my newsletter for a monthly(ish) free pattern and visit my crafty tutorial archive for lots more free projects.

Visit my shop to buy my printable PDF sewing patterns: