Showing posts with label rain. Show all posts

Thursday, 23 April 2020

Felt Weather Mobile Tutorial: Assembling the Mobile

UPDATE: this project is now available as part of my Patreon pattern library.

Click here to find the Felt Weather Mobile Tutorial and to sign up to my Patreon. 

Subscribers get full access to a growing library of PDF patterns and tutorials, and emails whenever new projects are added. You can unsubscribe at any time. 

-------


P.S. Visit my crafty tutorial archive for lots of free projects.

Visit my shop to buy my printable PDF sewing patterns:

Tuesday, 21 April 2020

Felt Weather Mobile Tutorial: Sew a Felt Cloud or Raincloud!

UPDATE: this project is now available as part of my Patreon pattern library.

Click here to find the Felt Weather Mobile Tutorial and to sign up to my Patreon. 

Subscribers get full access to a growing library of PDF patterns and tutorials, and emails whenever new projects are added. You can unsubscribe at any time. 

-------

My baby mobile tutorial continues this week with a how to for making a fluffy felt cloud, with or without raindrops.


The weather mobile would make a special gift for a baby's nursery. You can also use the individual tutorials to make cute ornaments (just add a ribbon loop!) or things like brooches or patches.


Remember: as with all mobiles, this is a decoration not a toy so make sure you hang the finished project well out of reach of little fingers. 

 
P.S. Visit my crafty tutorial archive for lots of free projects.

Visit my shop to buy my printable PDF sewing patterns:

Friday, 21 June 2019

3 Fun Felt Brooch Patterns - Sew Teacups, Rainclouds & Tree Stumps

UPDATE: these PDF patterns are now available from my shop, or in my Patreon pattern library.

Subscribe for a small monthly fee and you'll get access to a growing library of PDF patterns and tutorials, with an email whenever I add a new project. You can cancel any time.     

Click here to check out my Patreon page and sign up!

---
 
 felt teacup brooch PDF sewing pattern
 felt raincloud weather brooch PDF sewing pattern
 felt tree stump woodland brooch PDF sewing pattern

With this trio of simple step-by-step tutorials you can sew three different felt brooches: little teacups, rainclouds, and tree stumps.

felt teacup brooch PDF sewing pattern
felt raincloud brooch PDF sewing pattern
felt tree stump woodland brooch PDF sewing pattern

There are clear photos and instructions for each step of the process, and different size options for the templates so you can make bigger brooches than mine if you'd like.

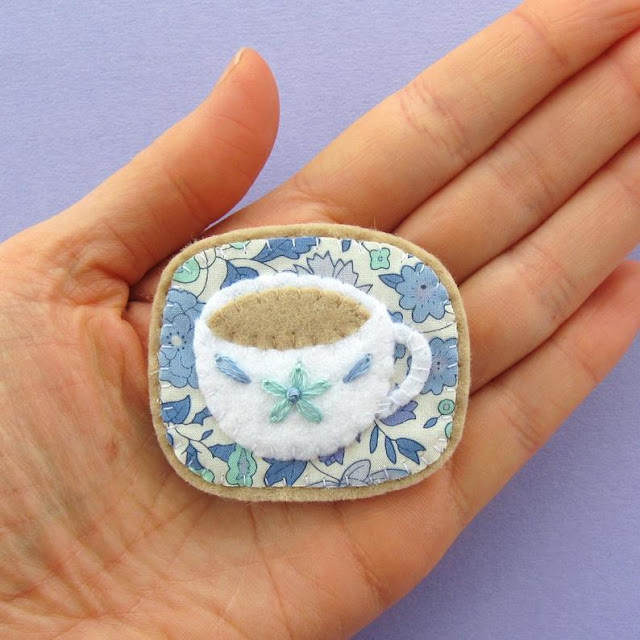
I used the medium teacup templates yesterday to sew this floral teacup - isn't it cute?

felt teacup brooch PDF sewing pattern
 felt teacup brooch PDF sewing pattern
 felt teacup brooch PDF sewing pattern

 
These would be so perfect for using up scraps of pretty floral fabric you can't bear to throw away. I've had that scrap of Liberty Tana Lawn in my stash for years and am so glad to have found a use for it! 

I can't stop picturing how lovely whole row of brooches with different floral prints and different colours of embroidered detailing to match the fabrics would be. Maybe you can make a whole rainbow of them?

Thursday, 9 May 2019

Felt Raincloud Brooch Tutorial

UPDATE: this tutorial is now available in my shop and in my Patreon pattern library.

Subscribe for a small monthly fee and you'll get access to a growing library of PDF patterns and tutorials, with an email whenever I add a new project. You can cancel any time.      

Click here to check out my Patreon page and sign up!

-----

The next free project for my newsletter subscribers is going to be a tutorial for sewing little felt raincloud brooches.

http://eepurl.com/dvfYO1

This is an old design I used to sell in my online shops back in the day - as you can see from that photo, I also once stitched the design on a little felt needlebook. I always enjoyed making these and I hope you guys will, too!

http://eepurl.com/dvfYO1
 http://eepurl.com/dvfYO1
 

Click here to visit my tutorial archive for lots of free patterns and project ideas.

Friday, 26 January 2018

Felt Weather Mobile Tutorial

UPDATE: this project is now available as part of my Patreon pattern library.

Click here to find the Felt Weather Mobile Tutorial and to sign up to my Patreon. 

Subscribers get full access to a growing library of PDF patterns and tutorials, and emails whenever new projects are added. You can unsubscribe at any time. 

-------

 https://www.thevillagehaberdashery.co.uk/blog/2018/diy-felt-weather-baby-mobile
 https://www.thevillagehaberdashery.co.uk/blog/2018/diy-felt-weather-baby-mobile


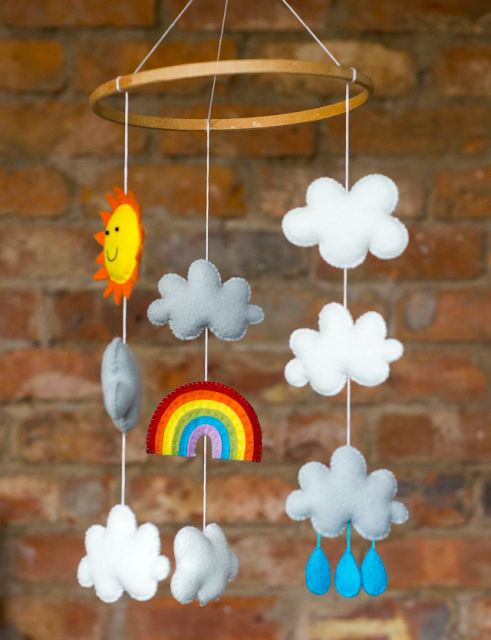
I designed this mobile as a workshop project for The Village Haberdashery last year. Sadly the class didn't go ahead but happily the design is now a tutorial instead - hurrah!

 https://www.thevillagehaberdashery.co.uk/blog/2018/diy-felt-weather-baby-mobile
 
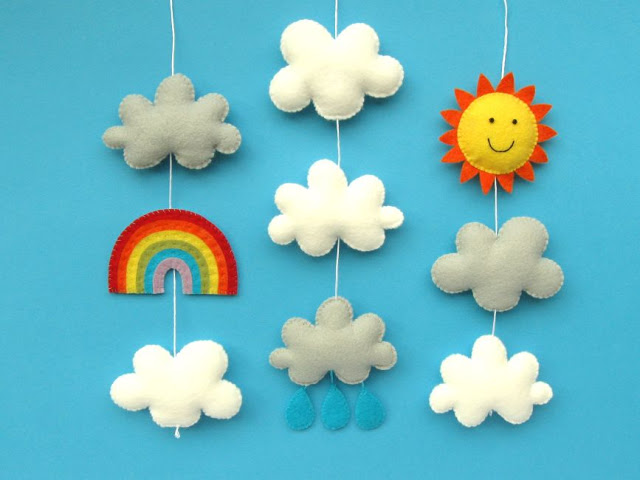
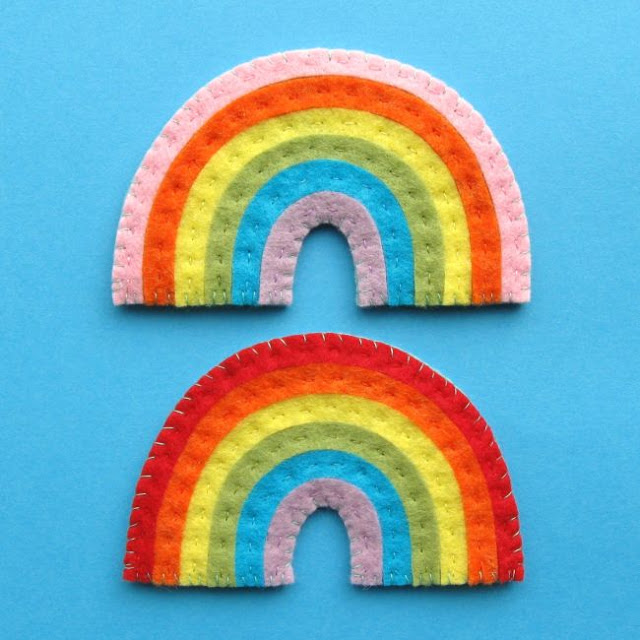
As well as making a full mobile, you could also use this tutorial for making individual felt rainbows, rain clouds and smiling suns. They'd make fab felt brooches or ornaments, or you could use them to decorate other projects - a felt rainbow would look awesome wherever you decide to stitch it.

 https://www.thevillagehaberdashery.co.uk/blog/2018/diy-felt-weather-baby-mobile
https://www.thevillagehaberdashery.co.uk/blog/2018/diy-felt-weather-baby-mobile


Visit my crafty tutorial archive for lots more projects.

Saturday, 21 April 2012

How To: Felt Cloud Mobile

We've had lots of "April Showers" this week, so it seemed like a good time to share a tutorial for making a fun felt rain-cloud mobile. It's a perfect craft project for a rainy afternoon! 


There's two versions to choose from...

A happy cloud with cute button raindrops:


Or a sparkly cloud decorated with lots of sequins:


Or you can skip the decoration completely and make a simple mobile from plain felt shapes. (I decorated one side of my mobile with a smiley face & buttons, and the other side with sequins).

To make your mobile you will need...
- the templates provided at the bottom of this post
- turquoise or other blue felt to make raindrops
- grey or white felt for the cloud
- matching blue and grey/white sewing thread
- white or light blue ribbon
- polyester stuffing or felt/fabric scraps
- sewing scissors, pins, a needle

- for the happy cloud you will also need pretty blue buttons, black or navy blue embroidery thread/floss and a large needle
- for the sparkly cloud you will also need turquoise or other blue sequins, and a selection of silver sequins

1) Use the templates provided to cut out two cloud shapes from grey or white felt, and lots of blue raindrops. You'll need two teardrop-shaped pieces for each raindrop you want on your mobile (I cut out 14 shapes to make 7 raindrops).


2) Decorate one cloud shape - this will become the front of your mobile.

For the happy cloud, cut out two small blue circles to form the eyes and sew them in place with a couple of small stitches of dark embroidery thread/floss (black or navy blue). Use more of the embroidery thread to backstitch a smile. You could sew the smile freehand or draw it on in pencil first and then sew over the pencil line.

For the sparkly cloud, just sew on lots of silver sequins. You could use all one size and shape, or an assortment like I have, and use as many or as few sequins as you like in whatever arrangement you fancy! Use grey or white thread and three stitches per sequin. 

If you want to plan out the sequin arrangement before you sew them in place, lay out your sequins on the second felt cloud shape or the cloud template and transfer them to the first cloud shape one by one as you sew them in place. 


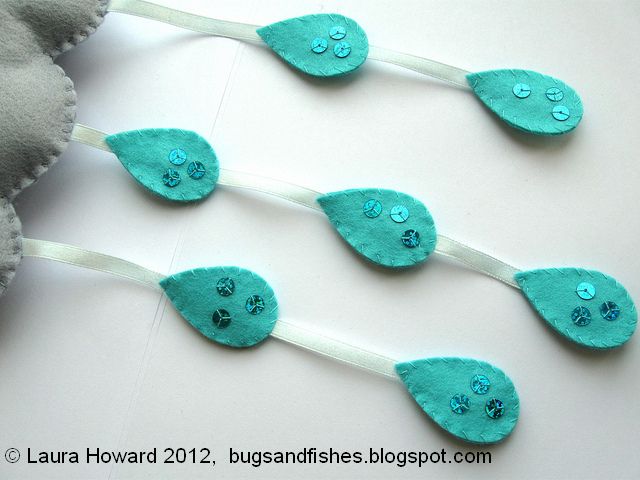
3) Decorate half your raindrops - either with blue buttons or blue sequins. Use matching blue thread to sew them in place, using three stitches per sequin and two or three stitches with double thickness thread per button.


4) Cut a length of narrow blue or white ribbon, fold it over to form a loop and sew it in place to the back of your decorated cloud piece using thread to match the felt cloud. I used 6mm wide ribbon & cut a piece of ribbon approx 32cms long.

Use whip stitches and sew slightly into the felt instead of all the way through it so your stitches don't show through on the front. Alternatively you can sew the ribbon loop to the undecorated backing cloud piece - make sure you sew it to the side which will be hidden when the two cloud shapes are sewn together!


5) Then cut three pieces of ribbon to sew your raindrops onto (I cut three 25cm lengths of ribbon). Make sure you include enough so your ribbon can overlap onto the felt cloud shape!

Arrange the raindrops how you want them, and then sew them in place along the ribbon. First sew the ribbon to one raindrop shape using thread to match the raindrops. As with sewing the loop to the cloud, use whip stitch sewing into the felt instead of through it.


Then put the second raindrop shape in place and sew them together by whip stitching around the edge with more matching thread. Finish your stitching as neatly as possible at the back of the raindrop, then move onto the next raindrop...


6) You should now have three strands of ribbon, with felt raindrops sewn onto them. Pin the ribbons in place so they're hanging from the bottom of one of your cloud pieces. It doesn't matter which cloud piece you sew them to, just make sure the decorate side of the raindrops is facing towards the side which will be the front of your mobile.


Sew the ribbons in place with whip stitch, remove the pins and trim any excess.


7) Put the front and back cloud pieces together so the "right" sides are facing outwards (i.e. the sides you want visible when the mobile is finished) and pin them together. Use matching white or grey thread to whip stitch around the edges (or use blanket stitch if you prefer) leaving a gap large enough for adding the stuffing in the next step.


8) Stuff the cloud lightly with polyester stuffing or small scraps of felt or fabric - just enough to give the cloud a nice shape without becoming overstuffed. I added small pieces of stuffing bit by bit to make sure each curve of the cloud had a bit of padding in it, and to ensure the cloud was evenly stuffed.

Then sew up the hole with more whip stitching (or blanket stitching) and finish your stitches neatly at the back. And you're finished!


Remember that all mobiles should be hung well out of reach of young children, and that if you hang your mobile in direct sunlight the felt will fade over time.

Double click the template / click to open it in a new tab / or click here in order to view it full size and print. To print the templates full size, make sure to set the image to print at 100% and your page to be "landscape".


This tutorial is for non commercial use only: you can use it for as many mobiles as you like for yourself or as gifts for friends but please don't make any for sale. It's okay to borrow a few photos if you want to blog about this project, but remember to credit me and link back to the original source, and do not reproduce my entire tutorial on your site or sell it in any form. Thanks!

Enjoyed this free tutorial? Buy me a "coffee" and help support my blog!

Buy Me a Coffee at ko-fi.com

Subscribe to my newsletter for a monthly free pattern and visit my crafty tutorial archive for lots more free projects.

Visit my shop to buy my printable PDF sewing patterns:

Friday, 30 April 2010

How To: Felt Raincloud Brooch

As promised - here's a tutorial to make your own sparkly raincloud brooch!

I made mine in two different colourways, one white cloud with pale blue raindrops and one darker, stormy grey cloud with dark blue raindrops:


To make your own clouds you will need:

- a needle, a pin, scissors, and the template at the bottom of this post
- white or grey felt to make the cloud and blue felt to make the raindrops
- thread to match the two colours you choose
- embroidery thread to match your raindrops
- a large needle to sew the embroidery thread
- silver and blue round sequins
- a brooch clasp or safety pin

First, cut out your pattern pieces using the templates provided. Each piece of the brooch is made from a "sandwich" of three felt layers, the middle layer is the smallest so it's hidden when you sew them all together.


Using embroidery thread, sew your small raindrop pieces to your small cloud piece (this structure will be the filling in your sandwich). Knot your thread and make one stitch in one of the raindrops, starting from the bottom and sewing upwards. Then leave a bit of embroidery thread "loose" between your raindrop and cloud so the raindrop can dangle freely, and sew it securely to the cloud. Repeat this for your other two raindrops, hanging your middle drop slightly lower than the others.


Now it's time to add your sequins onto the "front" felt pieces. I used silver sequins on my white/light blue cloud and a mix of silver and blue sequins on my grey/dark blue cloud. You might find it helpful to arrange the sequins on one cloud shape or your paper pattern as a guide and then gradually transfer them to the final shape as you sew. Use three stitches for each sequin, and thread that matches the felt you're sewing them onto.


Take your remaining cloud shape, turn it over and sew a brooch clasp onto the back using a double thickness of matching thread (alternatively you can use a safety pin and a scrap of felt - for info on how to do this please see this post).


Using thread that matches your cloud, sew the back piece (with clasp) onto the middle piece. I used long stitches on the inside (which won't be visible when the brooch is finished) and shorter stitches on the outside (visible on the back of the brooch)


Now it's sandwich-making time. Start with your raindrops - they can be a bit fiddly! Use a couple of small stitches to secure the small middle piece to the plain back piece (as you just did with the cloud), this will make it much easier to sew all three pieces together neatly. Then then add the sequinned front piece to your sandwich and use whip stitch to sew all three layers together. Finish your stitches on the back where they will be less visible.


Finally, put your sequinned cloud shape in place and use whip stitch to sew your cloud sandwich together (again, use matching thread and finish on the back).


Double-click on the image below to view the template & print it. If you print the template at 100% your raincloud will be the same size as mine.


This tutorial is for non commercial use only: you can use it for as many brooches as you like for yourself or as gifts for friends but please don't make any for sale. Please feel free to borrow photos if you want to blog about this project, but remember to credit me and link back to the original source, and do not reproduce my entire tutorial on your site. Thanks!


Enjoyed this free tutorial? Buy me a "coffee" and help support my blog!

Buy Me a Coffee at ko-fi.com

Subscribe to my newsletter for a monthly free pattern and visit my crafty tutorial archive for lots more free projects.

Visit my shop to buy my printable PDF sewing patterns: