Showing posts with label brooch. Show all posts

Friday, 11 March 2022

Tutorial: Sew Felt Spring Tree Brooches

Spring is coming! Celebrate the return of all things green and glorious - or just your love of trees - with today's sewing tutorial: a step by step guide to making a felt tree brooch.


These trees started off life as part of a tutorial for some autumn leaf and tree cards...

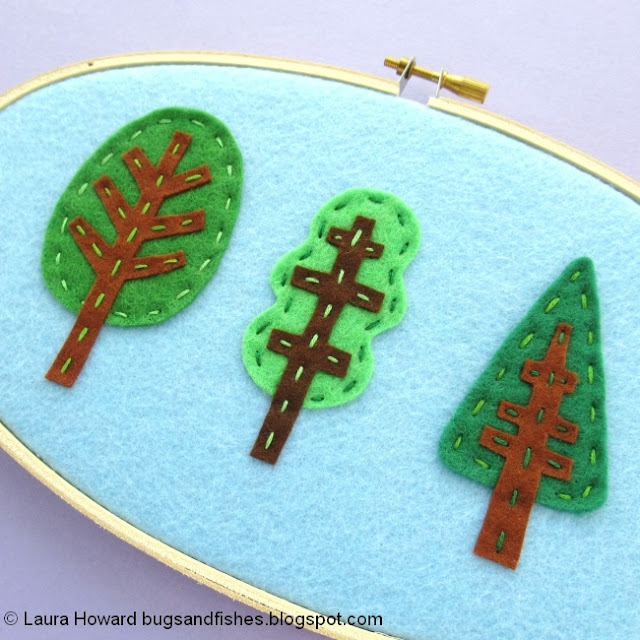
... then I couldn't resist doing a spring version, so I made some spring tree textile art...


... and shared some spring tree embroidery patterns:


Obviously I had to make some felt tree brooches, too! :)

You could also add ribbon loops to create little tree ornaments, or sew lots of trees for a spring forest garland. These would also make sweet motifs or patches to add to larger projects.


How to make a felt tree brooch:

1. Follow the steps in my spring tree textile art tutorial to sew your chosen tree design, using the templates linked to in that post. 

Instead of sewing the tree pieces to a piece of felt in an embroidery hoop you can just sew them to a piece of loose backing felt, but you may find having the felt held in the hoop makes it easier for you to add the embroidered details. If you're sewing your tree on loose felt there's no need to use tacking stitches to hold the tree shape in position, just use a pin instead.

If you're planning on making a few trees, try it one way then the other and see which method works best for you!

2. Remove the felt from your embroidery hoop (if you've used one) then cut out the tree shape, leaving a narrow border of the backing felt.


3. Use the tree shape as a template to cut out a matching matching shape from more of the backing felt. This plain shape will become the back of your brooch (or ornament, etc).


4. Turn the back of your brooch over, and add a brooch clasp. Sew it with a double thickness of sewing thread to match the backing felt.


5. Then hold the front and back of the brooch together and use more of the same thread to join them together, sewing flush around the tree shape with running stitch. And you're done! Arboreal felt goodness to pin to your jumper (sweater) or jacket this spring.


This tutorial is for non commercial use only: you can use it to stitch as many trees as you want for yourself or as gifts, but please don't make any for sale. Thanks xx

Enjoyed this free tutorial? Buy me a "coffee" and help support my blog!

Buy Me a Coffee at ko-fi.com

P.S. Subscribe to my newsletter (currently taking a break but hopefully back soooon) for free patterns and visit my crafty tutorial archive for lots more creative projects.

Visit my shop to buy my printable PDF sewing patterns and lots more:


Sunday, 17 January 2021

Felt Teapot & Teacup Brooches PDF Pattern

UPDATE: my felt teapot and teacup brooch tutorial is now available from my shop, or in my Patreon pattern library.

Subscribe for a small monthly fee and you'll get access to a growing library of PDF patterns and tutorials, with an email whenever I add a new project. You can cancel any time. 

Click here to check out my Patreon page and sign up!

---

Fancy a step by step guide for sewing felt teapot and teacup brooches?


These cute little felt brooches are super easy to sew and make lovely gifts for tea fans (either on their own, or along with a box of their favourite tea!).


Polkadot felt makes these brooches extra cute - I love these mini dots but I've made these brooches before with bigger spots and they looked just as nice. If you just have plain felt you could add dots with some simple embroidery, or maybe embroider a little flower instead.


You could also use the templates to make a teapot or teacup ornament (just add a loop of ribbon!) or applique the shapes onto a larger project. 

The PDF file includes three easy-to-print sizes of the templates, or you can resize the templates as you prefer.


Sunday, 19 April 2020

Recent(ish) Additions to My Instagram Sale

As I mentioned the other day, I've come up with a plan so I can post parcels without having to go to the Post Office: I've found a parcel postbox near me, I've ordered lots of stamps online, and a wonderful friend has offered to send me a roll of customs labels - hurrah!

This means I can start sending out orders from my Instagram sale page again. I'm in the middle of stocking up on packaging supplies so you may have to wait for me to ship some larger items, but if there's anything you've got your eye on please get in touch.

Here's a selection of the items still available from the sales I held in March...

A couple of gorgeous vintage atlases, perfect for framing and/or using in paper crafts.

https://www.instagram.com/lauralupinsells/
 https://www.instagram.com/lauralupinsells/

A very pretty jigsaw puzzle (so soothing!).

https://www.instagram.com/lauralupinsells/

A selection of craft books.

https://www.instagram.com/lauralupinsells/
 https://www.instagram.com/lauralupinsells/
 https://www.instagram.com/lauralupinsells/

Some lovely First Day Covers featuring gorgeous stamps. These would look really nice framed or propped up on a bookshelf or picture ledge.

https://www.instagram.com/lauralupinsells/
 https://www.instagram.com/lauralupinsells/
 https://www.instagram.com/lauralupinsells/

A brand new Leuchtturm notebook, still in its packaging.

https://www.instagram.com/lauralupinsells/

Some floral fabric, including a vintage Laura Ashley print!

https://www.instagram.com/lauralupinsells/

A charming brooch to pin to your jacket.

https://www.instagram.com/lauralupinsells/

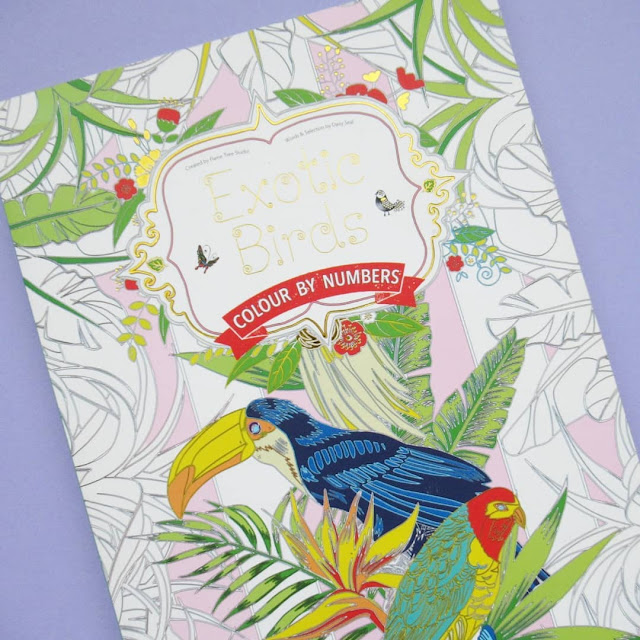
A colouring book full of birds.

https://www.instagram.com/lauralupinsells/

And an absolutely fabulous vintage bedspread.

https://www.instagram.com/lauralupinsells/
 
Click here to view everything I've got listed!

If it's not marked as "sold" or "sold pending payment", it's almost certainly still available. You can message me on Instagram or get in touch via my contact form and I'll get back to you as soon as possible.

Sunday, 12 April 2020

Felt Teacup & Teapot Brooches Tutorial: Available Now!

UPDATE:  I shared this project with my newsletter subscribers last year, it's now available from my shop or in my Patreon pattern library.

For a small monthly fee you can get access to my growing library of PDF patterns and tutorials, with an email whenever I add a new project. You can cancel any time. Click here to check out my Patreon page and sign up!

------- 

This tutorial is a step-by-step guide to sewing cute felt teacup and teapot brooches:


These are so fun and easy to sew and make sweet gifts for tea lovers. You could even make a whole batch of them, have a tea party (once the lockdown is over, of course!!) and give a brooch to each of your guests as a memento.


Polkadot felt makes these brooches extra cute. I found mine on Etsy, but lots of craft stores sell it. I love these mini dots but I've made these brooches before with bigger spots and they looked just as nice. If you just have plain felt you could add dots with some simple embroidery, or maybe embroider a little flower instead.


Saturday, 1 February 2020

Sewing Tutorial: Felt Teacup and Teapot Brooches

UPDATE:  I shared this project with my newsletter subscribers last year, it's now available from my shop, or in my Patreon pattern library.

Subscribe for a small monthly fee and you'll get access to a growing library of PDF patterns and tutorials, with an email whenever I add a new project. You can cancel any time. 
 

------- 

I'm running a little behind with 2020's first freebie for my pattern newsletter subscribers... so I thought I'd make it a double tutorial!

This year's first free project will be a step by step sewing tutorial for making cute little felt teacup brooches...


... and felt teapot brooches, too.


A felt teacup or teapot (or both) would look lovely pinned to your favourite jacket this spring, and one of the brooches would be a fab gift for the tea lovers in your life (along with some tea, of course!). You could also swap the brooch clasp for a hairclip to make Alice in Wonderland style hair accessories, or add a ribbon loop to make a cute teacup ornament.

Polkadot or other patterned felt is optional when making these brooches but it looks super cute. If you just have plain felt you can easily add dots or other patterns with sequins, seed beads, or some simple embroidery.

If you've been following my work for a really long time you might remember these designs (and these photos) from the days when I sold lots of tea-themed brooches. It's so nice revisiting these old projects to share them with you guys and having a nostalgic browse back through my photo archives.

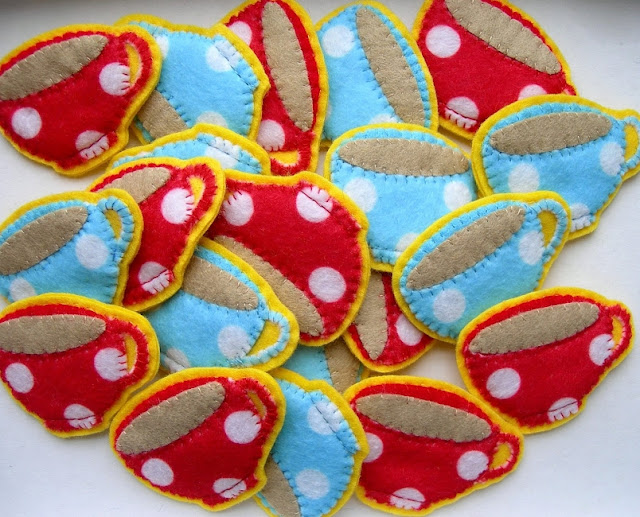
I used to make blue and red versions of the teacups and teapots, both on a zingy yellow felt background but you can of course make yours in any colours you fancy.

 http://eepurl.com/dvfYO1
http://eepurl.com/dvfYO1

Choosing matching sewing thread will help your brooches turn out lovely and neat - I took this photo when I sat down to sew blue teacup brooches and had dozens of blue threads but none in the shade I needed!

http://eepurl.com/dvfYO1

Here are some teapots and flowers in progress - I love looking back at these colourful work-in-progress pics.

http://eepurl.com/dvfYO1

Since I took this photo back in 2008 the forget-me-nots have evolved into a design I included in my first book, and a version of the primrose design is now available in my shop as a printable pattern. Aaaaand of course now I'm working on a tutorial for the teapots :)

Monday, 19 August 2019

Faux Leather Crafts: Lightning Bolt Brooch Tutorial

This week I'm sharing four tutorials for making stuff using synthetic (vegan) leather.

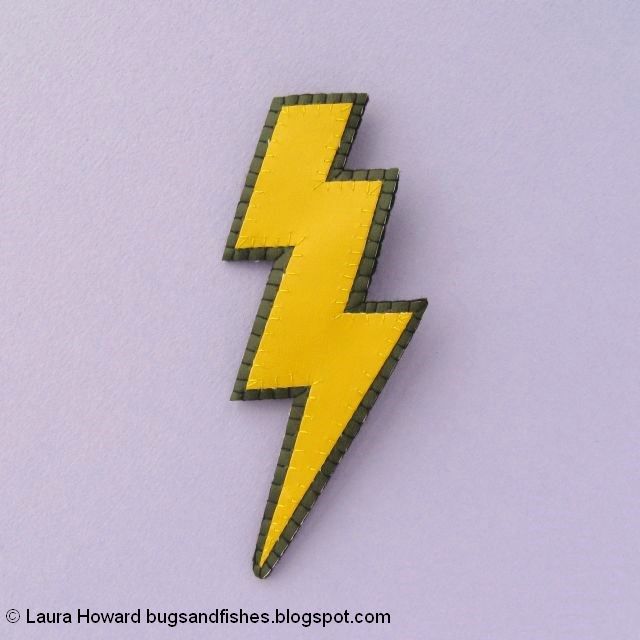
First up, sewing a bold lightning bolt brooch:

vegan leather lightning bolt brooch tutorial

This brooch would look particularly fab pinned to a black coat or sweater, and would make a fun gift for a Harry Potter fan.

Synthetic leather looks great and is really easy to cut and sew... but if you don't have any faux leather, don't worry! You can use felt for making this lightning bolt brooch instead! The template sheet also includes star templates which you could use to make star brooches (these would look awesome cut from metallic faux leather or glitter felt).

This tutorial originally appeared on the Village Haberdashery's blog and was created using synthetic leather and other craft supplies from their shop.

vegan leather lightning bolt brooch tutorial

You will need:

- The lightning bolt template (follow the link to view and download the PDF)
- Some synthetic leather
- Coordinating felt
- Matching sewing threads
- A brooch clasp
- A sewing needle
- Sewing scissors
- An air-erasable fabric marker pen or an ordinary felt tip pen

To make a lightning bolt brooch:

Use the template provided to cut out the bolt shape from yellow or metallic leather. Turn the template over and place it on the back of the leather, draw around it with a pen then cut it out with sewing scissors. Then place the bolt on a backing piece of contrasting leather.

vegan leather lightning bolt brooch tutorial: cut out the lightning bolt

Use whip stitch and matching sewing thread to sew the bolt to the backing leather.

vegan leather lightning bolt brooch tutorial: sew the pieces together

Cut out the bolt, leaving a border framing the shape.

vegan leather lightning bolt brooch tutorial: cut out the brooch shape

Use the shape you’ve just cut out as a template to cut a matching piece of felt. Turn the felt shape over and add a brooch clasp. Sew the clasp in place securely with a double thickness of matching sewing thread.

 vegan leather lightning bolt brooch tutorial: add the brooch clasp

Place the front and back of the brooch together and sew the edges together with blanket stitch and matching sewing thread.

UPDATE: for more faux leather goodness, why not make a star headband, a geometric necklace, or a mini covered notebook.


This tutorial is for non commercial use only: you can use it to make as many brooches as you want for yourself or as gifts, but please don't make any for sale. You may borrow a couple of photos if you want to blog about this project, but remember to credit me and link back to this page on my blog, and do not reproduce my entire tutorial / share my templates on your site. Thanks!

Enjoyed this free tutorial? Buy me a "coffee" and help support my blog!

Buy Me a Coffee at ko-fi.com

P.S. Subscribe to my newsletter for a monthly free pattern and visit my crafty tutorial archive for lots more free projects.

Visit my shop to buy my printable PDF sewing patterns: