Showing posts with label Christmas Quilt. Show all posts

Friday, 3 August 2018

Making a Christmas Quilt: the Finished Quilt!

Waaaay back in 2014 I decided to make a Christmas quilt for my sister. She loves Christmas and I thought a cosy, festive quilt would be a perfect, special gift.

I decided to hand sew the whole quilt... and massively underestimated how long that would take! After many, many hours of hand stitching I finally finished the quilt this spring, and gave it to my sister (hurrah!) and now I finally have lots of pics to share with you guys (double hurrah!).


This isn't the biggest thing I've made (that would be my double-bed-sized giant granny square blanket), or the longest-running work-in-progress that I've completed (that title is currently held by my mini patchwork squares blanket, which took six-and-a-half years from start to finish), but it's still a huge thing to have finished and I'm thrilled with how it turned out. Luckily my sister likes it, too!


You can read about the making of the quilt here and here, or just scroll down for lots of photos of the finished quilt in all its festive glory...


P.S. I might have finished this quilt but I'm not done with quilting! My current work-in-progress (although I've not been making much progress on it during this hot summer) is another patchwork quilt - click here to read all about it.

Tuesday, 29 May 2018

Making a Christmas Quilt: Part Two

By December 2015, the Christmas quilt I was sewing for my sister looked like this:


(If you've not read Part One click here to catch up!).

2016 was a very busy year for me and (I'm slightly embarrassed to admit this) it took me nine months to get around to shopping for wadding and backing fabric to complete the quilt. When it arrived, though, I was excited to get stuck into the quilting process.


I found some nice red extra-wide fabric which wasn't a perfect match for the deeper red in the quilt top, but still looked good and meant I didn't have to worry about joining fabric together to make the back of the quilt. After washing and ironing the backing fabric, I ironed the quilt top...


... and laid all three layers out on our living room floor, pinning them together with special curved safety pins. 


As well as the wadding, backing fabric, and quilting pins, I also bought some special thread designed for hand-quilting and a massive (16 inch / 40 cm) quilting hoop - you use the hoop to help hold the fabric as you stitch. It was, I'll be honest here, a bit annoying having to buy a great big wooden hoop as well as all that other stuff (making a quilt is not cheap!) but all the hand quilting tutorials I read said you needed one and they were right.

I'd decided to do the quilting with red thread, sewing a line either side of each seam. I used masking tape to help mark out a line for me to stitch along, which I found worked really well.


It took a while to get the hang of the hand-quilting, and I'm sure if any "proper" quilters took a look at my stitches they'd be appalled by how messy they are... but I made slow and steady progress. Sitting under the layers of this quilt as I stitched it was super cosy!


It's a little hard to see the quilting lines in photos, but they stand out much more clearly in real life and as well as holding the layers of the quilt together they give it a lovely bit of added detail and texture.


The hand quilting process was relaxing but boy was it time-consuming! I timed myself one afternoon and found it took approximately one and a half hours to sew one of the grid lines across the quilt. With 44 lines to stitch in total, that's at least 66 hours of quilting (and probably a lot more - to say nothing of the time spent on all the other stages!).

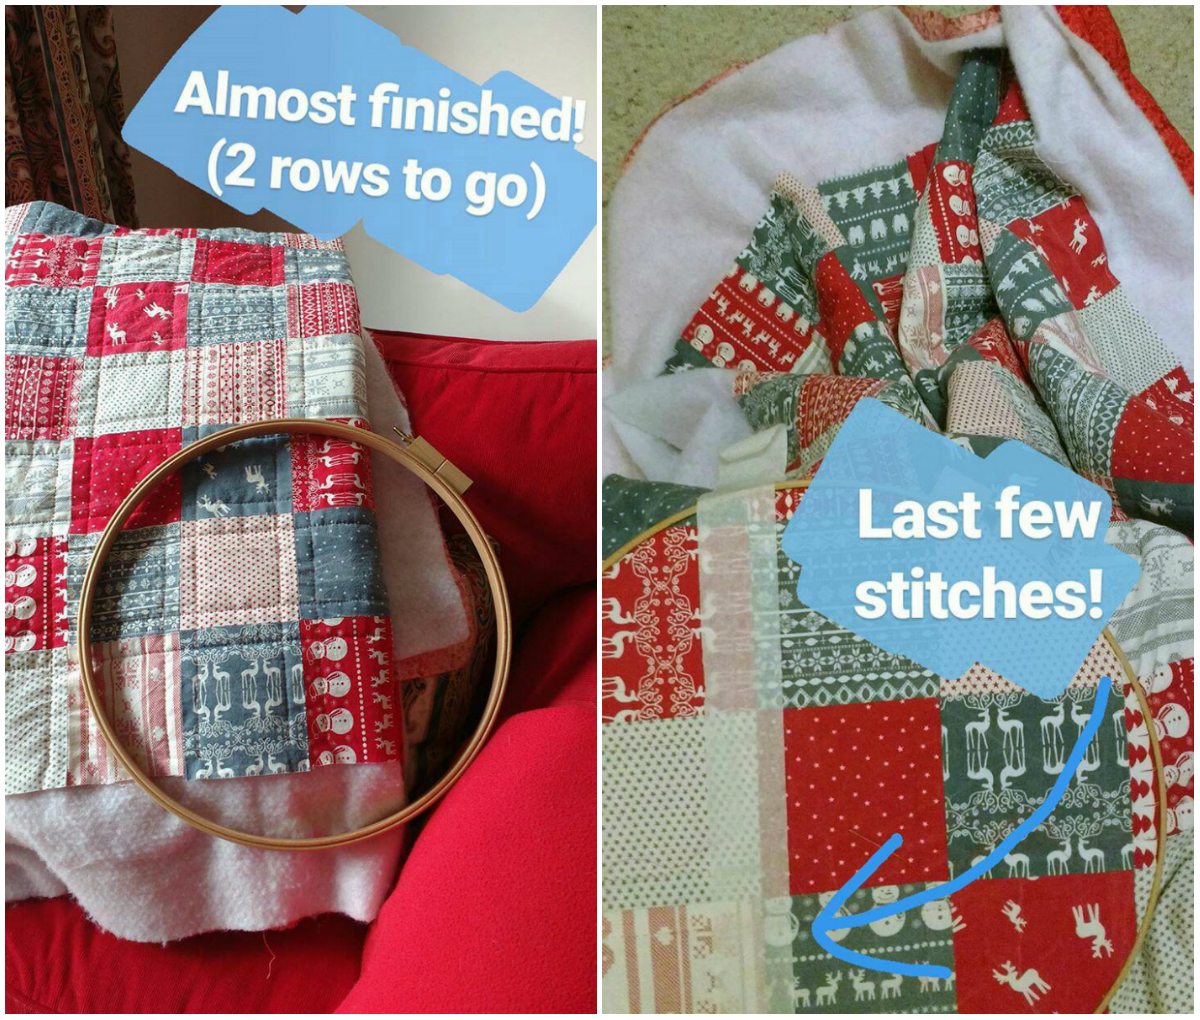
In October I hit the halfway point...


... then spent so much of my spare time quilting that I got totally sick of it and had to take a break for a couple of weeks to do other things to stop myself going a bit bananas.

By late November I had just two lines left to stitch. I'd drawn a little diagram of the quilt and marked off each line in red pencil when it was finished so I could easily track my progress. It was very satisfying seeing it slowly fill up with red lines!


At the end of November, the quilting was finally finished! I took a late night victory selfie and (foolishly) predicted that I'd have it finished by Christmas.


The quilt was looking soooo gooood...


 ... though its size meant it was tricky getting a decent photo of the whole thing!


I asked my Facebook and Instagram followers what colour they thought I should use for the binding (there was a pretty decisive vote for red!), started looking up binding tutorials... and then got no further.

December that year was incredibly hectic. I packed everything I owned up into boxes, moved across the country and into a new flat, then almost immediately began lots of DIY projects. I might have possibly been able to find the time to do the final bit of stitching for the quilt, but I definitely didn't have the space in my brain for planning fabric purchases and getting my head round the binding instructions.

So, the quilt went in a box and it stayed there... until last month! A mere 17 months after I finished the hand-quilting! I know this is not the longest time anyone has neglected a work-in-progress (heck, I myself have another quilt which has been "in progress" since I was a teenager) but FOUR Christmases have now passed since I started making my Christmas quilt. Full of enthusiasm for Finally Finishing Things after finishing my mini squares blanket - I was DETERMINED to get this quilt finished.

Over the course of a few April evenings, I trimmed away the excess fabric and wadding, cut the binding fabric into strips and sewed them together, ironed them, then began sewing them to the quilt.


I totally misunderstood the instructions for how to do the corners (oops) but managed to get them looking okay in the end (though not remotely how they were actually supposed to look). 

Adding the binding wasn't exactly a quick process but after all the hours of stitching that have gone into this quilt (and all the months in between) it seemed to go by in a flash.


Now I know this is a bit of a tease as I don't have final photos to show you yet, but it is amazing how much impact adding the binding had on the overall look of the quilt. It actually looks like a quilt now instead of just a bunch of fabric sewn together. I know technically all a quilt is is a bunch of fabric sewn together but I'm sure you get what I mean - it looks complete now, it's delightful. 

I did a very happy dance when it was finished and I cannot wait to show you guys photos of how it turned out!

Monday, 21 May 2018

Making a Christmas Quilt: Part One

After finishing my patchwork mini squares blanket last month (which was a work-in-progress for six and a half years), I decided to tackle another of my slightly neglected WIPs: the Christmas quilt I'm making for my sister.

My youngest sister loves Christmas so when I spotted a gorgeous collection of Christmas quilting cottons at the Festival of Quilts in 2014, I decided I absolutely had to buy a bunch of the prints and make her something festive. Full of quilt-related enthusiasm after my two days at the Festival, I decided to make her a cosy quilt to curl up under during the holiday season. I decided to hand sew the whole thing, because I love hand-sewing... and also because I haven't used a sewing machine since 1998!

It was going to be a big task, but one I was excited about! I ordered my favourite prints from the collection in August 2014...


... then in the autumn I washed the fabric, ironed it and cut it into squares.


(I still have these scrappy off-cuts in a bag somewhere - they were just too lovely to throw away! I must try to think of a tutorial to make use of them sometime...)

Once I'd cut out the squares I laid them all out on the floor to try out possible layouts for the quilt. It took a while to get a good balance of the prints but I got there in the end.


I spent a lot of hours that winter watching made-for-TV Christmas movies and sewing these squares together. I love made-for-TV Christmas movies, and it turns out that they're the perfect easy background viewing to accompany hand-sewing a quilt. I like to think my choice of viewing also helped infuse the quilt with festive vibes! This sounds a bit ridiculous, I know, but if you can stitch love into something - which I think us makers know we absolutely can - then I'm sure it's possible to stitch in some Christmas spirit along with it.

Because I am an idiot I initially thought I'd be able to put in lots of evenings working on the quilt and have it ready for Christmas 2014. Hahahahahahahaha. This was... not a realistic goal.

When it gradually dawned on me that I wasn't magically going to be able to hand stitch an entire quilt in just a few weeks, I pushed my deadline back to Christmas 2015 then immediately neglected the project in favour of other things (you know how it goes with works-in-progress: always so many distracting projects to work on!).

I picked it back up the following summer, getting all the squares stitched together in rows and making a start on joining the rows together.


By October 2015 I had just two more rows to add - the end was in sight! (Well, the end of this stage of the process was, anyway).


For the first year of working on this project I'd managed to keep it secret from my sister. I'd been tempted to blog about the process as I went along, but decided it was better to keep it Top Secret so I could surprise her at Christmas with a massive parcel full of quilt-y goodness.

Unfortunately, I forgot to properly hide the in-progress quilt one day when she came to visit and of course she spotted it and asked what it was and I immediately blurted out that it was a Christmas quilt I was making for her. Oops! (I would clearly make a terrible spy). It's a shame the surprise got spoiled but it has been nice being able to mention the quilt on my blog and social media as I've worked on it, so there's the silver lining to that cloud.

In late November I stitched the last few squares together...


... then photographed the finished quilt top with help from my dear departed furry assistant.


It was looking lovely, but there was still a long way to go...

I'll be blogging about the hand-quilting in Part Two next week - stay tuned...

UPDATE: click here to read part two of the quilt-making process, or click here to see the finished quilt.