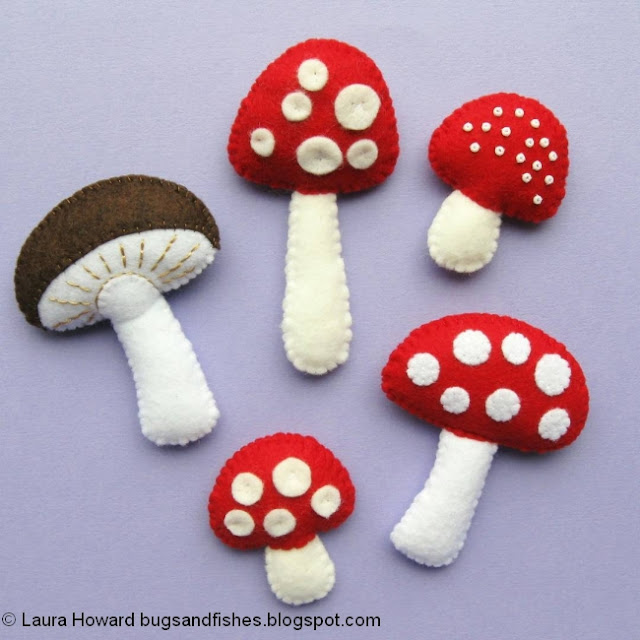
Earlier this week I shared templates and tutorials for making the mushroom and toadstools (which would also make fab brooches or Christmas ornaments!) and today I'm sharing the tutorial for putting together the whole autumnal wreath.
You will need:
The template sheet provided (click here to download and print the PDF)
A 30cm polystyrene ring wreath base
Chunky yarn in an autumnal shade
Red, white and dark brown felt
Matching red, white and dark brown sewing thread
Assorted autumnal shades of felt for the leaves (I used 6 colours)
Red, orange and light brown embroidery thread
Toy stuffing
Sewing scissors
Embroidery scissors (these are great for cutting out felt shapes!)
Sewing needles and pins
Glue gun and glue
Heat-proof mat for the glue gun
Newspaper to protect your workspace from any glue drips
Optional: air-erasable fabric marker pen, a pencil
To make the mushroom and toadstools:
Follow the instructions in my earlier blog post.
To make the leaves:
1. Use the leaf templates provided to cut out 24 felt leaves in assorted autumnal colours (12 large and 12 small). Pin each paper template onto your chosen felt colour, cut around it with sewing scissors then remove the pin. I used six felt colours, cutting two large and two small leaves of each colour.
2. Add detail to your leaves with half strands of contrasting embroidery thread (i.e. for six-stranded embroidery thread just use three strands). Sew a line of running stitches down the centre of each leaf then finish your stitching at the back and trim any excess threads.
Variation: keep the leaves unstitched for a simpler look, or mix and match stitched and unstitched leaves.
To wrap the wreath base:
Chunky yarn is perfect for wrapping the wreath! I chose brown yarn, which goes well with the autumnal colours of the wreath but allows the leaves and toadstools to stand out. Grey or black would also look great, as would an autumnal shade like burnt orange or mustard yellow to match your leaf colours.
Tip: if you’re using thinner yarn, use two balls of matching yarn and wrap with two strands at once (one from each ball) to save time.
1. Secure the yarn with a knot at what will become the back of your wreath. Begin wrapping the yarn around the wreath base, passing the skein/ball of yarn through the hole in the centre of the wreath as you wrap the yarn around the outside.
2. Hide the loose yarn end under the yarn as you wrap, and make sure that you’re not leaving any gaps where the white wreath base shows through. Continue wrapping, gradually covering the whole of the wreath base with your chosen yarn. This can take a while, so I highly recommend wrapping your wreath while watching a film or an episode of your favourite TV show.
3. Once the whole wreath base has been covered with yarn, tie a knot securely at the back and carefully trim the loose end so it won’t be visible when the wreath is hung up.
To assemble the wreath:
1. Arrange the leaves on the yarn-wrapped wreath base, using the photo below as a guide. When you’re happy with the arrangement pin each leaf in place, inserting the pin at the bottom of each leaf.
2. Heat up your glue gun then use it to attach the leaves to the wreath. Work inwards, holding the leaf back and applying a small dab of glue to the wreath then lightly pressing the outer/top half of the leaf down so it sticks in place. Then remove the pin from the bottom of the leaf and glue the lower half. When you reach the central cluster of leaves, glue all the outer/top halves of the leaves then remove the central pins and glue the inner/bottom halves of the leaves one by one.
IMPORTANT: take care when working with the glue gun as the glue gets very hot! Always place it on a heat-proof mat when not in use, and use newspaper to protect your workspace. Work slowly, squeezing the gun with care to control the amount of glue you’re using and keeping your fingers out of the way of the hot glue.
Tip: you may find it helpful to test glue a couple of scrap pieces of felt before you start, so you can see how much glue you need to use to hold each piece in place.
3. Arrange the mushroom and two toadstools on the leaves. When you’re happy with their position, glue them in place one by one. Apply several dabs of glue to the back of each mushroom/toadstool where it will lie against the leaves, then place it in position and press firmly.
4. Finally, cut a length of yarn or co-ordinating ribbon and knot it securely around the top of the wreath. Use this to hang the wreath in your chosen spot.
This tutorial is for non commercial use only: you can use it to make as many wreaths as you want for yourself or as gifts, but please don't make any for sale. You may borrow a couple of photos if you want to blog about this project, but remember to credit me and link back to this page on my blog, and do not reproduce my entire tutorial / share my templates on your site. Thanks!
Enjoyed this free tutorial? Buy me a "coffee" and help support my blog!

P.S. Subscribe to my newsletter for a monthly free pattern and visit my crafty tutorial archive for lots more free projects.
Visit my shop to buy my printable PDF sewing patterns:
0 comments:
Post a Comment