Monday, 27 February 2017

Sew Some Felt Fruit! Watermelon Slice Tutorial

UPDATE: my felt watermelon tutorial is now available in my Patreon pattern library.

Subscribe for a small monthly fee and you'll get access to a growing library of PDF patterns and tutorials, with an email whenever I add a new project. You can cancel any time.      
 
Click here to check out my Patreon page and sign up!

-----

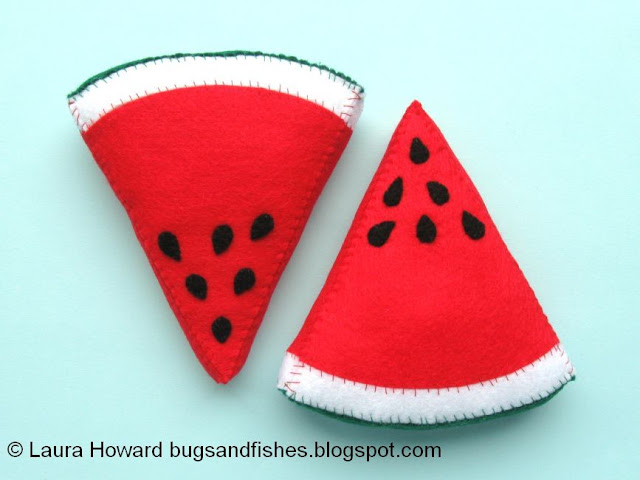
Time for the penultimate tutorial in my felt fruit series: how to sew slices of watermelon.

 felt watermelon slices

A faux watermelon slice would look fun propped up against a bookshelf, or you could add a ribbon loop and hang it as a quirky ornament or sew on a brooch clasp and wear it as a giant fruity brooch.

 felt watermelon slice

Or why not make the whole set of felt fruit and display them in a bowl? I've already shared tutorials for sewing the apples and pear, the orange and apple slices and the strawberries. I'll post the kiwi tutorial sometime soon.

Please note that the finished felt fruit is intended for decorative use only - it is not a toy and should be kept well out of reach of young children.

felt fruit

This project was originally published in docrafts Creativity magazine and stitched using felt from their Craft Planet range.

 felt watermelon slices

felt watermelon slices

Subscribe to my newsletter for creative updates, and visit my crafty tutorial archive for lots of free projects.

Visit my shop to buy my printable PDF sewing patterns:

Friday, 24 February 2017

Not the Piccadilly Line: Chiswick Park Station

Time for my third blog post about the Art Deco Piccadilly Line photowalk I took part in last year, organised by Kate of Made by Mrs M. This is the "problem" with photowalks, you see, you take so many photos you end up having to write loads of blog posts to fit them all in!

After visiting Rayners Lane and Sudbury Hill, then Sudbury Town and Park Royal we took a break for lunch and headed to Chiswick Park (on the District Line). We only went there because it was nearby and we knew there were lots of nice places to eat quite near the station... but it turned out to be a great place for photos as well. Hurrah!

All over the platforms at Chiswick Park there are little details in this lovely green.


I love all the bold shapes of the concrete, and the little pops of colour against that plain background.


There are lots of traces of times gone by: old intercom systems, signs and phone booths.


The combination of the green with black and the safety yellow markings on the stairs makes for a very striking look! I'm not sure I would ever think to combine those colours but I think it kinda works?


There's more black in the entrance hall - I love the contrast of the black tiles with the bricks.


And the curves! What a joy these curved buildings are.


Altogether: an unexpected delight. Our lunch was pretty tasty, too! 

The final post in this series will be popping up in the next few weeks, so keep your eyes peeled for more Art Deco awesomeness. 

P.S. I have no idea which stations I took these final three photos at. I think I took them on our way to and from Chiswick Park but it's been so long that I can't remember which station we changed at or which pictures belong to which stations. I like them though, so here you go: three slightly random bonus photos for you! Don't say I never give you anything, haha.


(Maybe you travel on this part of the Tube yourself and recognise these places? Let me know!).

Wednesday, 22 February 2017

Weston-super-Magic

I've started a new Instagram account! I know, I know - how many Instagram accounts does one person need? But I promise there's a reason for this one.

My new account is called westonsupermagic and I've started it so I can have a space to share all the photos I'm taking of my new seaside hometown.

https://www.instagram.com/westonsupermagic/

I'm loving taking these photos, but I don't want them to overwhelm my main account (lauralupinhoward) so I'm giving them their own space to shine.

I'll be sharing lots of photos taken on my walks along the seafront (of course) as well as snaps of local architecture and other interesting bits and pieces I spot around town. If you think that might be your cup of tea, do follow me on Instagram or bookmark the page on your desktop. I'll probably also share occasional round-ups here on my blog of my favourite pictures.

I hope you'll enjoy exploring with me!  

Monday, 20 February 2017

Never Stop Learning: Free Embroidery Pattern

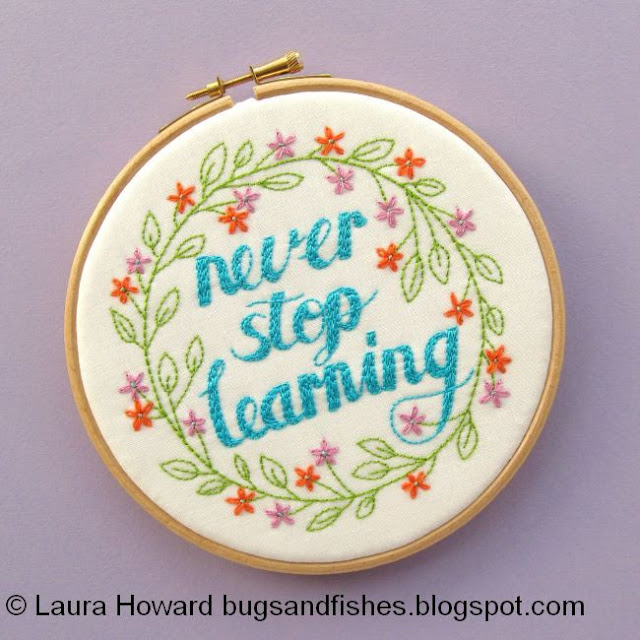
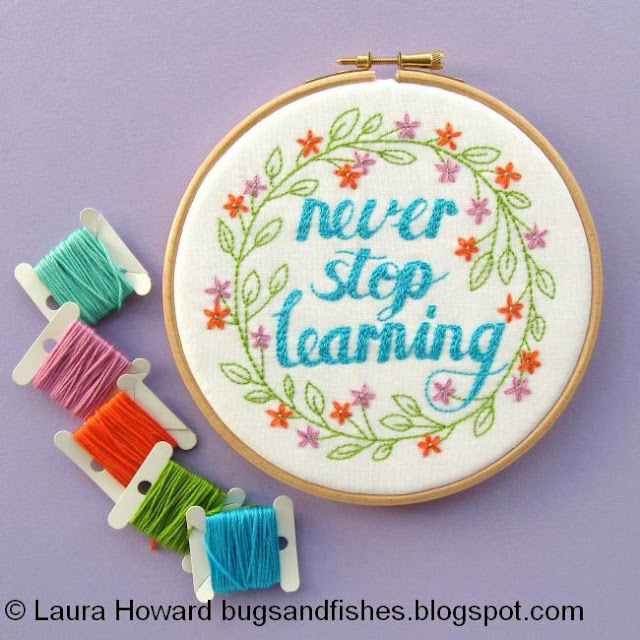
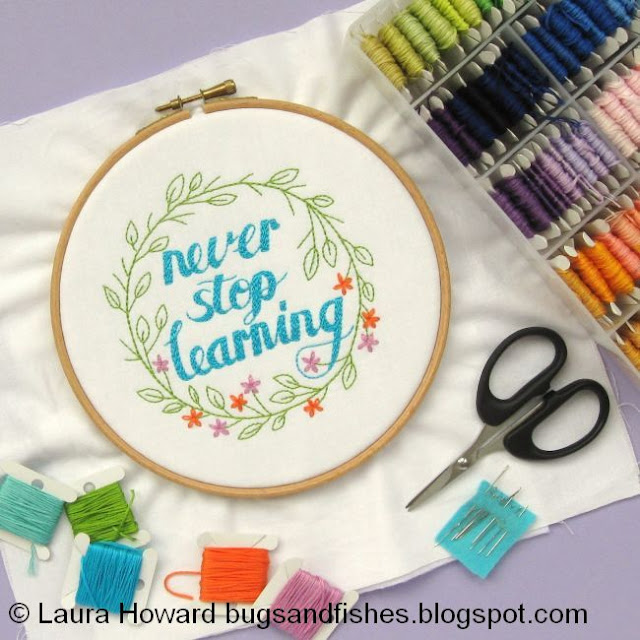
Never Stop Learning embroidery hoop art

Today I've got a new embroidery project to share: a free pattern to remind to you to never stop learning.

Never Stop Learning embroidery pattern
Never Stop Learning DIY embroidery hoop art

This post is sponsored by Obby: a new site for discovering creative classes in London.

Discover creative classes in London with Obby

As people with crafty hobbies, we all know how great it feels to learn something new. To try new skills and techniques, to stretch yourself and have the satisfaction of that YESSSSSS moment when you get a technique just right or finish your first project. (I have been known to do little happy dances round the room in those moments).

Well, Obby want more people have have those moments! On their site you can find and book all kinds of creative classes and workshops in London. You can learn baking, sewing, flower-arranging, perfume-making, photography, wine-tasting, crochet, cooking, embroidery and much, much more.

Book a needlework class in London with Obby
 https://obby.co.uk/

Today's never stop learning embroidery pattern is inspired by these creative possibilities and the joy of learning new things. I hope you'll enjoy stitching it!

You'll find the free embroidery pattern at the bottom of this post. You can, of course, stitch it on anything you like but it's designed to be framed in a six inch embroidery hoop.

To get started, transfer the pattern to a piece of fabric using your preferred transfer method. I chose a white quilting cotton and used a window as a lightbox, holding the pattern and fabric in place with masking tape while I carefully traced the design with a sharp pencil.

Once you've transferred the design, lay the fabric on top of a piece of white felt and place them both in a seven inch embroidery hoop (I like to use a slightly larger hoop than the design will be framed in, to make it easier to stitch the edges of the design). The layer of felt adds sturdiness for stitching the design and will help prevent threads from showing through the white fabric. If you're using a darker and/or thicker fabric you could skip the felt, or add some iron-on interfacing if you prefer.

Tracing the pattern

Time to start stitching!

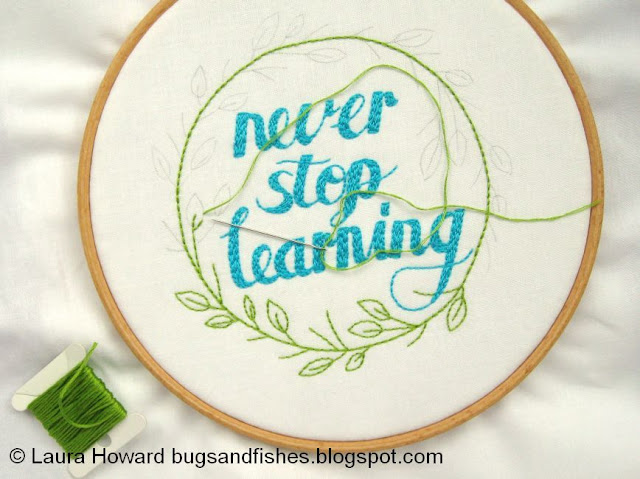
Choose the shade of stranded embroidery thread (floss) you want for the lettering; I chose a bold turquoise blue. Using three strands only, backstitch the outlines of the letters then fill them in with more lines of backstitch. Don't pull your stitches too tight or you risk puckering the fabric.  

Here and throughout, avoid carrying your thread across the back of the work to keep the back neat and to help prevent threads showing at the front.

Stitching the lettering

When you've stitched all the text, choose some co-ordinating embroidery thread colours for the wreath. You'll need green for the leaves and branches of the wreath but you can use any colours you like for the flowers. I chose a bright spring green for the leaves, pink and orange for the flowers and light turquoise for the flower centres.

Embroidered lettering

Start by stitching the circular wreath shape, using backstitch and three strands of green thread.

Stitching the wreath

Then switch to using just two strands and backstitch the leaves and branches.

Stitching the leaves and branches
 Wreath fully stitched - detail
 Wreath fully stitched

Now it's time to add the flowers. Each flower is made using the Lazy Daisy stitch - if you've not sewn these before just search online for "Lazy Daisy tutorial" and you'll find lots of step by step tutorials and videos to help you.

Use three strands of thread for each flower, adding one flower to the end of each bare branch and switching between your chosen colours as you work around the wreath. If you're using two colours, you could use my photos as a guide.

Adding the embroidered flowers
 Embroidering the flowers
 Embroidery hoop art in progress

The final bit of embroidery is to add the flower centres. With three strands of thread, sew two tiny stitches in the centre of each flower (like an X). 

Adding the final stitches
Finished embroidery ready to frame

Now remove your fabric (and felt, if you've used some) from the embroidery hoop and re-frame it in a six inch hoop. Take your time getting the design centred in the hoop then tighten the screw as much as you can to keep the fabric (and felt) secure.

Trim the fabric (and felt) roughly, as shown.

Trimming the backing fabric

If you used a layer of felt to back your design, carefully trim it right down to the edge of the hoop. Take care not to snip the fabric in the process!

Trimming the backing felt

With a double thickness of white thread (or thread to match the fabric you've chosen) sew a line of running stitch around the edge of the fabric. Gently pull the thread so that the fabric gets pulled together as shown, then secure the thread with a few stitches.

Neat embroidery hoop back

You've finished! Hurrah! You can now add a loop of co-ordinating ribbon if you want, or hang your hoop directly from a hook or nail.

Finished embroidery hoop art: Never Stop Learning
Never Stop Learning embroidery hoop art


Click here to open the pattern sheet in another tab or window. Make sure you're viewing it full size then print it at 100% - I've included a scale line so you can check if it's printed the correct size. 

This embroidery pattern is for non commercial use only: you can stitch it as many times as you like for yourself or as gifts, but please don't use it make anything for sale. You may borrow a photo or two if you want to blog about this project, but remember to credit me and link back to the original source, and do not reproduce my entire post or share the pattern itself on your site. Thanks! 


For more free embroidery patterns and other crafty tutorials check out my project archive.

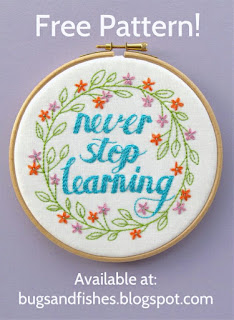
Free embroidery pattern: Never Stop LearningFree embroidery pattern: Never Stop Learning
 

Friday, 17 February 2017

My Flat in Progress: December & January

A couple of weeks before Christmas I made a big change: I moved across the country (to the seaside!) and bought a flat. Since then I've been busy with lots of DIY and new-home admin and cleaning... as well as buying what feels like half the contents of our local branch of B&Q! I'm incredibly lucky to have my parents helping me out, gifting me their time and expertise and giving me lifts to the shops, but there's still a lot to do between us.

As this is going to be such a big ongoing project in my life for a while, I thought it might be nice to do an occasional blog post about how my flat is progressing. I've been taking lots of photos of all the changes we're making and I thought it might be fun to share some of them - I hope you'll enjoy following along in the coming months.

Moving day: using a box as a makeshift table for our first cups of tea!


The first of what will no doubt be many bits of flatpack furniture from IKEA (I love IKEA).


I shared this pic a few days after I moved in because it made me laugh that I had hardly any furniture and no fridge or cooker but I did have a big pile of handmade blankets. Priorities. I'm moving all my boxes and the few bits of furniture I own gradually, so I can live out of part of the flat while decorating the other rooms.


In the first few weeks after moving in we did lots of cleaning and I bought what felt like all the things: everything from paintbrushes to curtains to an ironing board to sandpaper to a plug for the bathroom sink.

I won't bore you with the full list (it's a very, very long one!) but I also bought a new thermostat (wired in by my dad, what a star), a fridge/freezer (and a cooker! hurrah!), some super energy-efficient LED lightbulbs (which also look much nicer than those old long ones), and some moisture-absorbing thingummies to help prevent damp (weird looking but very effective).


Mostly though I have bought DIY equipment, which is starting to take over the place.


The flat has some lovely old features, like the doors...


... and some less lovely newer features! Yes, that is an iron mark on the carpet. Luckily it's a carpet I was planning on replacing anyway.


My mum has been gradually painting the living room white - she is a whizz with a paintbrush and is happy to paint pretty much anything as long as you keep her well-supplied with cups of tea. We're cheating a bit by painting over the wallpaper in the living room instead of stripping it but after several coats it looks pretty good.


It's amazing how much lighter and bigger the room looks replacing the light grey with brilliant white. It all looks very bare at the moment but this is a blank canvas for all my colourful stuff, not the beginnings of a new minimalist lifestyle. I'm quite excited about the possibilities of those alcoves!


We've also started prepping to decorate the spare room: filling and sanding the walls and replacing the wall vent.


We've made lots of little changes too, including: updating the light fittings and adding simple white shades; putting up a new white curtain rail, some thick curtains and some sheer voiles in the bedroom; giving the radiator in the living room a fresh coat of paint (and cleaning inside and behind it too - those things trap so much dust!); and moving one of the bathroom mirrors to a wall with better light.


Oh, and I'm not going to show you a photo of my new loo seat but: I got a new loo seat! I never thought buying a loo seat would make me happy, but it totally did! We also put up a shower rail in the bathroom, bought a new shower curtain which turned out to not be entirely waterproof (not great), took down an old cabinet, and painted over the lilac bathroom walls with more white paint.

Not bad for a month and a half, right?