Showing posts with label tips. Show all posts

Friday, 17 May 2019

Cutting Out Small Felt Shapes... With Blu Tack!

If you've ever had trouble cutting out small and fiddly pattern pieces from felt then today's blog post is for you!

Cutting Out Small Felt Shapes With Blu Tack

ADVERTISEMENT: This tutorial is sponsored by Bostik, and is part of a series of crafty projects I'm creating to promote their range of adhesives. Click here to see all the posts in the series!

This is the third post I've shared using Bostik's products this week. On Monday I made fantastic festival hairbands using Bostik's Power Repair glue, then on Wednesday I made fun travel-themed notecards using their PVA Glue, Glu Dots and Micro Dots.

Today I'm sharing a Blu Tack Hack: a new way to use that sticky blue stuff we all love using to put up posters!

Cutting Out Small Felt Shapes With Blu Tack

When you're using a small paper template to cut out a tiny felt shape, I always recommend cutting out a bit of felt slightly bigger than the template. This is much easier to work with than handling a large piece of felt.

Cutting Out Small Felt Shapes With Blu Tack

When you go to cut out the shape though, how do you hold the template in place?

For larger pattern pieces you could use pins, but not for a little shape like this. You can hold the paper onto the felt with your non-dominant hand, but this takes practice and the paper can slide about a bit as you're cutting and make your finished shape much less accurate.

I've sometimes recommended using a bit of clear sticky tape to hold shapes in position but, of course, your scissors will get sticky from cutting through the tape and you can't re-use the template more than a couple of times before it'll start getting bulky from too many layers of tape.

So... why not try using a tiny piece of Blu Tack to hold the paper template in place?

Make a little ball of the Blu Tack...

Cutting Out Small Felt Shapes With Blu Tack

... then press it as flat as possible onto the back of your pattern piece, making sure that none overlaps the edge of the shape. 

Cutting Out Small Felt Shapes With Blu Tack

Press the template firmly onto the piece of felt...

Cutting Out Small Felt Shapes With Blu Tack

... and the Blu Tack will hold the template in position as you cut around it!

Cutting Out Small Felt Shapes With Blu Tack
 Cutting Out Small Felt Shapes With Blu Tack

I always use embroidery scissors for cutting out small felt shapes: look how much smaller and narrower the blades of the small scissors are compared with my sewing scissors! Using embroidery scissors will give you a lot more precision and control when cutting small or detailed shapes.

 Cutting Out Small Felt Shapes With Blu Tack

Once you've cut out the shape, peel off the template then carefully remove the Blu Tack and discard it. Easy peasy!

Cutting Out Small Felt Shapes With Blu Tack
 
If you're worried about the Blu Tack leaving an oily mark on your felt or pulling away a few of the fibres as you remove it, simply add the Blu Tack to the front of the template so it'll be attached to what will become the back of your cut out felt shape.

DISCLOSURE: this post is sponsored by Bostik, who also provided the Blu Tack for my #BluTackHack.

P.S. Fancy some more free crafty goodness? Subscribe to my newsletter for a monthly free pattern and visit my crafty tutorial archive for lots more free projects.

Cutting Out Small Felt Shapes With Blu Tack

Wednesday, 6 August 2014

7 Social Media Tips for Makers

As I mentioned last month, I was included in a piece in last month's Craftseller magazine about social media. I got a bit carried away and sent lots of tips (turns out I type too much just like I sometimes talk too much!) and in the end, thanks to a mix-up, none of them got published. So, I thought I'd share them with you guys today.

This is in no way an exhaustive list of tips - and I am by no means an expert in This Sort of Thing - but I hope you'll find some of them helpful!

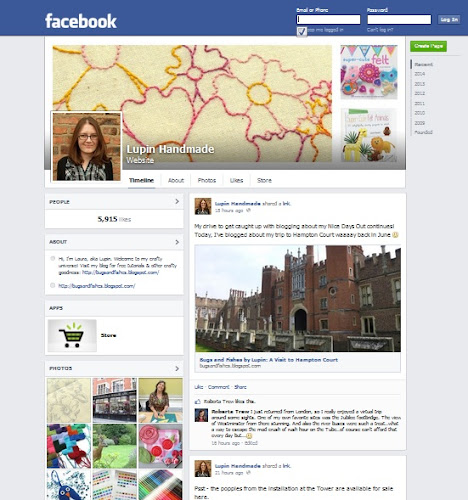
https://www.facebook.com/LupinHandmade
My Facebook Page

1. Make connections.

Remember the all important "social" in "social media" - reply to people when they message you or comment on your photos or Pins, and take time to comment on what others are sharing. One of the very best things about making and selling handmade stuff is being part of a fantastic, friendly creative community. Take part!

As well as being fun, making connections with your fellow makers and bloggers can help your business in all sorts of unexpected ways (networking, baby).

2. Work out what works.

Don't worry, you don't have to join all the different social media sites and update them all constantly. Instead, find out what works for you - what you enjoy doing, what kind of posts and photos people are responding to, and what's driving the most traffic to your shop. But be patient, you're not suddenly going to get a gazillion followers overnight and sell stuff instantly just because you Tweeted about it.

3. Think about your photos. 

If you're using Pinterest, portrait images work better than landscape ones so remember to take a couple in addition to the sizes that suit your shop, etc. Images can often end up getting re-Pinned and even blogged without your link attached, so think about adding your shop or blog name and/or url to the pictures you share to help people find their way back to your corner of the internet.

4. Always be professional!

Don't discuss difficult customers (this is such a turn-off for prospective customers) or bitch about your fellow makers (they probably know how to Google themselves).

You don't need to be a personality-free robot (who would follow one of those?) but think about your audience and target customer and what's appropriate (or not!) to share with them. Should you swear? Talk about politics? Discuss your kid's potty training? The answers to these questions will be different for everyone, but think before you Tweet.

5. Don't just sell, sell, sell.

Obviously you want people to visit your shop and buy things, but no-one is going to follow you if all you do is post links to your Etsy shop or photos of your products. Chat to people, and share interesting things. Link to things that you like and things you think your followers will be interested in.

I link to my newest blog post or tutorials, and mention new products and special offers, etc but I also share products by my fellow makers, interesting craft-themed articles, fun tutorials, great blog posts by the people I follow, etc.

6. Don't spam people with automated tweets.

Make sure that if you've connected your social media accounts and/or your shop to each other that you've un-ticked any settings that auto-post when you update. Getting 20 Tweets in a row from someone because they've just added a batch of listings to their Etsy shop or been Pinning lots of things on Pinterest is super annoying. Oh and if you do set up auto-posting from one account to another, check your feed to make sure the links work!

7. Making first, sharing second.  

Social media is great but remember that there's no point spending hours driving people to your shop unless there's something awesome waiting for them. Put your smartphone down or turn off your laptop and go make some great stuff!

Got any social media tips of your own to share? Leave a comment! :)

P.S. Wanna connect with me on social media? You'll find me on Facebook, Twitter and Google+.

Friday, 30 May 2014

Guest Post: How To Remove the Image Border / Shadow in Blogger

Today's guest post is a useful blogging tip from MJ who blogs at Little Panda Crafts...

-----


Hello everyone! My name is MJ and I blog over at Little Panda Crafts. Thanks so much to Lupin for having me here! 

Today I wanted to share a blogging tip with you all. Do you have that image border or "shadow" that pops up automatically whenever you post a picture? Like this:


At first, I really didn't mind. Then..it started becoming annoying. I wanted to get rid of it...but how? Turns out you can do it with these few easy steps!

1. Go to Blogger. Click on Template, then Customize.


2. Once in Customized, click on Advanced.


3. Scroll down through the choices in Advanced until you see Add CSS. Click on it.


4. Paste the following code into the text box:

.post-body img, .post-body .tr-caption-container, .Profile img, .Image img,
.BlogList .item-thumbnail img {
  padding: none !important;
  border: none !important;
  background: none !important;
  -moz-box-shadow: 0px 0px 0px transparent !important;
  -webkit-box-shadow: 0px 0px 0px transparent !important;
  box-shadow: 0px 0px 0px transparent !important;
}


5. Make sure you hit Enter after the } or last character. Then click Apply to Blog.


And there you go! No more annoying image border/shadow!


I hope you all enjoyed this tutorial! Please let me know if it worked for you, or if you have any questions. Thanks again to Lupin for having me guest post today! :)

Love love love! MJ

-----

MJ is a blogger who loves crafting, writing, and meeting new friends! You can visit her blog at www.littlepandacrafts.blogspot.com to find more crafting or blogging inspiration, or just to chat :) She's also on Pinterest & Bloglovin.

Fancy taking part in my Guest Post series? Click here for more info.

Friday, 7 March 2014

Guest Post: 10 Tips for a Creating a DIY Wedding

This week's Guest Post is from Laura Strutt of Made Peachy. 

In 2012 I was lucky enough to tie the knot with the man of my dreams (yes, I said that, I really am that soppy!). As a pair of creative folks, and also a couple with a fraction of the average UK wedding budget as our disposal, we decided that we’d much rather have a handcrafted, fun and colourful wedding. We had the very best time on our wedding day, and had heaps of fun making all the little bespoke touches. But, taking on a DIY wedding is a big project, here are a few of my top tips for creating your own DIY Wedding…

Photo credit: The DIY Wedding Manual

1. What to Craft & What Not To Craft

When you first decide to go DIY for your Big Day it is hard not to get caught up in the moment and proudly declare that you shall make every single thing all by yourself…even if that means you won’t sleep for six months before the wedding. While we might love to be able to say that we made the whole shebang with our own fair hands, it is important to be realistic too.

If you’ve never sewn a stitch in your life, do you really want your first attempt at dressmaking to be a full length, frothy wedding gown? Will you really have time on the morning of the wedding to hand-tie all 15 bridesmaid’s posey bouquets? I’m not  for a second doubting that you are capable of making each and every element if you put your mind to it, but, it might be wiser to select the items that you confidently know you can make with your current skills, budget and timeframe.
 
Photo credit: The DIY Wedding Manual

2. Find inspiration

Before you start cutting paper, slicing fabrics and going wild with the glue gun, it is always best to have a strong idea of what you are making before you begin. This not only takes the stress out of the whole making process - which is great if you need to make 100 of the said item -  but it also means that you won’t be wasting precious supplies (and time) by scrapping an idea halfway through and starting over. Check out bridal magazines, blogs, Pinterest boards and wedding books for lots of ideas to get you started.

Photo credit: Kerrie Mitchell

3. Keep an eye on the costs

In many cases, it can often work out cheaper to make up your own invitations than to buy bespoke designs from a high street wedding stationer but as any crafter will tell you, handmaking does not necessarily go hand-in-hand with low-cost – more’s the pity

If cost is at the forefront of your planning, be sure to cost out each and every make before you begin – mini jars of homemade chutney as wedding favours that cost £4 each to make sounds like great value, until you realise that you need one for each member of the 250 strong guest list!

4. Set a schedule

If you are making a number of different elements for your big day, you will need to work to a schedule – which sounds like a bit of a passion killer, but looking at the different elements and assessing the time required for each you will be able to prioritise each make.

Working on things in a logical order – rather than picking out the thing that your most excited about making – will help to bring all the many elements of the DIY preparations together. Now, it would be shame if the 35 vintage tea cup candles that you so lovingly made weren’t enjoyed by your guests because you didn’t get the invitations finished up in time to invite everyone you had hoped to attend.

Photo credit: The DIY Wedding Manual

5. Recruit your friends

What are bridesmaids for if not to get busy with glitter and glue? By calling on your nearest and dearest you’ll soon find if anyone has a flare for baking and might want to make your wedding cake, or is a whizz with a sewing machine and would be happy to whip up an army of bridesmaid frocks. Well, if you don't ask you’ll never know!

Getting together a group of crafty friends and working production-line style is a great way to get through a mountain of labour-intensive makes, like the invitations, place settings or even the order of service stationery. Remember to offer you team of helpers refreshments, or they may not come back to help again!

6. Buy handmade

If handmade is your passion and you find that you have run out of time or lack the experience to make that last crucial thing on your wedding to-do-list, all is not lost. There are a wide range of professional designer/makers out there that offer a whole host of beautiful wedding supplies – many can even worth with your current design ideas to really personalise your wedding. Check out some of the amazing handmade wedding goodies on Etsy, Folksy, and NotOnTheHighStreet to get you off to a flying start.

Photo Credit: Kerrie Mitchell

7. Make space

One thing that comes with a handmade wedding is a whole heap of creative clutter. It won’t be long before you’re falling over boxes of tulle and showering the place in sequins. If you can, set out a small area of your home in which to work on your wedding projects – this way everything will be kept neat and tidy in one spot, ready for when you want to get stuck in.

Clear plastic storage boxes are great for stowing away both makes-in-progress and finished projects – this also makes transporting decorations, table settings and other carefully made goodies to the venue (and back) quick and easy.

Photo credit: The DIY Wedding Manual
 
8. Find ‘Together’’ tasks

Depending on your fella, the thought of spending a Saturday adding a halo of glitter to the petals of 4000 silk roses might make his blood run cold. Let’s not fall out over this, find creative projects that you can do together. Divide out projects based on each other’s skills. Failing that, has he always fancied himself as something of a DJ? Great - he can work on your wedding day play list!

Photo Credit: Kerrie Mitchell

9. Make a day of it

Wedding themed workshops are growing in popularity, with local craft stores offering a wide range of creative one day sessions ideal for learning new skills. These make a great idea for a hen party – what better way to have some crafty fun with your chums than by making your own tiaras or fascinators? Better yet, you’ll be able to take away these new found skills and put them to good use on many of your other wedding projects.

Photo credit: Kerrie Mitchell

10. Enjoy it!

You enjoy making things, you want to enjoy your wedding planning and the Big Day itself, so make sure that the things that you make aren't stressing you out – if a project isn’t going to plan, try not to get upset about it (often easier said than done, I know), think if you can update it or change it, check online to see if there are any how-to guides that might help you. Or, failing that, consider ditching it in favour of something else.

DIY Weddings are a whole heap of fun, so have a giggle, take and share lots of photographs and have your self some pre-wedding fun – remember you're not only making the bits and bobs for your special day, you're also making some pretty fabulous memories too!

----------

Laura blogs daily at www.madepeachy.com sharing projects, how-to guides, recipes and handmade style. She is the author of The Sewing Manual (Haynes, 2013) and her new book The DIY Wedding Manual (Haynes, 2014) was published last month. You can also find her on Twitter, Pinterest, Instagram and Facebook.

Pop back tomorrow for a chance to win a copy of Laura's new book: The DIY Wedding Manual.

Fancy taking part in my Guest Post series? Find out more info HERE. 

Saturday, 1 March 2014

A Top Sewing Tip

Don't leave your work unattended on the floor when there are kitties about!

During an afternoon of sewing on the sofa I came back from making tea to find this little lady casually sitting next to a bit of purple felt she'd obviously been having fun catching / attacking. Luckily it was just leftover scraps and not something I was sewing.


"What? This was nothing to do with me!" *innocent face*


This is why the kitties aren't allowed in my studio! :)

Monday, 27 February 2012

How To Cut out Small Felt Shapes

One of the questions I get asked most often is "do you have any tips for cutting out small and fiddly felt shapes?"... I've written about it before in my guide to designing and making your own felt brooches, but I thought it would be helpful to have a separate post about it.

I always recommend buying a pair of embroidery scissors for felt crafting. The small, sharp blades make it much easier to cut out small or intricate shapes.

These are the scissors I use in my work - you can see how much smaller the blades are on the two pairs of embroidery scissors compared to the standard sewing scissors.


I sell a smaller pair of stork embroidery scissors in my shop. If you're going to be doing a large amount of cutting, you might want to invest in a pair with comfy handles (I bought mine from John Lewis).

I always roughly trim any excess felt around the paper pattern piece before I start cutting the shape - I find a small piece of felt is much easier to manoeuvre.


Hold the pattern piece in place against the felt between your thumb and fingers while you cut around the pattern.


Cutting out small or fiddly shapes can be tricky, so go slowly, turning the felt & pattern piece in your hand as you cut.

If the shape is really fiddly and/or if you're using a nice colour or some lovely felt you don't want to waste, you might want to practice on some unwanted scraps to get the hang of it before you cut out the shape for real.

Please do share any of your own tips in the comments :)

Found these tips helpful? Buy me a "coffee" and help support my blog!

Buy Me a Coffee at ko-fi.com

Subscribe to my newsletter for a monthly free pattern and visit my crafty tutorial archive for lots of free projects.

Visit my shop to buy my printable PDF sewing patterns:

Thursday, 6 September 2007

Some thoughts on product photos...

Having spent a lot of time this morning taking photos of assorted cards, I then spent almost as long sitting at my computer tweaking, cropping, and then (oh dreaded chore of chores) naming each picture and filing it in the appropriate place on my computer. Whilst doing so, I realised how many of my photos have been just shoved in random folders and set about tidying them up a bit, naming lots, re-filing many and deleting several.

I also found a whole load of VERY old pictures, taken way back in January when I'd first started with the whole Etsy lark and was taking pictures of some cards to list.... and looking at them I realised just how much my photos have improved in the intervening months. There were even some photos of the same cards as I'd photographed today (not that stock hangs about in my house for ages, no no, not at all) and the direct comparisons were pretty interesting. I don't think by any means that my photography nowadays is any good, but I'm getting much better at picking the right kind of light to photograph in and I'm learning with practice how best to use my camera (and the image-processing software that came with it - nothing fancy but everything helps!).

Sample pictures taken for super-old listings... a shot of the set (as it was then) of cards...
... nice and dark there, weird blue tissue paper backdrop (hmm). And that was probably the photo I used in the very first slot! mmm, tempting! I think not. Oh and here's one of my detail shots (better than some I found!) ...
... taken in not the best light (on my kitchen table with a lamp if I remember correctly) and this may have been before I noticed that handy macro button on my camera.

Now this is the same card photographed today, with the same camera, on my kitchen windowsill (slightly overcast but natural daylight) ...


I took one of it inside its cellophane wrapper, too, and took a cropped shot of the felt square. I shall use the middle one as the first (thumbnail) photo I think even thought it's not as in-focus as I would like. Any improvements between the January batch and now are mostly a result of setting, trial and error, and lots and lots and lots of practice!

I have run out of things to say now. I think I shall go delete the rest of those photos...