I have lots of fun news to share this month! It's funny the way these things work out - you work on a whole bunch of different projects at different times, then they're all published at once and you seem like a super-busy crafting machine.
Today I'm delighted to be able to show you guys the projects I designed for Sew Sweet Creatures, a new book from Lark Crafts which features 16 plush animals with matching accessories:
I know I am a teeny bit biased but this book is straight up ADORABLE. I actually emitted a small high pitched squeak upon seeing everyone's projects - all the animals are very cute and their accessories are super charming.
You can make a cupcake-baking squirrel, an adventurer bear, a party-loving fox, a lumberjack beaver (complete with logs joined together by velcro so you can "chop" them!), and more!
I designed four creatures for the book.
There's Alex the crafty bunny, who loves to knit and sew...
... (look! there's Alex peeking out from the inside cover of the book!)...
... Olivia the fairy mouse who's here to grant your wishes...
... Lynne the festival-loving panda...
... and Samuel the superhero pig!
It was an absolute joy to design these animals and all their accessories, and so much fun coming up with little stories about them and their lives. I hope you guys will have just as much fun stitching them when you buy the book!
Sew Sweet Creatures is out now in the USA and will be published here in the UK later this autumn. It's available from Amazon USA, the Book Depository and many other bookshops, and you can pre-order it from Amazon UK. Please note: The Amazon and Book Depository links in this post are affiliate links.
Showing posts with label plush. Show all posts
Friday, 23 October 2015
Sew Sweet Creatures: Adorable Plush Animals to Stitch!
Labels:
animals,
craft book,
cute,
felt,
plush,
plushies,
sew sweet creatures,
sewing book,
softies
Sunday, 26 October 2014
How To: Felt Candy Corn Plush
After making some felt candy corn ornaments I couldn't resist scaling up the pattern and making some GIANT CANDY CORN :)
I stitched a big mama candy corn and a baby candy corn. A giant candy corn or a whole family of them would make great decorations for Halloween, propped up on a bookcase or tucked among the cushions on your sofa.
They're dead easy to sew - and I've even re-sized the templates for you so you can just print them out and start sewing. Hurrah!
To make the plush candy corn, you'll need to refer to the candy corn ornament tutorial.
Follow steps 1 & 2, cutting out the pieces and sewing them to some backing felt.
At step 3, instead of adding seed beads for the eyes you'll need to add black felt eyes. Sew these in place with black sewing thread and whip stitch. Sew the smile with black embroidery thread (floss). I used three strands of six-stranded thread.
Follow steps 4 & 5 to cut out the candy corn shape and cut a backing shape. If you want you could make the back match the front (minus the face!) but using plain felt saves you lots of time.
Skip step 6 as you don't need to add a ribbon.
Then follow steps 7 & 8 to sew up the candy corn and stuff it. I used blanket stitch for sewing the larger versions of the candy corn as it gives a neat finish, but you could stick with whip stitch if you prefer.
And that's it! One giant plush candy corn, ready to spread some cuteness this Halloween.
Click here for template sheet 1 and here for template sheet 2. Make sure you're viewing them at full size, then print them at 100%.
This tutorial is for personal use only: you can use it to make as many felt candy corn as you want for yourself or as gifts, but please don't make any for sale. You may borrow a couple of photos if you want to blog about this project, but remember to credit me and link back to this page on my blog, and do not reproduce my entire tutorial / share my templates on your site. Thanks!
Enjoyed this free tutorial? Buy me a "coffee" and help support my blog!
Subscribe to my newsletter for a monthly free pattern and visit my crafty tutorial archive for lots more free projects.
Visit my shop to buy my printable PDF sewing patterns:
I stitched a big mama candy corn and a baby candy corn. A giant candy corn or a whole family of them would make great decorations for Halloween, propped up on a bookcase or tucked among the cushions on your sofa.
They're dead easy to sew - and I've even re-sized the templates for you so you can just print them out and start sewing. Hurrah!
To make the plush candy corn, you'll need to refer to the candy corn ornament tutorial.
Follow steps 1 & 2, cutting out the pieces and sewing them to some backing felt.
At step 3, instead of adding seed beads for the eyes you'll need to add black felt eyes. Sew these in place with black sewing thread and whip stitch. Sew the smile with black embroidery thread (floss). I used three strands of six-stranded thread.
Follow steps 4 & 5 to cut out the candy corn shape and cut a backing shape. If you want you could make the back match the front (minus the face!) but using plain felt saves you lots of time.
Skip step 6 as you don't need to add a ribbon.
Then follow steps 7 & 8 to sew up the candy corn and stuff it. I used blanket stitch for sewing the larger versions of the candy corn as it gives a neat finish, but you could stick with whip stitch if you prefer.
And that's it! One giant plush candy corn, ready to spread some cuteness this Halloween.
This tutorial is for personal use only: you can use it to make as many felt candy corn as you want for yourself or as gifts, but please don't make any for sale. You may borrow a couple of photos if you want to blog about this project, but remember to credit me and link back to this page on my blog, and do not reproduce my entire tutorial / share my templates on your site. Thanks!
Enjoyed this free tutorial? Buy me a "coffee" and help support my blog!
Subscribe to my newsletter for a monthly free pattern and visit my crafty tutorial archive for lots more free projects.
Visit my shop to buy my printable PDF sewing patterns:
Labels:
candy corn,
cute,
felt,
free tutorials,
halloween,
how to,
plush,
plushies,
softies
Wednesday, 5 March 2014
12 Awesome Free Stuffed Toy / Plushie / Softie Tutorials
Stuffed toys, softies, plushies, plush, soft toys, whatever you call them they're fun to sew!
Inspired by last week's Guest Post - a review of Abby Glassenberg's book Stuffed Animals: from concept to construction - today I'm sharing a round-up of links to 12 fantastic free softie patterns.
5. Stuffed Marshmallow - Wild Olive. Super simple and SUPER cute.
6. Playful Stuffed Crocodile - Sew 4 Home. Those teeth! So great.
Got the toy-making bug and want to learn how to design and make your own softies? Check out the review of Stuffed Animals by Abby Glassenberg I shared last week. Abby also has lots of fun free sewing tutorials on her blog, While She Naps.
Inspired by last week's Guest Post - a review of Abby Glassenberg's book Stuffed Animals: from concept to construction - today I'm sharing a round-up of links to 12 fantastic free softie patterns.
1. DIY Nessie - We Lived Happily Ever After. Make your own Loch Ness Monster!
2. Mr Ted - Craft Schmaft. A modern take on the classic teddy bear.
3. Animal Bean Bags - Tried & True. Who knew cubes could be so cute?
4. DIY Handmade Walrus - The A & B Stories. I love his tusks!
5. Stuffed Marshmallow - Wild Olive. Super simple and SUPER cute.
6. Playful Stuffed Crocodile - Sew 4 Home. Those teeth! So great.
7. Donkey Softie - Myra Masuda, on the Etsy Blog. Love the ears and the cute eyes!
8. Myrtle the Turtle - The Purl Bee. Make use of some of that pretty fabric in your stash.
9. Superhero Soft Toy - Lisa Tilse at CraftTuts+. Easy to customise to create a personalised gift.
10. Stegosaurus - Nuno Life. My favourite kind of dinosaur.
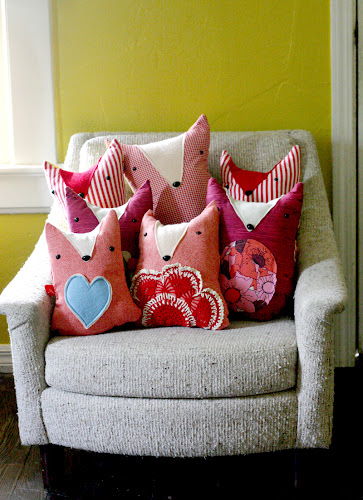
11. Plush Fox Dolls - A Beautiful Mess. Every sofa needs a fox cushion!
12. Kawaii Yeti Monster - Amanda Tepie at CraftTuts+. Just adorable.
Got the toy-making bug and want to learn how to design and make your own softies? Check out the review of Stuffed Animals by Abby Glassenberg I shared last week. Abby also has lots of fun free sewing tutorials on her blog, While She Naps.
Labels:
craft tutorials,
free tutorials,
plush,
plushies,
sewing,
sewing tutorials,
soft toys,
softies,
stuffed toys,
tutorials
Wednesday, 9 February 2011
A Ring-Bearing Owl
Have you been watching Big Fat Gypsy Weddings on Channel 4?
I've not seen it, but apparently on this week's episode one of the super over-the-top weddings included (wait for it) a real live ring-bearing owl.
An owl! Carrying the wedding rings! So nuts, and also so, so, awesome.
Of course, I had to make a felt version immediately and spent a happy evening last night making this fella and refused to go to bed until I'd finished him:

The owl is carrying a little felt envelope which opens up so you can put rings (or other important things that need delivering via owl) inside it.

This is one of those projects that makes the boyfriend think I've gone completely insane ("you're staying up late to sew a what???"), but I'm pretty chuffed with how it turned out!
I think the design & colours could use some tweaking though (I was in such a rush to sew him together I just grabbed the nearest felt to hand!) ... and it definitely needs the addition of a loop of ribbon at the top so he could be carried by a flower girl down the aisle & hung up for display later... hmm...
I've not seen it, but apparently on this week's episode one of the super over-the-top weddings included (wait for it) a real live ring-bearing owl.
An owl! Carrying the wedding rings! So nuts, and also so, so, awesome.
Of course, I had to make a felt version immediately and spent a happy evening last night making this fella and refused to go to bed until I'd finished him:

The owl is carrying a little felt envelope which opens up so you can put rings (or other important things that need delivering via owl) inside it.

This is one of those projects that makes the boyfriend think I've gone completely insane ("you're staying up late to sew a what???"), but I'm pretty chuffed with how it turned out!
I think the design & colours could use some tweaking though (I was in such a rush to sew him together I just grabbed the nearest felt to hand!) ... and it definitely needs the addition of a loop of ribbon at the top so he could be carried by a flower girl down the aisle & hung up for display later... hmm...
Labels:
inspiration,
new designs,
owl,
plush,
wedding
Thursday, 8 April 2010
Hello from Rob
I've got a lovely work experience student helping me out this week, and today he's going to do a guest post while I put my feet up and have a cuppa! Enjoy :)
Hello everyone! My name is Rob Jones, I'm on my second year of illustration at the University of Gloucestershire and I have recently been getting work experience in the world of crafts! I've already been at Stuffed Nonsense with Bex and El, who make really nice toys and were very kind for letting me get in the way in their shop for a couple of days!
The animals that have been posted are my first attempt at handstitching toys, they are pretty much the starting point of my final major project which is going to be based on British eccentricity, they are also helping towards my first stop motion animation which is a very scary thought!
-------

Hello everyone! My name is Rob Jones, I'm on my second year of illustration at the University of Gloucestershire and I have recently been getting work experience in the world of crafts! I've already been at Stuffed Nonsense with Bex and El, who make really nice toys and were very kind for letting me get in the way in their shop for a couple of days!
And now for the last two days I have been working with Laura , I have learnt so much about crafts in this time by annoying her with my many many questions and helping out where I can, Laura runs an amazing business and is also a very busy person so I would like to thank her for taking the time to help me over the last two days :)

The animals that have been posted are my first attempt at handstitching toys, they are pretty much the starting point of my final major project which is going to be based on British eccentricity, they are also helping towards my first stop motion animation which is a very scary thought!
Anyway.. all of my development will be on my blog at some point soon so I look forward to any comments if anyone finds it interesting :) - rob
Saturday, 17 November 2007
365 / 93 - The Ignoring of Plans
So yesterday I said "I am planning on making little penguin pins , finishing that little pile of tree stumps and also working on lots of oak leaves" and then yesterday evening I did none of these things! I didn't even start any of them! I faffed about most of the evening, tidying up a little, listening to the radio and leaving my dinner in the oven while I was busy nattering on Etsy (oops). I did get a little bit of sewing done though, clearly influenced by all the cake I have eaten this week (I am having a very sweet toothed phase at the moment) - cake slice brooches:
One is Victoria sponge and the other is coffee cake I think (or perhaps chocolate? any thoughts?). I'm quite pleased with them, but now I want to bake a sponge cake!
Subscribe to:
Posts (Atom)