Showing posts with label snow globe. Show all posts

Saturday, 11 May 2019

Snow Globe and Angel Felt Ornaments & Embroidery Patterns

I've added two of my Christmas patterns to my shop this week!

My snow globes tutorial includes templates and step by step instructions for sewing felt snow globe ornaments, a snow globe embroidery pattern, and instructions for using the embroidery pattern to make an embroidered ornament.

Felt Snow Globes Christmas Ornament Tutorial
 Felt Snow Globe Christmas Ornament Tutorial
 Embroidered Snow Globe Christmas Ornament Tutorial
 
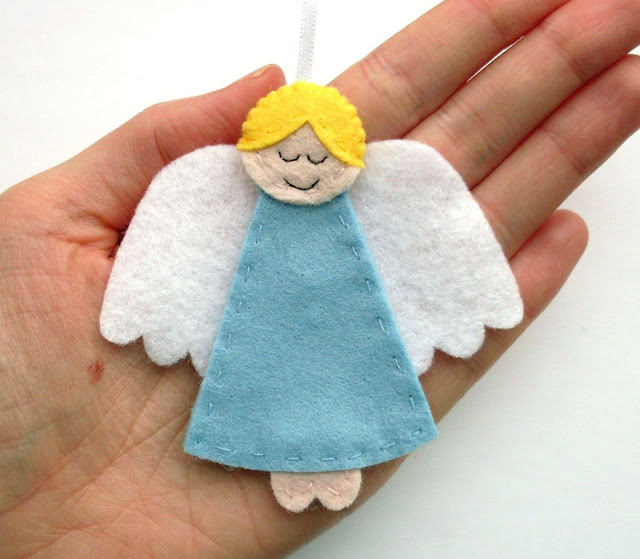
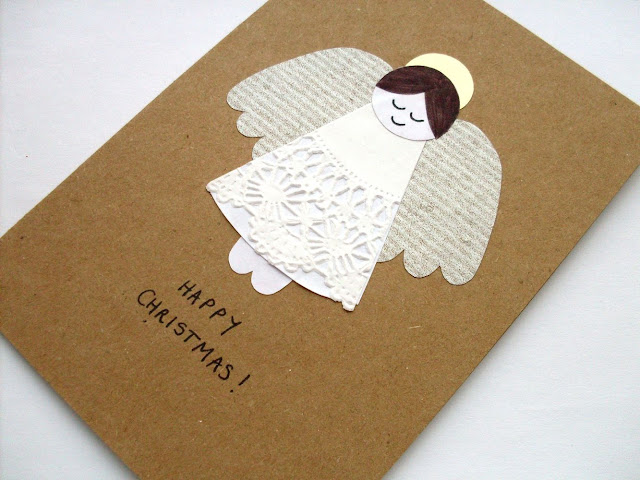
My angels tutorial includes templates and step by step instructions for sewing two styles of felt angel ornaments, an angel embroidery pattern, and a tutorial for making angel Christmas cards.

Felt Angel Christmas Ornament Tutorial
 Felt Angel Christmas Ornament Tutorial
Felt Angel Christmas Ornament Tutorial
 Felt Angel Christmas Ornament Tutorial
Angel Embroidery Pattern
 Angel Christmas Card Tutorial

When you buy any patterns from my shop you can of course make lots of things for yourself and to give as gifts, but you can also sell the finished items at craft fairs or in your Etsy shop, etc, as long as you credit me as the designer.

Buy the printable PDF patterns from my shop and the patterns will be available to download immediately! Shop before May 16th (for the angels) or May 17th (for the snow globes) to grab your fave project at the bargain launch price.

P.S. I've got lots more patterns in progress at the moment - follow me on Instagram or subscribe to my newsletter for all the latest updates from me and my shop.

Snow Globe PDF Sewing Tutorial & Embroidery Pattern by Laura Lupin Howard
 Angel PDF Sewing Tutorial & Embroidery Pattern by Laura Lupin Howard

Monday, 26 September 2016

Monday, 19 September 2016

Tuesday, 10 December 2013

How To: Felt Snow Globe Ornament

UPDATE: this tutorial is now part of my printable PDF snow globes pattern, available from my shop.


Subscribe to my newsletter for a monthly free pattern and visit my crafty tutorial archive for lots of free projects.


Friday, 29 November 2013

How To: Cross Stitch Snow Globe Ornament

After stitching my snow globe pattern, I decided that I wanted to turn it into a Christmas decoration. I'd not left enough fabric around the outside to frame it in a small embroidery hoop so I stitched it into a felt bauble instead.


The easiest way to make your own cross stitch snow globe ornaments would be to stitch onto plastic instead of fabric canvas then cut out the shape, add a ribbon loop and back it with a piece of white felt... but I thought it was worth writing up instructions for how I made my felt bauble in case you fancied making one too. You can follow these steps to turn any small cross stitch design into an ornament!


To make your ornament you will need...

- your cross stitched design (you can find the snow globe chart here)
- felt in your chosen shade, plus matching sewing thread and narrow ribbon
- white sewing thread
- a compass or something you can draw round to create the bauble template
- a ruler, some paper and a pencil for drawing the template
- tracing paper
- polyester or other toy stuffing (optional)
- sewing scissors (embroidery scissors are ideal), a needle, pins

To make the ornament...

1. Place a piece of tracing paper on top of your finished cross stitch design, and trace around the edge of the design, following it as closely as possible. Then draw a second line a few mms around the outside, to create a line that frames the shape of your cross stitching. Cut around this second (outer) line so you've got a tracing paper shape slightly larger than your design.


2. Create a bauble template by drawing a circle the size you want (I used one approx. 4 inches across) and adding 3 straight lines to create the top of the bauble. Use this paper template to cut out two felt bauble shapes.

3. Draw around the bauble template to create a second template. Position your tracing paper shape in the middle of the new template and draw around it. Then carefully cut out this inner shape, creating a template that's a bauble shape with a hole in it. This is the template for the piece of felt that will frame your stitched design. Carefully pin the template to some felt and cut it out.

You will now have three pieces of felt that look something like this:


4. Trim away the excess fabric from around your cross stitch design - you should probably leave more fabric than shown in this photo, I got a bit over-enthusiastic!


5. Place the cross stitch design on one of the felt bauble shapes. Place the framing felt shape (the bauble with the hole in the middle of it) on top, and use it to carefully line up the design so it's in just the right position. Set aside the framing shape and pin the cross stitch design to the backing felt.


6. Use white sewing thread and small whip stitches to sew the cross stitch design to the felt, removing the pins as you sew around the edge.


7. Place the framing felt piece in position and pin it in place. Use whip stitches in matching sewing thread to sew around the inner edge of the felt "frame", removing the pins as you sew. I had to tug the felt slightly to get the frame to be super-neat around the snow globe, so the felt was slightly stretched.


I turned the bauble shape over once I'd finished sewing, and trimmed away any of the framing felt which was then sticking out beyond the original (backing) bauble shape. There wasn't much to trim away, but neatening it up at this stage is important as it needs to still be a neat circle and also needs to match the final piece of felt added in the next steps.

8. Cut a length of narrow ribbon (approx 5 or 6 inches long) and fold it over to create a loop. Use matching sewing thread and whip stitches to sew the ribbon ends to the top of the third bauble shape. Sew the ribbon to the front of the shape and take care to sew into the felt not through it. This piece will become the back of the bauble.


9. Place the front and back bauble pieces together, and sew around the edge with blanket stitch (or whip stitch) and matching sewing thread. If you want a flat bauble, sew all the way around it and finish your stitching neatly at the back. If you want a stuffed bauble like mine, sew most of the way round and leave a gap for adding stuffing.


10. Lightly stuff the bauble, then sew up the remaining gap with more blanket stitches (or whip stitches). Finish your stitching neatly at the back.


The back of your stuffed bauble should now like this:


And the front will look something like this:


These instructions are intended for non-commercial use - please don't use them to make and sell snow globe baubles, or sell copies of the instructions themselves. You may borrow a few photos if you want to blog about this project, but remember to credit me and link back to the original source, and do not reproduce my tutorial on your site. Thanks!

Enjoyed this free tutorial? Buy me a "coffee" and help support my blog!

Buy Me a Coffee at ko-fi.com

Subscribe to my newsletter for a monthly free pattern and visit my crafty tutorial archive for lots more free projects.

Visit my shop to buy my printable PDF sewing patterns:

Thursday, 28 November 2013

A Winter Snow Globe - Free Cross Stitch Pattern!

Regular readers may remember that last winter I designed my first non-text-based cross stitch pattern: a snow globe with snow-capped mountains, a little cabin and some fir trees.


There was a lot of trial and error involved in the design process, but it was very enjoyable solving the problems of how to turn the picture in my head into a little pixelated, stitched picture... and I was so pleased with how it turned out!

I totally meant to draw up a neat version of the chart to share with you guys, but (as I couldn't mention at the time) I was busy working on my new book and I just didn't have the time to get it sorted out. Boo.

11 months later, I have finally drawn up the chart so you can stitch your own cross stitch snow globe. Yay!


You can find the chart and a few notes at the bottom of this post. The chart should be pretty simple to follow if you look at a photo of the finished piece - I've marked all the outlines and main shapes, you just need to fill in the blocks of colour as shown in the photos. I hope the notes will all make sense, but if there's something you're not sure about, please do leave a comment and I'll get back to you as soon as I can!


I haven't included suggested thread colours, as I just used some random shades from my stash but you will need: silver or light grey (the metallic silver thread looks great but it is a total pain to stitch with!), white for the snow, sky blue (this should be dark enough that the white "snowflakes" stand out clearly), brown for the cabin and the tree trunks, and green for the tree branches.

I stitched my snow globe on 14 count Aida, and used half strands of embroidery thread for all the cross stitching (e.g. three strands of six-stranded thread). I also used a single strand of black thread for the outline of the door and the window frame.

Click here to view the chart in another window/tab, and print it at 100%.


This cross stitch pattern is for non commercial use only: stitch as many snow globes as you like as gifts, but please don't make any for sale or sell the chart itself. If you blog about this project, please don't post the full size chart on your site and remember to credit me and link back to my blog or this post. Thanks!

Enjoyed this free pattern? Buy me a "coffee" and help support my blog!

Buy Me a Coffee at ko-fi.com

Subscribe to my newsletter for a monthly free pattern and visit my crafty tutorial archive for lots more free projects.

Visit my shop to buy my printable PDF sewing patterns:

Tuesday, 18 December 2012

A Stitched Snow Globe

Remember the in-progress cross stitch project I blogged about a couple of weeks ago?

Well, I finished it!


As you can see, it's a little silver snow globe - with a couple of mountains, a little cottage, some fir trees and (of course) some snow.


This is the first cross stitch picture I've designed - before this I'd only made a sampler or two, and some mini sampler brooches. I'm quite pleased with the finished result and, apart from the fiddly silver sections and all that unpicking I had to do when I changed my mind about some of the colours I was using (sigh), this was a super relaxing project to work on in the evenings this winter.

I think there is definitely going to be more cross stitch in my future!


I'm hoping to get the pattern written up neatly so I can share it with you guys sometime soon... if anyone is interested?