Showing posts with label felt buttons. Show all posts

Tuesday, 24 March 2020

How To: Make Felt Covered Buttons

Sooo... we're all staying inside and making things for the next few weeks, then?!

If you're looking for crafty ideas to help yourself relax and pass the time, remember you'll find loads of free patterns and project ideas in my tutorial archive and my printable PDF patterns are still available as instant downloads over in my Etsy shop.

I've also got lots of fun projects in progress which I'll be sharing here on my blog in the coming weeks. First up: how to make awesome felt buttons!

Felt buttons are so much fun. I've made lots of them over the years with colourful felt scraps left over from other projects, and I thought it was high time I shared a "how to" with you guys so you can make some too.
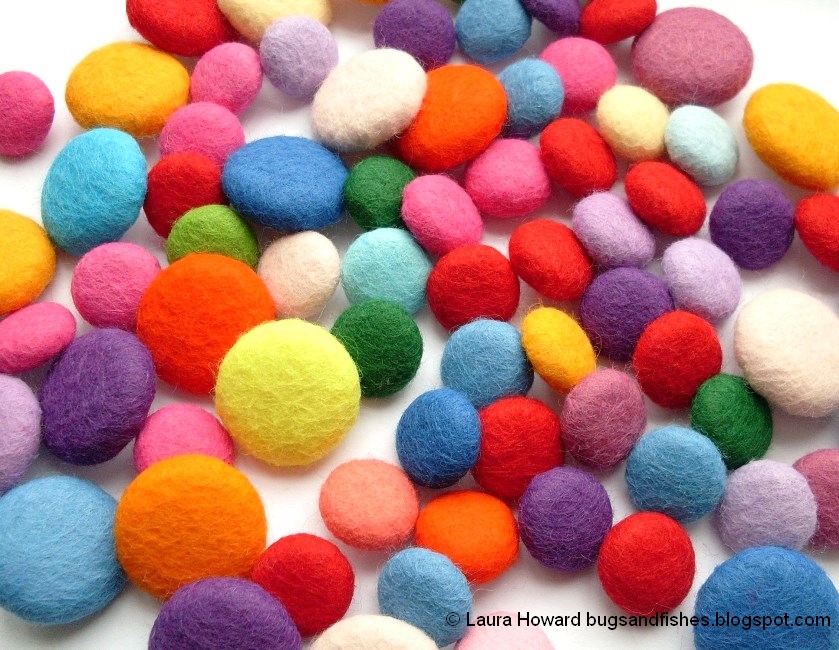

Felt buttons are, essentially, buttons covered in felt. You can use them to embellish all kinds of craft projects and they make fantastic centres for felt flowers (they'd look great with my fabulous flowers!). 


To make them you'll need some cover buttons in your chosen size(s) - I prefer plastic ones because they're cheaper but metal ones are also available. You'll find these for sale in online craft shops, Etsy, or in your local craft or haberdashery shop (when those re-open again! Gosh these are such weird times we're in, aren't they?).

You'll also need some felt, of course. Cover buttons are designed to be used with fabric, so thinner and more flexible felt works best. I usually use a soft wool/acrylic blend which looks lovely but is easy to stretch around the button shape.


If you're planning on making lots of buttons I'd highly recommend buying a button covering tool. Pressing the front and back of the cover buttons together takes a fair bit of force and the button tool will save you a lot of effort, as well as helping you make nice neat buttons.

I use the Prym universal button covering tool, it includes holes for five different button sizes (11mm, 15mm, 19mm, 23mm, and 29mm)... I've got a lot of use out of mine over the years! 


Your cover buttons will probably come with a template, showing you how large your piece of fabric (or, in our case, felt) needs to be to cover the button. The Prym tool came with a template, too.


Use the correct size template to cut out a circle of felt from your chosen colour.


To cover the button in felt, you need to wrap the felt around the front of the cover button then press the back of the button into position. The back clicks inside the front, holding the edges of the felt/fabric in place and giving you a lovely button ready to use.

The button tool is really helpful during this process! To cover a button using the tool place your felt circle over the correct sized hole in the tool then add the front of the button on top, facing down.


Carefully press your button and the felt into the rubbery shape. The felt will be pushed up around the button, as shown.


Squash the edges of the felt down towards the centre of the button with your fingers.


Put the back cover button piece in position then use the hard section of the button covering tool to press it firmly in place.


Your finished buttons may look slightly different if you use a different style of button to mine, but here's how the back of my button looked:


And here's the front. Mmm... buttony goodness...


Now just sew your finished button to your chosen project, as you would with a normal button.

Caution: making felt buttons is slightly addictive! :)

Enjoyed this free tutorial? Buy me a "coffee" and help support my blog!

Buy Me a Coffee at ko-fi.com

P.S. Subscribe to my newsletter for a monthly free pattern and visit my crafty tutorial archive for lots more free projects.

Visit my shop to buy my printable PDF sewing patterns:

Wednesday, 16 October 2013

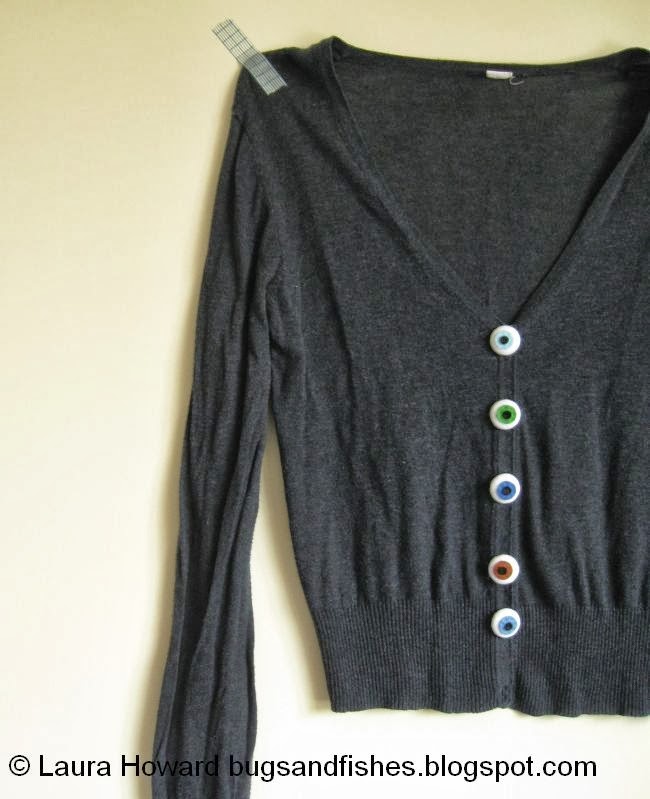
How To: Felt Eyeball Buttons for Halloween

With Halloween just around the corner, I thought I'd squeeze in an extra tutorial this week... how to make fun felt eyeball buttons!


I used my buttons to customise an old cardigan - perfect for adding a spooky touch to an outfit this Halloween.


Felt buttons are quick and easy to make!

You will need:
- small pieces of black felt (for the pupils) and blue, green and brown felt (for the irises)
- matching sewing threads
- soft white felt (30% wool blend felt is perfect for this) or white fabric
- 22mm cover buttons
- a button covering tool (optional, but very useful! I use the Prym universal button covering tool)
- a needle and a pair of embroidery scissors
- the circle templates at the bottom of this post

If your cover buttons are a different size to mine, use a pencil and a compass to draw your own templates for the pupil and iris.

To add the buttons to a cardigan you will also need.... a cardigan, matching sewing thread and some pins. If you want wear the cardigan more than once, make sure you choose washable (synthetic) felt when making the buttons!


1. Use the templates to cut out one white eye from felt or fabric, one black pupil and one coloured iris.


2.  Place the iris and pupil in the centre of the eye and sew them in place with matching threads. Sew the pupil in position with a small X made from two stitches, then sew the iris with a line of small running stitches. Trim any excess thread at the back.


3. Now follow the instructions on your pack of cover buttons (or look online for a how to) and cover a button with your decorated circle of felt/fabric. Using a button covering tool makes it much easier to snap the front and back of the cover button together and the holes in the tool I use are very helpful for checking that the decoration on your button (in this case, the pupil and iris) are in the centre.


4. Repeat steps 1-3 to make a selection of eyeballs with different coloured irises. If you want you could also add some red stitches to the eyes for a bloodshot effect.


To add your eyeball buttons to a cardigan, first remove the original buttons (apologies for the low quality of some of these pics, navy blue is a real pain to photograph!).


The buttons on most cardigans are likely to be much smaller than the large eyeball buttons, so the eyeballs won't fit through the buttonholes. Because of this you need to turn your cardigan into a jumper (sweater) by sewing the front together (make sure the neckline of your cardigan is large enough that it's easy to take off and on again!).

Pin and then sew the front of the cardigan shut, using matching sewing thread and small running stitches. Make sure you don't sew the front and back of the cardigan together!


Then use a double thickness of sewing thread to sew on the eyeball buttons, sewing them securely in place through where the old buttons were. I left off the final button at the bottom as I preferred how it looked with just five buttons.


And you're done! :)


Click here to view the template sheet in another window/tab, and print it at 100%.


You may borrow a couple of photos if you want to blog about this project, but please remember to credit me and link back to the original source, and do not reproduce my tutorial on your site. Thanks!

Enjoyed this free tutorial? Buy me a "coffee" and help support my blog!

Buy Me a Coffee at ko-fi.com

Subscribe to my newsletter for a monthly free pattern and visit my crafty tutorial archive for lots more free projects.

Visit my shop to buy my printable PDF sewing patterns:

Saturday, 25 May 2013

Lots of Crafty Goodness in my Shop!

Pssst - I've added a whole bunch of stuff over in the Craft Supplies section of my shop...

There are wheels of rainbow pins in leaf, heart and flower designs:


Bundles of colourful ribbons I'm clearing out from my craft stash, including lots of pretty polkadot ribbon:


Some fun sheets of printed felt - in camouflage & zebra prints:


And remember when I was making all those felt buttons back in March...?


Well, I've finally got them photographed & added to my shop, hurrah!


There's also one last set of "not quite perfect" giant buttons (and lots of "perfect" giant buttons too)...


 ... and a whole bunch of other "destash" listings, including buttons, hat elastic and grip seal bags (which are super useful for packaging or for storing small supplies or pattern pieces).


And remember, there are still lots of handmade goodies available in my SALE section... sale prices start from just £1. Click here to see the full range of treats in stock.


Monday, 4 March 2013

More Buttons, More Destash Bits & Bobs

I've been busy making more felt buttons - they are so addictive! I'm planning on putting some packs of these together & adding them to my shop in the next week or so.


I've also been busy listing some more "destash" craft supplies, including colourful buttons...


... felt beads...


... felt ric rac...


... and lots of useful bits and bobs like grip seal bags:


You can find all the destash supplies HERE.

I've also listed some sets of "not quite perfect" buttons...


... and this afternoon / evening I'll also be adding some more bargain bundles of "not quite perfect" felt squares HERE. UPDATE - the felt bundles have now been listed, hurrah!


Unfortunately, with all this photo-taking and listing, I totally forgot about the embroidery thread giveaway! Oops! I'll pick a winner & announce it tomorrow :)