These embroidered oak leaf brooches are a great way to add a bit of woodland charm to your spring or autumn outfits.
I've included a template sheet at the bottom of this post for making the oak leaves pictured in these photos, but you could also go out and collect your own leaves and replicate them with felt and thread. Going for a walk to find a beautiful leaf would be a lovely autumn activity. It would also be lovely to turn a bit of your favourite tree or a much-loved walk into something you can wear regularly, carrying a little bit of nature with you wherever you go.
The oak leaves also make great headbands! Simply attach your stitched leaf to an elastic hairband or a length of coordinating ribbon and channel your inner wood nymph...
When I used to sew oak leaf brooches and headbands for sale in my online shops I embroidered them all with sewing thread, using a double thickness of sewing thread to stitch the veins on the leaves. In this tutorial I recommend using stranded embroidery thread (floss), which is easier to work with than a double-thickness of sewing thread and gives a nicer finish, but you could of course just double-up your sewing thread if you prefer!
You will need:
- Green or brown felt for the leaves
- Contrasting green or brown backing felt
- Sewing thread to match both your chosen felt colours
- Embroidery thread (floss) for stitching the veins (to match or almost-match the leaf colour, or to contrast nicely - e.g. orange embroidery thread on a light brown leaf)
- Sewing scissors (embroidery scissors are great for cutting out detailed felt shapes)
- A sewing needle and pins
- A brooch clasp
Optional:
- An air erasable fabric marker pen
- Tissue paper
- A biro or other fine pen
To make an oak leaf brooch using freehand embroidery:
1. Use one of the templates provided (or your own leaf sketch) to cut out an oak leaf shape from brown or green felt. Place it on a piece of backing felt.
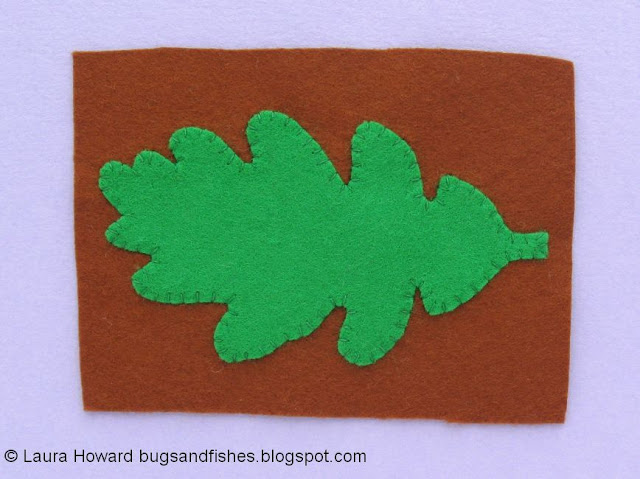
2. Sew the leaf to the backing felt, sewing around the edge with whip stitch and matching sewing thread.
You can pin or tack the leaf in position or just hold it against the backing felt as you sew. I find it helpful to start sewing near the centre of the leaf instead of at one of the ends as this quickly makes the leaf more secure against the backing felt.
3. Backstitch a line down the centre of the leaf, using the lines on the template as a guide. You can sew this completely freehand or use an air-erasable fabric marker to draw a guide line.
Use three of the six strands in your embroidery thread (floss) for this central line, but only two strands for the remaining lines. Add the other lines to the leaf using backstitch, or by sewing a line of running stitch out from the central line then back again filling in the gaps with your second set of stitches to create a continuous line.
Remember that you'll be cutting around the leaf in a moment and take care not to stretch thread across where you'll be cutting.
4. Cut out the leaf shape, leaving a narrow border of the backing felt framing the leaf.
5. Use the shape you've just cut out as a template to cut a matching piece of the backing felt.
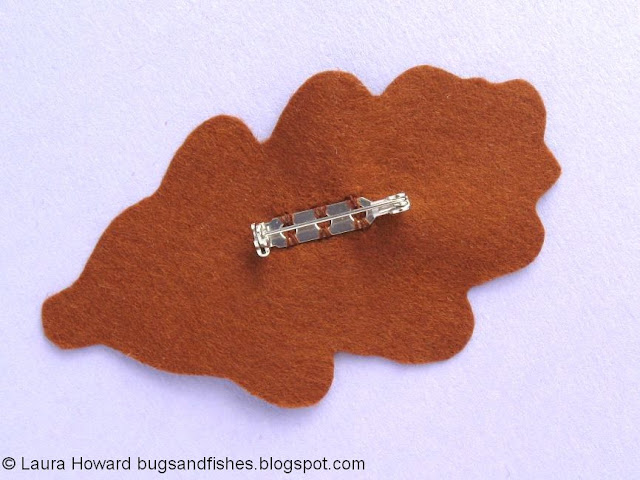
6. Turn over the plain backing piece and attach a brooch clasp with a double thickness of sewing thread. Think about which way up you'd like to wear the leaf before you attach the clasp!
7. Place the front and back of the leaf together and sew around the edges with matching sewing thread. You could use running stitch for this (sewing flush with the embroidered leaf shape, so your stitching is hidden), or use whip stitch or blanket stitch.
To make an oak leaf brooch using an embroidery pattern:
A. Trace one of the templates provided (or your own leaf sketch) onto a piece of tissue paper. Pin then tack the tissue paper to your chosen felt.
B. Embroider the leaf design, following the lines on the tissue paper pattern. Use embroidery thread and backstitch and/or running stitch as described in step 3, above.
If you're sewing the inner lines only (as shown in the photo below), sew the lines almost but not completely up to the outer line of the leaf (you'll be cutting round this later and you don't want to accidentally snip your threads!).
Alternatively, you can sew all the lines on the paper pattern (as shown below). I used three strands of embroidery thread (floss) for the outer line of the leaf.
C. Remove the tissue paper and cut out the leaf - how you do this will depend on how you decided to embroider the leaf.
If you've just stitched the inner lines, cut around the outer line to create the leaf shape...
... then tear away the tissue paper. Use a pin to carefully remove any remaining small pieces of the tissue paper.
If you've stitched the outer line of the leaf, remove the tissue paper first...
... then cut out the leaf shape, leaving a narrow border of felt around the edge of the stitching.
D. If you've only stitched the inner lines of the leaf, place the leaf shape on a piece of backing felt and sew it in position with whip stitch and matching sewing thread. Then cut out the shape, leaving a narrow border of the backing felt.
E. Follow steps 5, 6 and 7 (above) to finish your leaf brooches, cutting a matching piece of felt then adding a brooch clasp and joining the front and back of the brooch together.
As the fully embroidered leaf doesn't have a backing felt layer, you may want to cut two matching leaf shapes and add one sandwiched between the front and back of the brooch to give it some extra sturdiness.
Enjoyed this free tutorial? Buy me a "coffee" and help support my blog!

Subscribe to my newsletter for a monthly free pattern and visit my crafty tutorial archive for lots more free projects.
Visit my shop to buy my printable PDF sewing patterns:
Click here to view the template sheet, make sure you're viewing it full size then print it at 100%


0 comments:
Post a Comment