I made a big change at the end of last year: I moved across the country (to the seaside!) and bought a flat.
I rather optimistically assumed I'd have time to go sit in cafes a few days after I'd moved in, drinking tea and using the free WiFi to write some blog posts about the move and my Christmas plans and so on.
Did this actually happen? Of course it didn't!
Instead, I spent a couple of busy weeks moving boxes and cleaning and doing DIY (with help from my parents) and shopping for important but rather boring things like a fridge and a cooker and paint and a new thermostat for the central heating and a plug for the bathroom sink...
... and then after all that, I collapsed in a heap under a blanket over Christmas :)
Now it's 2017 already!
I love the possibilities a new year brings, and I'm really excited about this one: putting down roots in a new place, exploring the local area, and making this flat my own.
The flat is going to be my big project for the year - I've got lots of DIY to do, and of course I have already started a Pinterest board of decorating ideas.
I'll still be blogging about crafty things and my Nice Days Out though, don't worry! This isn't suddenly going to become a home decorating blog (though there might be the occasional update now and then!). I've got some fun work projects coming up and lots of creative plans in my sketchbooks which I can't wait to share with you all.
It's been almost 10 years since I started this blog (can you believe it?). I hope you guys will enjoy following along with my crafty adventures for another year.
P.S. The fab minimalist calendar on my wall is a free download from Foreign Rooftops.
Showing posts with label anniversary. Show all posts
Wednesday, 4 January 2017
A New Year and a New Project
Thursday, 25 August 2016
Five Years of Super-Cute Felt
Five years ago this month, my first book - Super-Cute Felt - was published.
I can't quite believe it's been five years! How time flies when you're busy sewing lots of stuff from felt!
I'd had projects published in magazines and other craft books before... but a whole book of projects designed and stitched by me? Very exciting indeed.
Here's the first box of copies that arrived from my publisher back in 2011.
It's been thrilling spotting it in bookshops (and in the haberdashery department of one of my all time fave shops, Liberty) and an absolute joy hearing from people who have bought copies of the book and made things from it.
Since the book was published, I've written a follow up - Super-Cute Felt Animals
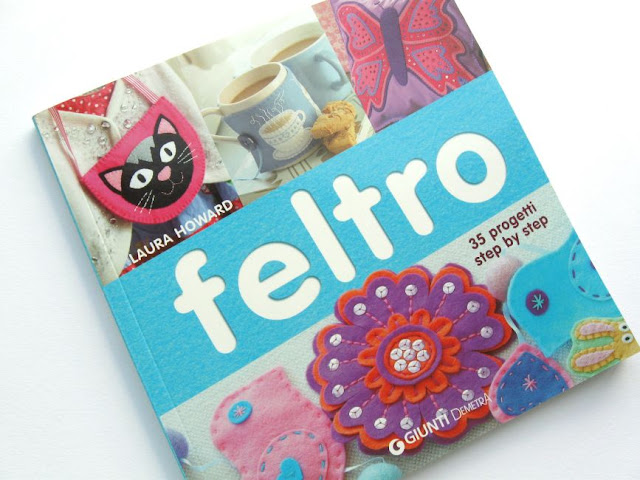
... and Super-Cute Felt has been translated into German, Dutch and Italian.
Here they all are on a shelf in my studio (along with other books I've contributed to - we jokingly refer to this as the ego shelf, but it makes me very happy!).
Huge thanks to everyone who's bought a copy in the past five years, or recommended it to a friend!
Super-Cute Felt is still available to buy from Amazon UK, Amazon USA, the Book Depository and many other bookshops.
Click here to read more about both of my books.
Please note: the Amazon and Book Depository links in this post are affiliate links.
I'd had projects published in magazines and other craft books before... but a whole book of projects designed and stitched by me? Very exciting indeed.
Here's the first box of copies that arrived from my publisher back in 2011.
It's been thrilling spotting it in bookshops (and in the haberdashery department of one of my all time fave shops, Liberty) and an absolute joy hearing from people who have bought copies of the book and made things from it.
Since the book was published, I've written a follow up - Super-Cute Felt Animals
... and Super-Cute Felt has been translated into German, Dutch and Italian.
Here they all are on a shelf in my studio (along with other books I've contributed to - we jokingly refer to this as the ego shelf, but it makes me very happy!).
Huge thanks to everyone who's bought a copy in the past five years, or recommended it to a friend!
Super-Cute Felt is still available to buy from Amazon UK, Amazon USA, the Book Depository and many other bookshops.
Click here to read more about both of my books.
Please note: the Amazon and Book Depository links in this post are affiliate links.
Labels:
anniversary,
craft book,
craft books,
super-cute felt
Friday, 16 January 2015
EIGHT WHOLE YEARS OF BLOGGING???
Today I realised that it has been exactly eight years since I wrote my first blog post.
Eight years! Craziness. It was also my eight year Etsyversary a little while ago... how time flies when you're having lots of crafty fun!
I wrote a little last year about the great things blogging has brought me. I am hugely thankful to past-me for deciding to start this blog on a whim. Excellent decision-making, Laura-from-eight-years-ago, well done.
Despite an attack of Impostor Syndrome earlier this year I am still loving this little blog and the crafty universe it connects me to... and I've got lots of plans for the year to come :)
Eight years! Craziness. It was also my eight year Etsyversary a little while ago... how time flies when you're having lots of crafty fun!
I wrote a little last year about the great things blogging has brought me. I am hugely thankful to past-me for deciding to start this blog on a whim. Excellent decision-making, Laura-from-eight-years-ago, well done.
Despite an attack of Impostor Syndrome earlier this year I am still loving this little blog and the crafty universe it connects me to... and I've got lots of plans for the year to come :)
![]() |
| A blogging birthday requires birthday cake, right? |
Friday, 24 January 2014
My 7 Year Blog Anniversary (!)
This time seven years ago I'd had a blog for a whole week. 1685 blog posts later... and here I am, still blogging!
In my first post I wrote "I'm hoping this [writing a blog] will encourage me to make more stuff..."
Given that I now design and make and write about crafty stuff for a living, I'd say that's a mission well accomplished :)
Here are just a few of the things I made that first year:
Blogging helped kickstart my creativity, especially when I began my Crafting 365 Project to do something crafty and take a photo of it each day for a year. Making stuff every day (and getting excited about making things and sharing them on my blog) definitely helped me become a Featured Seller on Etsy that year, which was a huge thing for my baby business.
Taking lots of photos for my blog has really improved my photography skills, and the challenge of taking interesting photos of my work so I could blog about has resulted in some great pics and, in turn, some exciting features.
Blogging also got me started writing craft tutorials, and reviewing craft books... which has led to my blog getting mentioned on / linked to from all sorts of amazing blogs and websites. It's also led to me writing craft books of my own which is something I still sometimes have to pinch myself about to believe it actually happened.
Plus being part of this crafty blogging community for seven years has been pretty darn awesome!
Thanks so much for all your support, folks xxx
In my first post I wrote "I'm hoping this [writing a blog] will encourage me to make more stuff..."
Given that I now design and make and write about crafty stuff for a living, I'd say that's a mission well accomplished :)
Here are just a few of the things I made that first year:
Blogging helped kickstart my creativity, especially when I began my Crafting 365 Project to do something crafty and take a photo of it each day for a year. Making stuff every day (and getting excited about making things and sharing them on my blog) definitely helped me become a Featured Seller on Etsy that year, which was a huge thing for my baby business.
Taking lots of photos for my blog has really improved my photography skills, and the challenge of taking interesting photos of my work so I could blog about has resulted in some great pics and, in turn, some exciting features.
Blogging also got me started writing craft tutorials, and reviewing craft books... which has led to my blog getting mentioned on / linked to from all sorts of amazing blogs and websites. It's also led to me writing craft books of my own which is something I still sometimes have to pinch myself about to believe it actually happened.
Plus being part of this crafty blogging community for seven years has been pretty darn awesome!
Thanks so much for all your support, folks xxx
Saturday, 9 February 2013
DIY Valentine's Card: I Love You More Than Tea
As I mentioned the other day, I've been doing a bit of tea-themed crafting. Here it is... an easy DIY Valentine's Card:
You can make your card with the message "I love you more than tea", or cross out the "more than" and write a cheeky "almost as much as" instead. You could also swap "tea" for "coffee" if that's your drink of choice :)
1. First, print your message on a piece of plain card. I used Word and set up an A5 page divided into two columns, with the page margins set to "narrow." I added my text in the right-hand column and centred it and played around with font sizes until I was happy with the arrangement. I printed out some test prints on paper...
... and then when I'd got everything set up how I wanted, I printed two versions on white card.
I printed two copies so I could show you guys two variations, but actually I think it's not a bad idea to print a couple of copies so you can choose the final version that turns out best as the later steps can be a bit messy.
2. Test making tea rings on a scrap piece of paper. I put the piece of paper on a tray, and filled a saucer with black tea. I then dipped the bottom of a small mug into the tea, and used it to make prints on the paper. I found it was a good idea to check underneath the mug for any bubbles that need bursting, and also to hold the mug over the saucer for a second or two to allow any large drips to drip into the saucer and not onto your piece of paper.
4. Now the fun bit: decorate your card(s) with tea rings. I placed my cards on pieces of paper towel (kitchen roll) on a tray, with the saucer on the tray next to it. Try to avoid the printed text if you can, as the tea will make the ink run. As you can see from the second picture, this can't always be helped - I placed my tea rings to avoid the text and still managed to drip a big drop of tea on it! Oops.
If you wanted you could always decorate the card with tea stains first and then add the text - the tea distorts the card so it probably wouldn't print very well, but you could hand-write the text instead.
5. Leave your card to dry and then fold them. My cards ended up looking like this when they'd dried:
6. Add the "almost as much as" text if you want to. I'd recommend writing this on one of your paper test prints first to test the position & size of your handwriting & get the finished result exactly how you want it.
7. Finally write your message inside, pop it in an envelope (a brown one would be nice, to go with the tea theme but it's not essential) and give it to your loved one this Valentine's Day :)
This would also be a sweet card to make for an anniversary!
You may borrow a few photos if you want to blog about this project, but remember to credit me and link back to the original source, and do not reproduce my entire tutorial on your site. Thanks!
Enjoyed this free tutorial? Buy me a "coffee" and help support my blog!

Subscribe to my newsletter for a monthly free pattern and visit my crafty tutorial archive for lots more free projects.
Visit my shop to buy my printable PDF sewing patterns:
Labels:
anniversary,
cards,
coffee,
craft tutorials,
diy,
love,
tea,
tutorial,
valentine,
valentine's card,
valentines day
Friday, 17 February 2012
Celebrating Five Years of Blogging!
January 16th was my FIVE YEAR blog anniversary! Wow.
I wrote a note to myself before Christmas to remind me to do something in January to celebrate my blog-iversary... and then lost the note in a pile of paperwork. I just found it again yesterday, a month late. Oops.
Oh well, better late than never, right? :)
Since starting this blog I've written over 1,200 posts and shared over 60 crafty tutorials. My most popular post? Definitely my felt butterfly mobile tutorial (although the paper snowflake curtain comes a close second).
I don't have stats from the very start of my blog back in 2007, but (according to Google Analytics) from December 2008 until yesterday my blog has had 1,052,728 visits, 585,671 unique visitors, and 2,588,332 pageviews. Oh my actual gosh.
I could waffle on for hours about how much I enjoy blogging and how much it has changed my life, but basically I love you guys, you are awesome. Thank you SO much for reading, for linking to my blog, etc, and for all your kind comments over the years.
To celebrate my five years of blogging, if you mention my blog while ordering anything from my website, Etsy shop, Folksy shop or DaWanda shop this month I'll include a free gift with your order. This offer ends at midnight UK time on 29th February 2012. If you miss the box to leave a comment during the checkout process don't worry, just send me an email straight afterwards.
I wrote a note to myself before Christmas to remind me to do something in January to celebrate my blog-iversary... and then lost the note in a pile of paperwork. I just found it again yesterday, a month late. Oops.
Oh well, better late than never, right? :)
Since starting this blog I've written over 1,200 posts and shared over 60 crafty tutorials. My most popular post? Definitely my felt butterfly mobile tutorial (although the paper snowflake curtain comes a close second).
I don't have stats from the very start of my blog back in 2007, but (according to Google Analytics) from December 2008 until yesterday my blog has had 1,052,728 visits, 585,671 unique visitors, and 2,588,332 pageviews. Oh my actual gosh.
I could waffle on for hours about how much I enjoy blogging and how much it has changed my life, but basically I love you guys, you are awesome. Thank you SO much for reading, for linking to my blog, etc, and for all your kind comments over the years.
To celebrate my five years of blogging, if you mention my blog while ordering anything from my website, Etsy shop, Folksy shop or DaWanda shop this month I'll include a free gift with your order. This offer ends at midnight UK time on 29th February 2012. If you miss the box to leave a comment during the checkout process don't worry, just send me an email straight afterwards.
Sunday, 29 January 2012
DIY Mini Envelope Valentine
This is a very simple project but I rather like it! It's a similar idea to the Valentine's garland I posted yesterday...
... a Valentine's Day card with a little semi-transparent envelope on the front, into which you can tuck a folded love letter, or the tickets you've bought to a concert/play/exhibition/etc for a romantic Valentine's surprise.
You could also make one for your anniversary, or use it as a more personal way to present a gift card you've bought a couple as a wedding gift.
1. Cut out a red heart from felt, paper or card using the heart template from this tutorial.
2. Stick the heart onto the front of a mini glassine envelope using double-sided tape. Make sure you leave enough room at the top of the envelope to fold it over.
If you can't get hold of any glassine envelopes, you could make your own see-through envelope using tracing paper. Search online for an envelope template you like, cut and fold the tracing paper to form the envelope and stick it together with double-sided tape.
3. Insert the love letter / tickets / gift card / etc into the envelope.
If you don't want to fold important tickets to fit the envelope (or, like me, you're a bit fussy and don't like how the colour of them clashes with the rest of the card) use a photocopier or a scanner to make a black and white copy of the ticket and add that to the envelope instead.
4. Fold over the top of the envelope, and position it roughly in the centre of your blank card - I used bright red card, but white would also look great and make the red heart stand out even more. Then stick the envelope in position with a piece of patterned washi tape (Japanese masking tape), torn at each end.
Please note: this tutorial is for non-commercial use only. You may
borrow one or two photos if you want to blog about my projects but
remember to credit me and link back to the original source, and do not
reproduce entire tutorials on your site. Thanks!
Enjoyed this free tutorial? Buy me a "coffee" and help support my blog!
Subscribe to my newsletter for a monthly free pattern and visit my crafty tutorial archive for lots more free projects.
Visit my shop to buy my printable PDF sewing patterns:
You could also make one for your anniversary, or use it as a more personal way to present a gift card you've bought a couple as a wedding gift.
1. Cut out a red heart from felt, paper or card using the heart template from this tutorial.
2. Stick the heart onto the front of a mini glassine envelope using double-sided tape. Make sure you leave enough room at the top of the envelope to fold it over.
If you can't get hold of any glassine envelopes, you could make your own see-through envelope using tracing paper. Search online for an envelope template you like, cut and fold the tracing paper to form the envelope and stick it together with double-sided tape.
3. Insert the love letter / tickets / gift card / etc into the envelope.
If you don't want to fold important tickets to fit the envelope (or, like me, you're a bit fussy and don't like how the colour of them clashes with the rest of the card) use a photocopier or a scanner to make a black and white copy of the ticket and add that to the envelope instead.
4. Fold over the top of the envelope, and position it roughly in the centre of your blank card - I used bright red card, but white would also look great and make the red heart stand out even more. Then stick the envelope in position with a piece of patterned washi tape (Japanese masking tape), torn at each end.
Enjoyed this free tutorial? Buy me a "coffee" and help support my blog!
Subscribe to my newsletter for a monthly free pattern and visit my crafty tutorial archive for lots more free projects.
Visit my shop to buy my printable PDF sewing patterns:
Labels:
anniversary,
cards,
craft tutorials,
diy,
felt,
heart,
paper crafting,
valentine,
valentines day,
washi tape,
wedding
Friday, 30 December 2011
Five Years on Etsy
Five years ago yesterday, I set up my Etsy shop as part of my New Year's Resolution to try selling a few of the crafty things I make...
My life has changed hugely in those five years. Being self-employed is a lot of hard work but it's also wonderful and exciting, and I'm so lucky to be able to spend so much of my working life doing creative, crafty things.
To celebrate my five years on Etsy, you can get 10% off all orders from my Etsy shop until the end of 2011 with the code HURRAH - just enter the code when prompted during the Etsy checkout process and the discount will be automatically deducted from your order. The discount excludes shipping, but it includes items already on sale... and I've just added a whole bunch of new things to my sale section to make room for new projects in 2012.
P.S. if there's anything you've ever wanted to ask me about my business or about selling your work online, now's your chance! Add your question to this Etsy forum thread and I'll reply as soon as possible :)
Subscribe to:
Posts (Atom)