Showing posts with label Easter. Show all posts

Tuesday, 17 March 2020

Felt Chicken & Egg Easter Ornaments Tutorial

Make some cute felt chicken and egg ornaments this spring with this easy sewing tutorial, now available on my Patreon as part of a growing library of crafty PDF patterns and tutorials.

 
Felt ornaments aren’t just for Christmas!

Decorate a Spring or Easter display with these cute felt chicken and egg decorations – they’d look fab hung from doorknobs, or from a cluster of budding twigs in a vase. I think they'd also make lovely gifts.

I used three pastel colours to make my ornaments (pastels for spring is such a classic look!) but you could go bolder or choose more realistic chicken and egg shades. A whole garland of chickens in different colours (maybe a rainbow??) would look awesome.


You could also use the templates to sew felt chicken brooches (in my opinion you really can’t have too many fun felt chickens).


P.S. Subscribe to my newsletter for a monthly free pattern and visit my crafty tutorial archive for lots of free projects.

Visit my shop to buy my printable PDF sewing patterns:


Friday, 23 March 2018

Make Felt Chicken & Egg Ornaments for Easter

Sew some cute felt chicken and egg ornaments for Easter or Spring with my latest tutorial for the Village Haberdashery!

Felt Easter Chicken & Egg Ornaments Tutorial
 
These fun felt ornaments are easy to sew and would look lovely hung on an Easter tree, or elsewhere in your home this Spring. You could also use the templates to make fun felt chicken brooches.

 Felt Chicken & Egg Easter Ornaments

I stitched my ornaments in classic Easter pastels, using wool blend felt from the Village Haberdashery's range. Switch up the colours to match your decor, or add extra embellishments with embroidery thread, sequins or seed beads. 

 Set of three cute felt chicken & egg ornaments

Click here for the free templates and step by step tutorial.

Subscribe to my newsletter for a monthly free pattern and visit my crafty tutorial archive for lots more free projects.

Wednesday, 15 March 2017

Spring Flowers Felt Easter Egg Ornaments Tutorial

Wool felt easter eggs decorated with spring flowers


Today I'm delighted to be sharing a free tutorial for sewing felt Easter egg ornaments decorated with pretty spring flowers: primroses, cherry blossoms and narcissi.

Wool felt easter eggs decorated with spring flowers
Wool felt Easter eggs decorated with spring flowers

This post is sponsored by Cloud Craft, who sell 100% wool felt and lots of other supplies for hand stitching projects: fabric, thread, embroidery hoops and tools, buttons and trims, sewing kits, and more!

https://www.cloudcraft.co.uk/

I love their wool felt, it's great quality and comes in a gorgeous range of colours. You can pick the perfect colours for your project or get inspired by their lovely colour collections.

https://www.cloudcraft.co.uk/

These Easter egg ornaments have been stitched with 100% wool felt from the Cloud Craft range - click here to purchase a kit with everything you need to make them!

The felt egg ornaments would make lovely decorations for spring and Easter. You could leave off the ribbon loops to make eggs to display in a bowl, or to use in an indoor Easter egg hunt. You could also mix and match the flowers on the eggs, get creative with your colour scheme, or use the flowers to decorate other things (everything looks better with some flowers on it, right?).

You will need:

The templates provided at the bottom of this post
Grey felt for the eggs
Small amounts of white, pale yellow, bright yellow, pink, bright pink, and orange felt for the flowers.
Co-ordinating ribbon or other trim - I used a lovely grey mini ric rac (20 cm per ornament)
White, orange, yellow and pink embroidery thread
Grey sewing thread
Gold and silver seed beads
Toy stuffing
Sewing needles and pins
Sewing scissors
Embroidery scissors (the small sharp blades of embroidery scissors make them perfect for cutting out small felt shapes)

Optional:
- White, orange, yellow and pink sewing thread
- An air erasable fabric marker

To make the egg ornaments:

1. For each egg you want to make, cut out two egg shapes from grey felt using the template provided.

Cutting out the felt egg shapes

Then use the flower templates to cut out the flower pieces. For the primroses, cut one large and two small primroses from pale yellow felt. For the cherry blossoms, cut one large and two small cherry blossoms from pink felt. For the narcissi, cut two large and four small narcissi from white felt.

cutting out the felt flower pieces

2. Next cut circles for the centres of the flowers. Cut these freehand using the photos as a guide - remember you're aiming for natural shapes so don't worry about cutting perfect circles! You'll need one larger and two smaller circles per egg: bright yellow for the primroses, bright pink for the cherry blossoms and orange for the narcissi.

When cutting small circles, I cut a small square of felt slightly larger than the circle I want to cut. Then I use embroidery scissors to cut in a spiral, cutting out a circle shape. Alternatively you could draw a circle on the felt with an air erasable fabric marker then cut it out.

all the felt pieces, ready to sew

3. For the primroses and cherry blossoms, arrange the flowers and circles as shown and secure eachh of them with an X of two small stitches of matching thread. You can use sewing thread for this, or a single strand of embroidery thread (this is usually made up of six strands - cut a length of thread then separate one strand from the rest to use for your stitches).

sew the circles with an x of two stitches

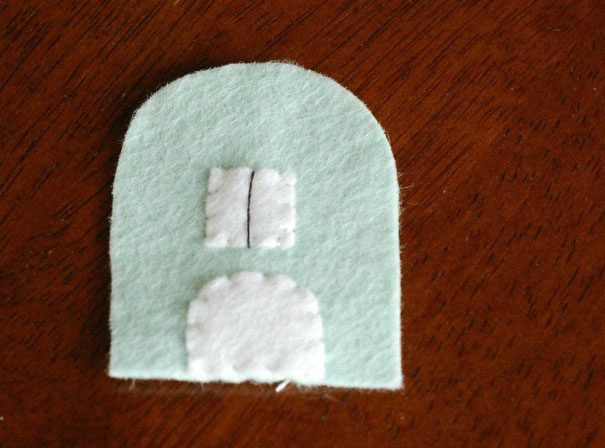
4. For the narcissi, arrange the white flower pieces so they overlap as shown then secure them with white thread and an X of two small stitches. Again, you can use sewing thread or a single strand of embroidery thread. 

secure the narcissi petals

Then add the orange circles to the centre of the narcissi flowers. Sew around the inside edge of each circle with orange sewing thread (or a single strand of embroidery thread), using backstitch to create a continuous line. If you find backstitch tricky, you could sew small running stitches in one direction then sew back in the other direction to fill in the gaps.

sew the narcissi trumpets with backstitch

5. Now it's time to add the embroidery. Throughout this step, use two strands of embroidery thread in the required colours.

For the primroses: use yellow embroidery thread to sew five long stitches radiating from the centre of each flower, as shown.

add embroidery to the primroses

For the narcissi: use orange embroidery thread to sew one long stitch along each petal, as shown. Start your stitches as close to the overlapping felt as possible so the lines seem to be coming right from the centre of the flowers.

add embroidery to the narcissi

Then use white embroidery thread to sew "stars" of overlapping stitches in the centre of each flower. Sew three stitches for each of the small flowers, and four stitches for the large flower. 

 embroidered narcissi
For the cherry blossoms: use bright pink embroidery thread to sew lots of radiating stitches, as shown. For each petal sew one shorter stitch, one long stitch, then another shorter stitch.

add embroidery to the cherry blossoms

If you're sewing a set of three eggs, they should now look like this:

embroidered felt spring flowers

6. Add seed beads to the primroses and cherry blossoms.

Sew three beads in the centre of each flower, sewing each bead flat like an O with two or three stitches of thread. Use sewing thread or a single strand of embroidery thread.

Add gold beads to the primroses with yellow thread, and silver beads to the cherry blossoms with pink thread.

adding seed beads to the flowers

Your eggs will now look like this:

finished felt flowers

7. If you're making the eggs as ornaments, now's the time to add the loops to hang them.

For each egg cut a 20cm piece of mini ric rac or narrow ribbon. Fold the trim in half to make a loop and sew the ends to the top of an undecorated egg piece. Use whip stitch and grey sewing thread to match the felt, sewing into but not through the felt.

adding the ric rac loop

8. Place the decorated front and undecorated back pieces together, so the ribbon / ric rac ends are sandwiched between then. Use grey sewing thread and whip stitch to join the edges, hiding your knot between the layers when starting your stitching.

Begin near the bottom of the egg and sew up and around it, leaving a gap of a couple of inches (a few centimetres) for stuffing.

sewing up the ornaments

9. Lightly stuff each egg with toy filling, adding small pieces at a time to create an evenly stuffed shape.

Then sew up the remaining gap with more whip stitches, finishing your stitching neatly at the back.

 the finished cherry blossom ornament
the finished narcissi ornament
the finished primrose ornament
the finished wool felt Easter egg ornaments

DISCLOSURE: This post is sponsored by Cloud Craft, who sell 100% wool felt and other handpicked needlework supplies for modern making.

Click here to buy a kit of all the materials you'll need to make the egg ornaments.

Click here to open the template sheet in another tab or window. Make sure you're viewing it full size then print it at 100% - I've included a scale guide so you can check if it's printed the correct size.

This tutorial is for non commercial use only: you can stitch as many eggs as you like for yourself or as gifts, but please don't make any for sale. You may borrow a photo or two if you want to blog about this project, but remember to credit me and link back to the original source, and do not reproduce my tutorial or share the templates on your site. Thanks!

Wool felt Easter ornaments templates

Want to make more fun stuff from felt? Check out my archive of free tutorials.

Wool felt Easter egg ornament tutorialWool felt Easter egg ornament tutorial

Saturday, 19 April 2014

Celebrity Egg Tutorials for Tesco Living

UPDATE: Unfortunately these projects are no longer available 

Last week I got to work on a really fun project, making a couple of CelEGGbrity eggs for Tesco Living.

"What did you do today, Laura?" "Oh, I made an egg look like Marilyn Monroe. You know, the usual."

My job is weird and awesome and I love it.


As well as a Marilyn egg, I also made a Tommy Cooper egg:


They were a lot of fun to make! You can find the tutorials for how to make both eggs (and four more CelEGGbrities designed by other bloggers) HERE. 

P.S. The mini felt fez might also come in handy if you wanted to make a Matt-Smith-as-Doctor-Who egg!

Tuesday, 8 April 2014

Guest Post: Felt Spring Bunnies Tutorial

I've got two coordinating spring-themed guest posts to share with you guys this week, both written by the lovely Rebekah from The Little Red Thread. In today's post you can learn how to sew cute felt bunnies!

----

Few things say Spring like bunnies, especially super cute and colorful tiny bunnies!  Make just one for fun or five for a whole party of adorableness.


Supplies:
- scissors
- sewing needle
- polyster stuffing / fiberfill
- 5 squares of assorted pastel felt 4.5” x 4.5” / 12cm x 12cm
- 1 square of white felt 4.5” x 4.5“ / 12cm x 12cm
- 1 square of pink felt 2.5” x 2.5” / 7cm x 7cm
- 10 7mm two-hole black buttons
- coordinating embroidery thread to match your felt colors

Stitches Used:
- straight stitch
- running stitch

How to Create Your Bunnies

1. Cut out all of your Bunny pattern pieces from the template provided.

2. Taking one of your pastel felt squares, cut out 2 x Body pieces and 2 x Ears.  Repeat this for the next 4 pastel felt squares.


3. Next take your white felt square and cut out 5 x Tummy pieces, 5 x Muzzle pieces and 1 x ¼” wide strip for your bunny Teeth Segments, then take the strip and cut 5 x ½” tall pieces out of it.

4. Using your pink felt square, cut 5 x Heart Noses.


5. Picking up one of your pastel bunny Body pieces, center one Tummy piece along the bottom edge and sew in place with a straight stitch using a single strand of white embroidery thread.


6. Align one of the Teeth Segments about ¼” above the tummy piece.  Sew, with a straight stitch using a single strand of white embroidery thread, along the top of the tooth first and then work your way around the entire piece. 


Next, sew a straight line with a running stitch down the center of the Teeth Segment using one strand of black embroidery thread.


7. Center one of your Muzzle pieces over the top of the Teeth Segment.  Use the black line you just sewed to help give you a visual.  You’ll see the top of the Teeth Segment in between the center part of the Muzzle near the top.  Starting in the middle, sew on to the Body with a straight stitch using a single strand of white embroidery thread.


8. Take one of your Heart Nose pieces and align it so that it sits nicely in the middle of the Muzzle.  Sew one straight stitch in the center dip of the top part of the heart using a single strand of pink embroidery thread.  Do another single straight stitch at the bottom point of the heart.


9. Attach the button eyes.  Keep each eye above the Heart Nose and centered over one Muzzle pooch.  Before sewing the eyes make sure you have them turned so that your button holes are horizontal.


Once your eyes are sewn in place take about 3 strands of white embroidery thread and make a knot at one end.


Pull the knot up to the interior button hole so it sits almost flush on top of the button, but not all the way thru it.  This will make a pupil. Repeat for the second button eye.  If you'd like you can add a very small dab of craft glue or fray check to the knots to keep them from unraveling.


10. Add details! Using one strand of black embroidery thread and a running stitch, sew a little arched line underneath each eye.


Then sew on 3 whiskers on each side of the Muzzle using one long straight stitch each.


Set the completed bunny front aside.

11.  Pick up the matching felt color Body piece and one of the matching ears.  Using a tiny straight stitch and one strand of matching embroidery thread, sew on the ear to the Body using the little “tab” at the bottom part of the ear.  Repeat for the second ear.


12. Pair your completed bunny front together with the completed ear section, the ear “tabs” should be sandwiched between the layers. Pin together.  All your stitch work should now be neatly hidden on the inside of your bunny.  Sew together starting on the bottom right hand corner using a running stitch and one strand of matching embroidery thread.  Sew close to the edge of your felt, using neat even stitches.


Go all the way around the bunny body till you reach the bottom left hand corner and stop to add a small amount of fiberfill to the bunny.


Stuff it so it’s slightly plump, then continue sewing the bunny closed till you reach the bottom right hand corner again.  Tie off your thread and you’ve finished one of your bunnies!


Repeat steps 1-12 for the next 4 Bunnies until you have a total of 5.

Make sure you give your bunnies names and feed them each day!

Click here to view the pattern sheet at full size and print.


©2014 Tumus Designs  This pattern is intended for personal use only and not for commercial distribution or reproduction.  Items made from this pattern may not be resold in any form or modification.  Please respect copyright law!

----

Rebekah is a gardening addict, an avid quilter and hand sewing mama to one very busy toddler, 2 ridiculous cats and the wife of an equally talented sewing husband.  She enjoys designing quilt and hand sewing patterns, reading epic fantasy series, obsessing over cute things, photography, yoga pants and the occasional video game binge.  You can follow her exploits and sewing adventures over on her blog.

Rebekah's second tutorial will be posted on Thursday.  

---

Fancy some more free tutorials? Subscribe to my newsletter for a monthly free pattern and visit my crafty tutorial archive for lots more free projects.

Visit my shop to buy my printable PDF sewing patterns: