Today I'm sharing three crafty ideas for jazzing up plain parcels: decorating them with pens, paint and colourful scrap paper.
Decorated parcels are super fun to receive but it's important to make sure they reach their destination safely: use lots of clear parcel tape to secure your decorated parcels before popping them in the post. If you're sending your package via a courier service it's best to wrap your decorated parcel in another layer of brown paper or even in a parcel box to keep it safe and protected on its journey.
This post is sponsored by My Parcel Delivery, a courier comparison site that helps you find the best deals for sending your important parcels.
There are a whole range of courier services that deliver in Europe and internationally - two of the most popular are UPS who have lots of designated drop-off points (no waiting in long queues at the Post Office!) and Parcelforce who can collect your parcel from your very own home.
Follow these handy tips to package your parcels correctly!
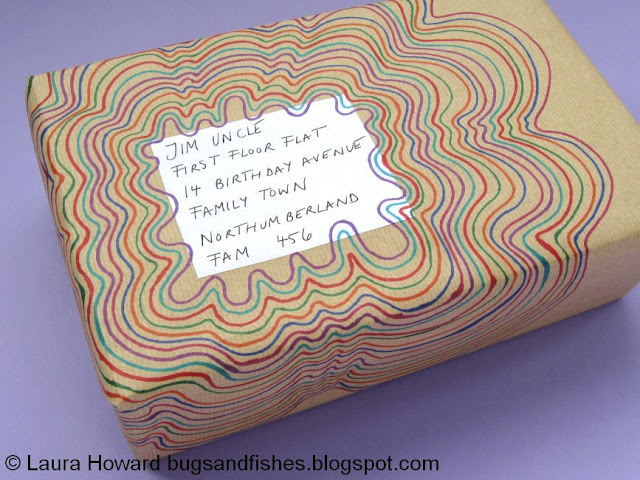
1. Marker Pen Doodles.
Use permanent markers to add a burst of colour to a plain package!
Start by drawing a shape around your handwritten address or printed address label...
... then add more lines to build up a stripey pattern, with one line of each colour.
Keep adding lines until you're happy with your design. I repeated the same colours, adding them in the same order, but you could add colours at random to create different patterns.
Carry your design on around the sides of your parcel for a really vibrant effect.
Cover your parcel in pretty polkadots! Use craft paint or leftover paint from emulsion tester pots - I used a pale lilac purple which stands out really nicely against the brown of the package, but you could use any colour (or colours) you fancy.
Print the polkadots using the eraser end of a pencil, carefully dipping the eraser in the paint then using it to make a few dots on the paper until the paint runs out. Repeat to gradually cover the parcel in dots!
Tip: print some test dots on a piece of scrap paper first to get the hang of printing them, and have tissues or kitchen roll to hand for wiping excess paint off the eraser.
If you're painting directly onto the wrapped parcel, remember that you'll need to wait for the paint to dry before you can turn the parcel over and paint on more sides!
3. Colourful Collages.
Use small bits of leftover gift wrap, scraps of coloured paper and magazine pages to make a colourful collage!
Choose a selection of decorative papers, and use a compass or circular objects in your house (like glasses or spice jars) to draw circles in various sizes. Cut out the circles and arrange them on your parcel to create a bright abstract design.
Stick the circles to the parcel with a glue stick, with the design "overflowing" onto the sides of the package.
Then add pictures you've cut out from magazines or printed from the internet (you'll find lots of free printables online designed for scrapbooking, card making and other crafty projects) and stick them to your parcel to complete your collage.
DISCLOSURE: This post is sponsored by My Parcel Delivery, a courier comparison site that helps you find the best deals around.
Fancy some more crafty goodness? Subscribe to my newsletter for a monthly free pattern and visit my crafty tutorial archive for lots more free projects.


2 comments:
It's not only pretty but shows thoughtfulness! Love all of these and can't wait to try them for some birthdays as I'm not sure our post office will take colorful packages :(
Thanks! If your postal service only accepts plain packages, just wrap the parcel in an extra layer of brown paper - then the parcel will travel safely through the postal system and your friend gets the fun surprise of the decoration underneath when they start unwrapping :)
Post a Comment