Monday, 10 December 2018

Crafty Christmas Bauble Tutorial: Make a Sewing-Themed Ornament for Your Tree!

If you're reading this post (and you're not reading it because you're my mother, who sweetly reads all my blog posts just because I wrote them) then there's a pretty strong chance you love crafting.

Sooo... why not lean into your love of all things crafty and make some crafting-themed baubles to hang on your Christmas tree?

DIY Paper Christmas Baubles Decorated with an old Sewing Pattern

This tutorial is sponsored by Bostik, and is part of a series of crafty projects I'm sharing using their range of adhesives.

So far I've also made a giant floral hula hoop wreath, some autumn leaf cards, some fun 3D cards, a cute autumn scene in a mason jar, and a reindeer Christmas card.

Today's project is super easy and fun: turning bits and bobs from your craft stash into cute sewing-themed ornaments to add to your holiday decor.

DIY paper Christmas baubles

I decorated my baubles with some old sewing pattern pieces, a cheap and colourful tape measure I got in a sewing kit, and some sequins. You could also make these with knitting patterns, embroidery patterns,  or cross stitch charts, and they'd look just as fab!

These crafty baubles would be a great addition to your Christmas tree... but you could also use them to make a garland for your sewing room, as card toppers, or as gift tags (maybe with some crafty gift wrapping?).

DIY paper Christmas baubles

I decorated my baubles on one side only, but if you want your baubles to be double-sided just repeat steps 2-4 as you work through them.

You will need:

- a Bostik Blu Stick (or other glue suitable for sticking paper and card)
- some Bostik White Glu (or other craft glue)
- white card
- craft scissors
- a pencil
- an old sewing pattern (or a knitting pattern or cross stitch chart, e.g. from a craft magazine or a second hand book).
- a measuring tape
- some sequins
- a darning needle (to poke holes in the tops of the baubles)
- some thread, yarn or bakers twine for hanging the baubles
- the bauble template provided at the bottom of this post

How to make a craft-themed Christmas bauble:

1. Use the bauble template and a sharp pencil to draw a bauble shape on white card, then cut it out.

Cutting out the bauble shape

White card is crucial as a neutral base if you're using a semi-transparent sewing pattern to decorate your baubles, but if you're using book or magazine pages, you could use scrap card from cereal boxes or other packaging as your bauble base because the card will be hidden by the thicker paper.

2. Use a glue stick to cover the card bauble in glue, then stick it to the back of the sewing pattern (or whichever craft pattern you're using). I found it helpful to roughly cut out interesting sections of the sewing pattern ready to stick the bauble shapes to, rather than working with whole pattern pieces laid out on my desk.

I used a Bostik Blu Stick for sticking my bauble shapes. The glue starts out blue then dries totally clear, so it's perfect for making sure you've completely and evenly covered a card shape with glue. 

Sticking the bauble shape to the sewing pattern

Before the glue dries, turn the bauble over and carefully smooth down the paper to make sure it's completely stuck down without any air bubbles or creases.

The bauble shape stuck to the sewing pattern

Once the glue has dried and the paper is firmly attached, cut away the excess paper leaving a decorated bauble shape.

Bauble shape decorated with an old sewing pattern

3. Cut a length of measuring tape slightly wider than the bauble.

Don't have a measuring tape or just fancy a different look? If you're using a pattern from a craft book or magazine, you could cut a colourful strip from the photo of the finished project to run across the centre of the bauble.

Adding the measuring tape to the bauble

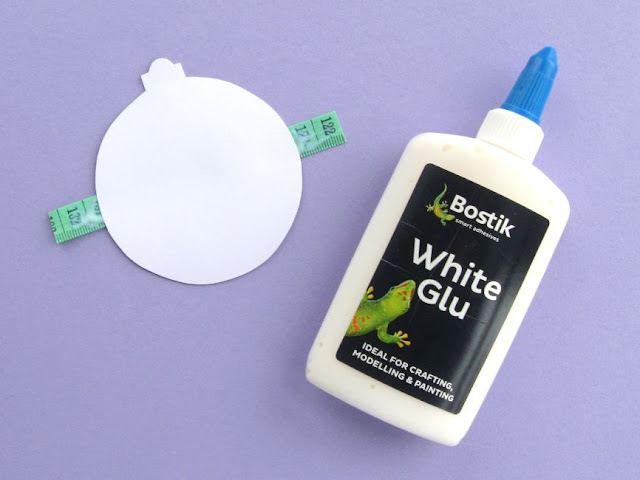
Add some craft glue to the back of the tape and press it in place on the front of the bauble.

I used Bostik White Glu to attach the measuring tape (and the sequins in the next step). The glue is really easy to control via the nozzle and it dries clear so if you accidentally use too much it won't show on your finished bauble.

Adding the measuring tape to the bauble

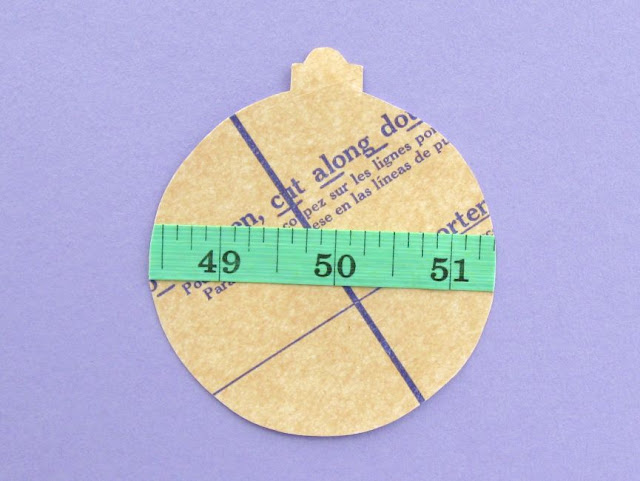
Turn the bauble over and leave it to dry, then trim away the excess tape.

Paper bauble decorated with sewing pattern and measuring tape

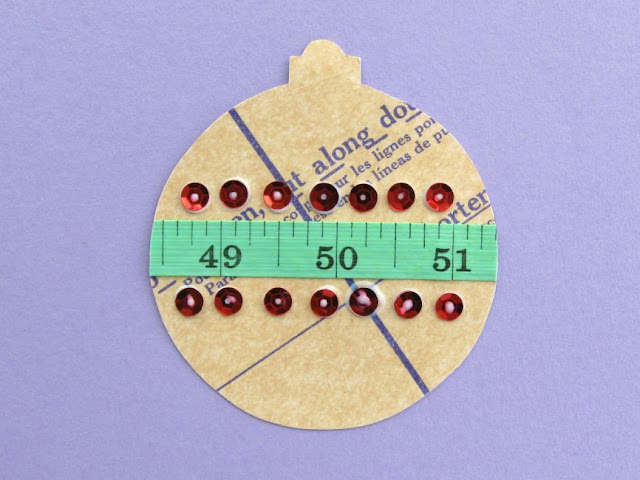
4. Add two rows of sequins to give your bauble some sparkle!

Tip: lay out your sequins on the bauble to check how many will fit in each row, and to get a rough idea of the spacing before you get out the glue.

I used more of the Bostik White Glu to attach my sequins, adding two rows of small dabs of glue then carefully pressing the sequins in position.

Adding the sequins to the bauble

Leave the bauble to dry - the glue will dry clear, so don't worry if you add a bit too much!

Waiting for the glue to dry

5. Use a darning needle to carefully poke a hole in the top of the bauble, then use the needle to thread a piece of sewing thread / yarn / bakers twine. I used some lovely sparkly sewing thread for my baubles, knotting the thread securely in a loop and trimming any excess loose ends.

DIY paper Christmas baubles


DISCLOSURE: this post is sponsored by Bostik, who also provided the Blu Stick and White Glu I used to make the baubles.

Click here to open the template sheet in a new window, make sure you're viewing it full size then print it at 100%.

DIY Christmas bauble template


P.S. Fancy some more free crafty goodness? Subscribe to my newsletter for a monthly free pattern and visit my crafty tutorial archive for lots more free projects.

Wednesday, 21 November 2018

An Autumn Visit to Arnos Vale: Bristol's Victorian Garden Cemetery

I joined a local hiking group this year, which has been a huge amount of fun. I've organised a few walks in my new seaside hometown, and have gone on several others in and around Bristol (though not nearly as many as I'd have liked!).

It's really nice having a group of people to get out and walk with, and I've found that organising walks (which you're then committed to because other people are coming) is a great way to get myself out of the house and exploring. I've decided to use this as a way of kicking myself into finally visiting places which have been on my "Ooh, I want to go there!" list for ages... and this autumn the first place I've ticked off the list is Arnos Vale Cemetery.


It sounds a bit weird to say that I took my hiking group for a walk round a cemetery, but Arnos Vale is somewhere pretty special. Established in 1837, the 45 acre site is really beautiful: a veritable maze of little woodland paths with interesting gravestones and memorials around every corner.


I arrived early to get my bearings before the others arrived and it didn't take me long to get slightly spooked out walking around the site. Okay so the ghost stories I'd been reading that week probably didn't help, but this is an incredibly atmospheric place to explore (particularly on your own, first thing after it opens on a slightly misty autumn morning!).


Later, after the other ladies from the group had headed home (and after we'd had some truly delicious cake from the on-site cafe), I went for another solo wander to take photos and explore some of the smaller paths we'd missed out when following the main discovery trail.


The trail map is available via the website or as a free leaflet from the gift shop - where you can also buy self-guided trail leaflets that tell you more about the history of the cemetary, some of the people buried here, and the symbolism used in gravestones and memorials.


"What did you do on Saturday, Laura?"
"Oh, I walked around a cemetery and thought about death! It was great!"

I'm already trying to work out when I can fit in a return visit.

Monday, 19 November 2018

Behind the Scenes: Working on New Bird Patterns

I'm slooooowly working on turning my old felt bird designs into printable sewing patterns for my shop...


... transforming them from things I've made (with my own weird methods of doing things) into things other people can easily make (with sensible processes, clear instructions, updated pattern pieces, etc).

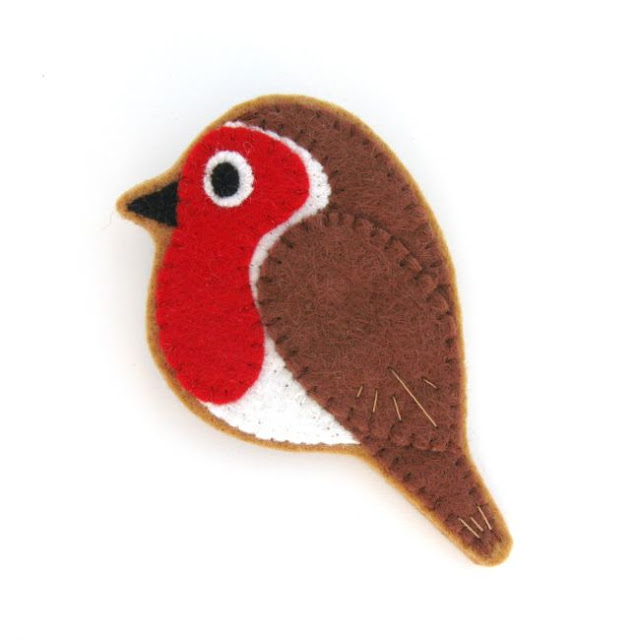
I added the first bird pattern to my shop this autumn: the robin!

https://www.etsy.com/uk/listing/633107342/robin-pdf-pattern-felt-bird-sewing

Each of the felt bird patterns will come with a matching embroidery pattern, so I'm busy designing and stitching those, too. Here's the robin embroidery:

https://www.etsy.com/uk/listing/633107342/robin-pdf-pattern-felt-bird-sewing

Progress is being slowed by all the DIY projects I've got in progress (which are both time-consuming and distracting!) and by the truly terrible quantity and quality of the daylight we've had lately (which makes photographing project steps very tricky!).

Hopefully I'll have some more birds in my shop soon (I will, of course, announce all the new patterns here on my blog and in my newsletter), but in the meantime here are some sneak peeks of the work going on behind the scenes.

I've been sketching embroidery patterns (choosing flora to accompany each bird and making all the patterns work well together as a set = a fun challenge!)...


... cutting out lots of felt pieces and sewing lots of birds as I work out the best way to describe each step...


... and getting stuck into lots of embroidery!

This is the greeenfinch, half-finished. I'm so pleased with how those fir tree branches have turned out.


Here's a slightly blurry snap of my bullfinch embroidery, from a day I was stitching while surrounded by workmen making a lot of mess and noise!


I think I might need to re-stitch this one as I'm not 100% happy with the flowers but We Shall See. Sometimes these magically things turn out how you picture them in your head, and other times they need a bit of tweaking and prototyping to get things just right.


I definitely need to buy some more embroidery hoops so I can get all of the embroideries framed up as I finish them! I've got lots more to stitch but I'm really pleased with these so far, both individually and how they look as a set.


Can't wait to get them finished so you guys can stitch them too! Watch this space...

UPDATE: My greenfinch design has now been added to my shop! Visit my shop to see all my printable PDF patterns:


Friday, 16 November 2018

My Flat in Progress, September 2018: Putting up Pictures

After hanging the first few pictures in my flat this summer (in the hallway), we finally got around to hanging a few more this autumn.

First up: adding a bit of gentle colour to my very minimal spare bedroom.


I am truly terrible at interiors blogging, because not only have I not taken any more photos of these pictures in situ (so you can better see how they look in the room as a whole) I've also not taken any close-up pics so you can actually, you know, see what the pictures themselves look like. Tsk tsk.

Here's an earlier photo of this wall looking very empty and boring. (If you're curious, you can see more pics of my spare room here).


The group over the radiator are six prints by Geninne D. Zlatkis from her collage birds series, which I bought way back in 2008 but still really like. Everyone who visits my flat seems to love them, too - I've actually had a few people tell my off for hanging them in my spare room! (Here are some old snaps of them in the kitchen/diner in my old flat in 2009, aren't they darling?).

After years of only having art up in cheap clip frames and then several more years of having all my pictures packed up in boxes while I was living with my parents, it feels BEYOND AMAZING getting things up on the wall in actual proper picture frames.

I keep changing my mind about what I'm going to hang where, though! The other picture in the spare room - a print of this wonderful illustration by Lauren Nassef (of pottery collector Edward Sylvester Morse) - I was convinced had to be hung in my living room, because I love it so much that I wanted to be able to look at it a lot instead of hiding it away in the spare room (especially as this was going to be the first time I'd ever actually had space to hang it up on a wall somewhere, after almost ten years of owning it). But once we'd hung up the birds, my dad suggested the pottery collector print would look good in the remaining space and it looked perfect... so up it went.

We made the mistake of hanging it centred in the gap between the end of the radiator and the wardrobe instead of centred between the bird pictures and the wardrobe, but it still looks okay enough that I'm happy to leave it as it is - especially as the wardrobe probably isn't going to be a permanent feature in this room, so I may have to re-hang this picture in the future anyway once I get the "final" bit of furniture for this space. Despite this niggle, I'm really happy with how these seven pictures look in the spare room and I've loved looking at them during the past few months while the spare room has been my bedroom!

In September we also put up the first few pictures in the lounge (we'd hung up my office noticeboard in the summer which has a lot of postcards etc pinned on it, but no actual framed art). On the left hand side of the chimney breast, we hung a couple of posters by Sharilyn Wright of lovelydesign: Beautiful Conifers of Canada and Beautiful Leaves of Canada.
 

These posters are another purchase from almost ten years ago (I bought a lot of art in 2008/9!) which have never been up on the wall before so, again, I am thrilled to finally have them on display. I continue to be a terrible interiors blogger with these rubbish photos, but you can get a better look at everything on those shelves here if you're curious. (I've had to shuffle some things around in the "office" end of my living room to find a new home for the little wooden drawers which previously sat on these shelves, because keeping them here would have meant the prints hanging above them would have been ridiculously high up the wall. Like my decisions about where to hang pictures, working out where all my stuff is gonna live in this flat is a slowly evolving process!)

I still need to properly mount the posters as I only just got round to getting custom mounts to perfectly fit them, but it's still fantastic having them up on the wall even if they are hanging a little wonkily right now.

On the other side of the chimney breast are a set of four Royal Mail stamp posters, from the village Post Office my grandparents used to run.


For a closer look at these posters (& to see them in their old homes in my old flat many years ago) check out this post.

Like the bird prints (and all the other art I've owned for a long time), these posters always looked great but look soooo much nicer now I've got them in some Actual Real Proper Non-Clip Frames. I love the design of these four stamp posters, and they have a lot of sentimental meaning for me as they (obviously) remind me of my grandparents but also of my childhood love of stamp collecting (I still love a nice stamp). It's wonderful having them up on the wall together, in pride of place.

I'll take some better pictures of them all in situ sometime soon, I promise! In the meantime, here's the whole room as it looked back in September (complete with stylish furniture island full of stuff displaced by the work going on in the main bedroom).


We didn't do any other DIY in September, but I did get very excited about MIRRORS.

I spent ages trying to work out what picture I could hang in the empty space at the gloomiest end of my hallway, but everything looked truly terrible (you know, because of the gloom). Everyone always goes on about how great mirrors are for adding light to a dark space, so - even though I'm not really a fan of having mirrors as decorative items in my home - I decided to have a look for cheap mirrors online, found a highly bargainous round one that looked like it might work, cut out a paper template the right size to test it out and it looked kinda awesome, sooo...


... now I have a mirror in my hallway. Do I have a photo to show you of said mirror in my hallway? Of course not. (It does look great, though! All those "put a mirror in a dark corner" articles in interiors magazines were right all along!).

Full of mirror enthusiasm, I then ordered a much fancier round mirror to hang on the chimney breast in my living room. It was the perfect size for the space and I'd oohed over it a lot when I'd seen it on Instagram but sadly, in real life, the colour was too coppery / rose gold for my taste so it went back in the box and back to the shop.


Such a shame, but one successful mirror purchase and finally getting more art up on the walls still feels like good decorating progress!

I'll share some more updates (and hopefully some better pictures) sometime soon. In the meantime, click here to catch up with my home renovation progress so far.

Thursday, 15 November 2018

How To: Reindeer Christmas Card Tutorial

Today I'm sharing another paper crafting tutorial: how to make a Christmas card featuring a cute reindeer!


This tutorial is sponsored by Bostik, and is part of a series of crafty projects I'm sharing using their range of adhesives.

So far I've also made a giant floral hula hoop wreath, some autumn leaf cards, some fun 3D cards, and a cute autumn scene in a mason jar.


Whether you send cards to all your friends each year or just have a couple of special people you want to send a note to this holiday season, handmade Christmas cards are such a joy to make and receive.

I'm really pleased with how these reindeer cards turned out, and I hope you'll have fun making one (or lots!) to send to people! You could also use the reindeer design for other festive paper crafting projects, like a scrapbook of your family Christmas.


You will need:

- a Bostik Blu Stick (or other glue suitable for sticking paper and card)
- blank cards (I used light blue cards, approximately 15cm / 6 inches square)
- the templates provided at the bottom of this post, sized to fit your cards
- brown paper (I used some old envelopes for this)
- white paper
- gold paper (I used a small bit of shiny gift wrap)
- scraps of Christmas wrapping paper, or other colourful or decorative paper
- a pencil
- a fine black pen
- craft scissors
- a white colouring pencil (optional)
- a red pen (optional)

How to make a reindeer card:

1. Cut out the templates provided: the two antlers, the blanket and the reindeer. Don't cut along any of the internal lines marked on the reindeer template!

2. Use the templates to cut out one of each piece, turning the template over and carefully drawing around it with a sharp pencil then cutting out the shape.


I used old brown paper envelopes for the reindeer, some shiny gold wrapping paper for the antlers, and some nice Christmas wrapping paper for the blanket.  

Remember: if the paper you're using has a right and wrong side, make sure you draw the shape on the wrong side of the paper so the side you want will be on top when you turn the finished shape over. 

Cutting out the antlers is a little fiddly, so take your time!


Tip: If you wanted to make a lot of these cards, you could glue the paper templates to some sturdy card and cut them out again to make templates which would be easier to draw around.

3. Roughly arrange the pieces on your chosen card, so you can make sure all the pieces fit together neatly and plan their final position on the card.

I chose light blue cards for my deer, so I could add a bit of white paper snow and the blue would become the sky. If you're using another colour of card, you can skip the snow if you want!

Then cut a piece of white paper to form the snow, cutting a wobbly line for the top of the snow. Make sure the paper is large enough to fill the space you want and to overhang the edges of the card. 


4. Cover the piece of paper with craft glue and carefully press it in place on the bottom of the card so the edges of the paper overlap the card, as shown.

I used a Bostik Blu Stick for glueing all the pieces of my Christmas card together - it's perfect for sticking paper and card, and it starts out blue then goes clear which is really helpful when you want to make sure you've evenly covered a shape in glue!


Place the card face down then leave it to dry. When the glue has dried completely, carefully cut away the excess white paper (cutting flush with the edge of the card) so you're left with a neat section of snow on the front of the card.


5. Add glue to the back of the deer shape and stick it in position.

I like to use scrap paper when sticking shapes like this: placing the shape face down on the scrap paper, covering the shape completely in glue (the scrap paper means you can quickly cover the shape without worrying about going over the edges and making a mess), then lifting it off the scrap paper and sticking it in place.

 
6. Then use more glue to stick the antlers and blanket in place, as shown. Take extra care when sticking the antlers as the shapes can be a little delicate!


7. Use the lines on the template as a guide to add the details to the deer: the eyes and nose, the lines of the ears and legs, and the strap holding on the blanket. I drew these with pencil first then a fine black pen, colouring in the eyes and nose with the same pen. For a red-nosed reindeer, simply use a red pen!


8. To add a final detail: colour in the insides of the ears with a white colouring pencil.

You could also give your card some extra sparkle by adding silver or white glitter to the snow!


Your finished card will look something like this:


DISCLOSURE: this post is sponsored by Bostik, who also provided the Blu Stick I used to make the Christmas cards.

Click here to open the template sheet in a new window, make sure you're viewing it full size then print them at 100% (or shrink/enlarge as needed for your cards).


P.S. For lots more free Christmas craft projects, visit my tutorial archive!