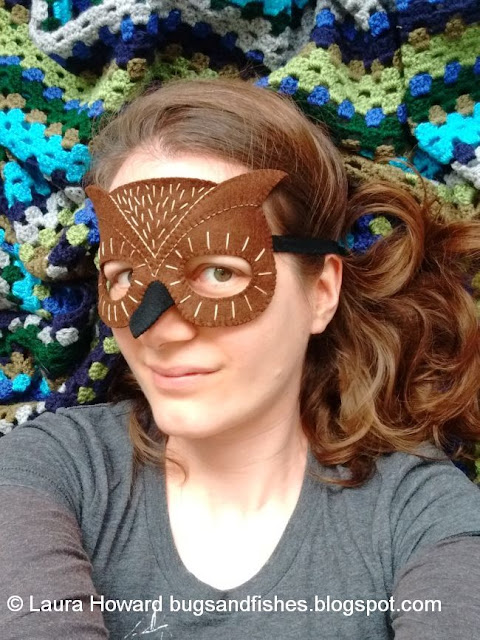
Added bonus: you get to enjoy these "Laura tries to take photos of herself wearing the owl mask without laughing" selfies.
This post is sponsored by Cloud Craft, who sell 100% wool felt and lots of other supplies for hand stitching projects: fabric, thread, embroidery hoops and tools, buttons and trims, sewing kits, and more!
I love Cloud Craft's wool felt, it's great quality, holds stitches really well and doesn't stretch out of shape like some less sturdy synthetic felts or blends. It also meets European Toy Standards and carries the Oeko-Tex ‘confidence in textiles’ mark, so contains no nasty chemicals. You can pick the perfect felt colours for your project or get inspired by their lovely colour collections.
I stitched the owl mask in this tutorial using 100% wool felt and other materials from Cloud Craft - follow the links to find each product in their shop!
You will need:
The templates provided at the bottom of this post
Dark brown felt - I used a 20 x 30 cm sheet of Walnut Whip
Black felt - I used a 20 x 20 cm sheet of Dog's Nose
Black and dark brown sewing thread
1 metre black ribbon (or a length of black elastic, if you prefer)
Light brown embroidery thread (floss) - I used DMC stranded cotton shade 3864
Sewing needles and pins
Sewing scissors
To make the owl mask:
1. Use the templates provided to cut out the following felt pieces: 2 x brown masks, 1 x brown feathers, and 2 x black beaks.
2. Place the feathers shape on one of the mask pieces as shown and pin it in place. Sew the feathers in position with whip stitch and matching sewing thread, sewing only the inside sections (the outside edge of the mask will be sewn later).
3. Time to start decorating the mask! For all the stitched decoration use half strands of light brown embroidery thread (so, for 6 stranded thread just use 3 strands). Begin by sewing along the edges of the feathers, sewing a line of backstitch flush with the edge of the felt to make the feathers stand out clearly.
4. Sew a series of radiating single stitches around each eye hole, as shown. Use the photo as a rough guide and try to sew the same number of stitches per eye.
5. Finish the decoration by filling in the top section of the mask with random single stitches, working from the bottom upwards to fill the space.
6. Cut two 50cm lengths of black ribbon. Position one ribbon end on the undecorated mask shape so it overlaps slightly above the eye hole, as pictured. Pin or hold the ribbon in place and sew it to the felt with whip stitch and brown sewing thread - take care to sew into the felt but not through it. Cut the unattached end of the ribbon at an angle to help prevent fraying.
Repeat to sew the other ribbon piece on the other side of the mask.
If you'd like to use a loop of elastic instead of ribbon ties, sew one end of a piece of elastic to the mask, trim the elastic to the size required and sew the other end to the other side of the mask.
7. Place the front and back mask pieces together, so the ribbon ends are sandwiched between them. Pin or hold the layers together and sew around eye holes. Use whip stitch and matching sewing thread, starting and finishing your stitching between the layers to keep the outside of the mask neat.
8. Sew around the outside of the mask with more whip stitches, sewing the layers together and sewing through the ribbon (or elastic) as you pass it.
9. Place the two beak pieces on top of each other and sew them together with whip stitch. Use a long piece of black sewing thread, starting your stitching in the centre of the curved edge. Hide the knot between the two layers, sew around the beak but don't finish your stitching / trim the thread yet!
10. Fold the beak in half along its length and line it up with the curve of the mask, as pictured. Using the same thread as before, sew the top edge of the beak to the mask with whip stitches. Sew out from the centre to one side of the beak and back again, then out to the other side and back so the beak is held in place securely.
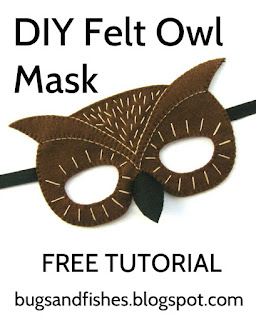
Congrats - you've now got a finished owl mask, ready for lots of Halloween fun!
DISCLOSURE: This post is sponsored by Cloud Craft, who sell 100% wool felt and other handpicked needlework supplies for modern making. Click here to visit their Halloween craft supplies shop.
Click here to open the template sheet in another tab or window. Make sure you're viewing it full size then print it at 100% - I've included a scale guide so you can check if it's printed the correct size.
This tutorial is for non commercial use only: you can stitch as many masks as you like for yourself or as gifts, but
please don't make any for sale. You may borrow a photo or two if you want
to blog about this project, but remember to credit me and link back to
the original source, and do not reproduce my tutorial or share the templates on your
site. Thanks!
For lots more mask tutorials, check out my Patreon pattern library!
Fancy some more free tutorials? Subscribe to my newsletter for a monthly free pattern and visit my crafty tutorial archive for lots more free projects.
P.S. If you've been reading my blog for years, you might recognise this mask as one of the old designs I used to sell in my Etsy shop. I discontinued the owl masks years ago but still get a lot of emails about them, so I thought it would be fun to bring them back as a tutorial so you guys can make your own if you want! :)


0 comments:
Post a Comment