This post is sponsored by Cloud Craft, who sell 100% wool felt and lots of other supplies for hand stitching projects: fabric, thread, embroidery hoops and tools, buttons and trims, sewing kits, and more!
I love their wool felt, it's great quality and comes in a gorgeous range of colours. You can pick the perfect colours for your project or get inspired by their lovely colour collections.
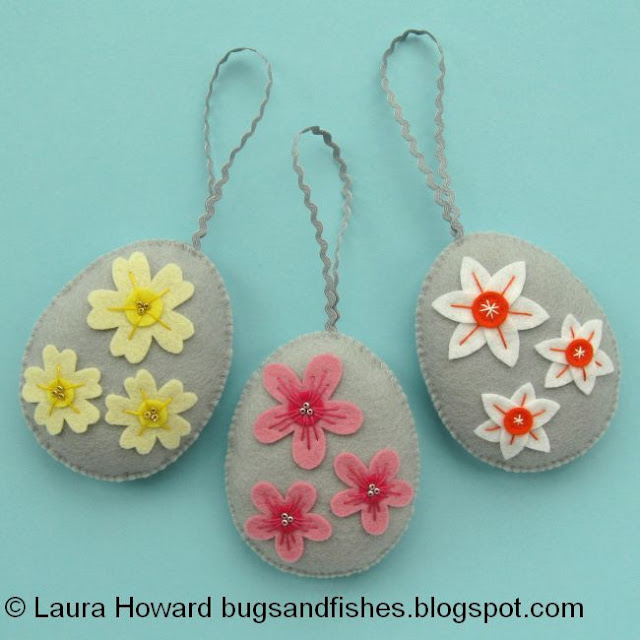
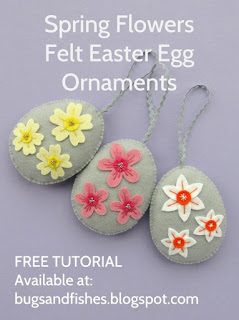
These Easter egg ornaments have been stitched with 100% wool felt from the Cloud Craft range - click here to purchase a kit with everything you need to make them!
The felt egg ornaments would make lovely decorations for spring and Easter. You could leave off the ribbon loops to make eggs to display in a bowl, or to use in an indoor Easter egg hunt. You could also mix and match the flowers on the eggs, get creative with your colour scheme, or use the flowers to decorate other things (everything looks better with some flowers on it, right?).
You will need:
The templates provided at the bottom of this post
Grey felt for the eggs
Small amounts of white, pale yellow, bright yellow, pink, bright pink, and orange felt for the flowers.
Co-ordinating ribbon or other trim - I used a lovely grey mini ric rac (20 cm per ornament)
White, orange, yellow and pink embroidery thread
Grey sewing thread
Gold and silver seed beads
Toy stuffing
Sewing needles and pins
Sewing scissors
Embroidery scissors (the small sharp blades of embroidery scissors make them perfect for cutting out small felt shapes)
Optional:
- White, orange, yellow and pink sewing thread
- An air erasable fabric marker
To make the egg ornaments:
1. For each egg you want to make, cut out two egg shapes from grey felt using the template provided.
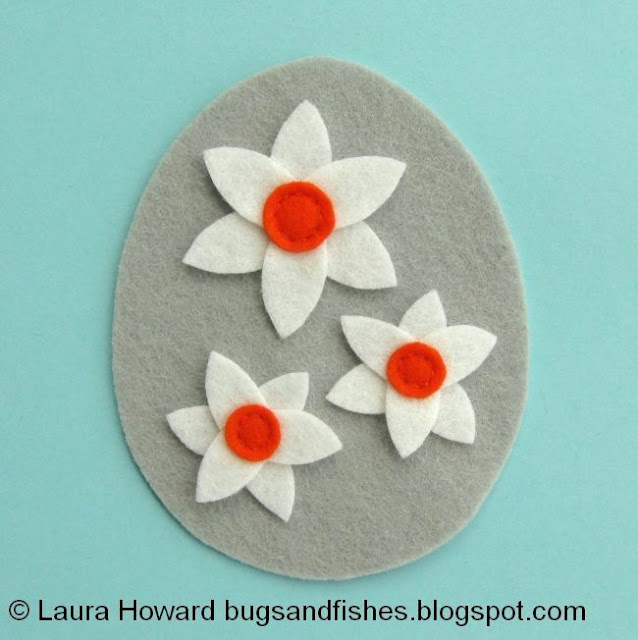
Then use the flower templates to cut out the flower pieces. For the primroses, cut one large and two small primroses from pale yellow felt. For the cherry blossoms, cut one large and two small cherry blossoms from pink felt. For the narcissi, cut two large and four small narcissi from white felt.
2. Next cut circles for the centres of the flowers. Cut these freehand using the photos as a guide - remember you're aiming for natural shapes so don't worry about cutting perfect circles! You'll need one larger and two smaller circles per egg: bright yellow for the primroses, bright pink for the cherry blossoms and orange for the narcissi.
When cutting small circles, I cut a small square of felt slightly larger than the circle I want to cut. Then I use embroidery scissors to cut in a spiral, cutting out a circle shape. Alternatively you could draw a circle on the felt with an air erasable fabric marker then cut it out.
3. For the primroses and cherry blossoms, arrange the flowers and circles as shown and secure eachh of them with an X of two small stitches of matching thread. You can use sewing thread for this, or a single strand of embroidery thread (this is usually made up of six strands - cut a length of thread then separate one strand from the rest to use for your stitches).
4. For the narcissi, arrange the white flower pieces so they overlap as shown then secure them with white thread and an X of two small stitches. Again, you can use sewing thread or a single strand of embroidery thread.
Then add the orange circles to the centre of the narcissi flowers. Sew around the inside edge of each circle with orange sewing thread (or a single strand of embroidery thread), using backstitch to create a continuous line. If you find backstitch tricky, you could sew small running stitches in one direction then sew back in the other direction to fill in the gaps.
5. Now it's time to add the embroidery. Throughout this step, use two strands of embroidery thread in the required colours.
For the primroses: use yellow embroidery thread to sew five long stitches radiating from the centre of each flower, as shown.

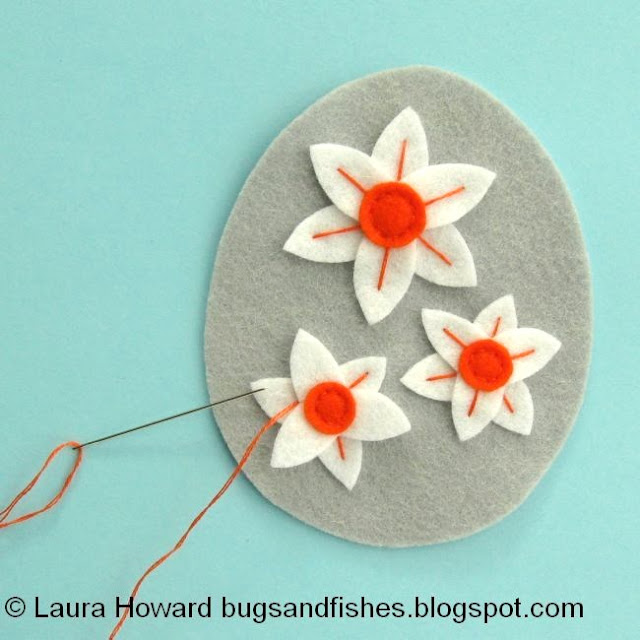
For the narcissi: use orange embroidery thread to sew one long stitch along each petal, as shown. Start your stitches as close to the overlapping felt as possible so the lines seem to be coming right from the centre of the flowers.
Then use white embroidery thread to sew "stars" of overlapping stitches in the centre of each flower. Sew three stitches for each of the small flowers, and four stitches for the large flower.

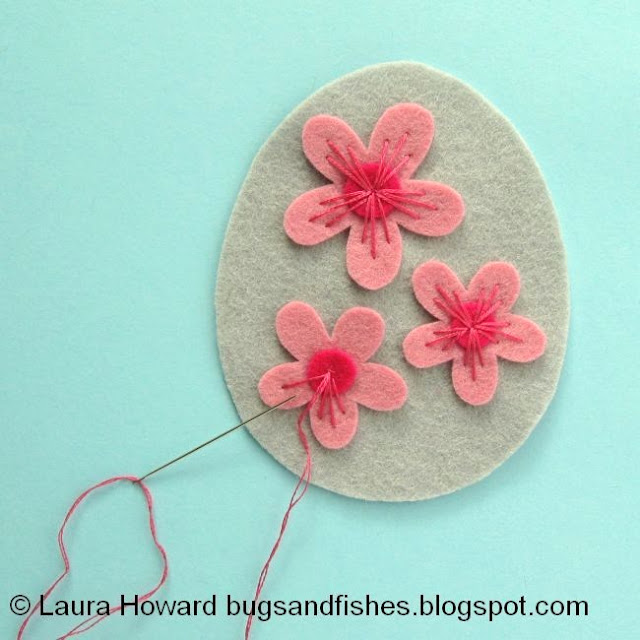
For the cherry blossoms: use bright pink embroidery thread to sew lots of radiating stitches, as shown. For each petal sew one shorter stitch, one long stitch, then another shorter stitch.
If you're sewing a set of three eggs, they should now look like this:
6. Add seed beads to the primroses and cherry blossoms.
Sew three beads in the centre of each flower, sewing each bead flat like an O with two or three stitches of thread. Use sewing thread or a single strand of embroidery thread.
Add gold beads to the primroses with yellow thread, and silver beads to the cherry blossoms with pink thread.
Your eggs will now look like this:
7. If you're making the eggs as ornaments, now's the time to add the loops to hang them.
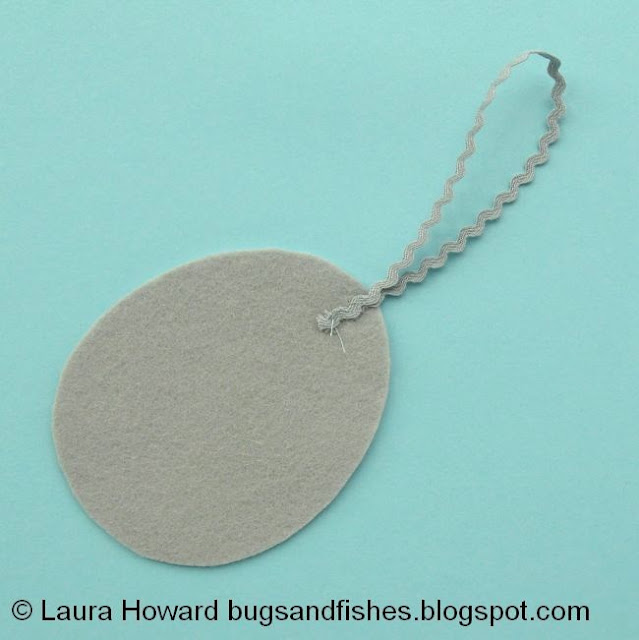
For each egg cut a 20cm piece of mini ric rac or narrow ribbon. Fold the trim in half to make a loop and sew the ends to the top of an undecorated egg piece. Use whip stitch and grey sewing thread to match the felt, sewing into but not through the felt.
8. Place the decorated front and undecorated back pieces together, so the ribbon / ric rac ends are sandwiched between then. Use grey sewing thread and whip stitch to join the edges, hiding your knot between the layers when starting your stitching.
Begin near the bottom of the egg and sew up and around it, leaving a gap of a couple of inches (a few centimetres) for stuffing.
9. Lightly stuff each egg with toy filling, adding small pieces at a time to create an evenly stuffed shape.
Then sew up the remaining gap with more whip stitches, finishing your stitching neatly at the back.

DISCLOSURE: This post is sponsored by Cloud Craft, who sell 100% wool felt and other handpicked needlework supplies for modern making.
Click here to buy a kit of all the materials you'll need to make the egg ornaments.
Click here to open the template sheet in another tab or window. Make sure you're viewing it full size then print it at 100% - I've included a scale guide so you can check if it's printed the correct size.
This tutorial is for non commercial use only: you can stitch as many eggs as you like for yourself or as gifts, but please don't make any for sale. You may borrow a photo or two if you want to blog about this project, but remember to credit me and link back to the original source, and do not reproduce my tutorial or share the templates on your site. Thanks!








11 comments:
Like your works very much :) They're amazing :)
mikaglo.blogspot.com
cute!! I'm going to make these, thanks for sharing.
laura mil gracias por su amable y maravilloso tutorial
reciba mi cariño y agradecimiento con mi corazon en cristo jesus
carmen
They're lovely, thanks so much. I hope, I've got the time to make some of these.
Thanks so much for your comments, everyone! If you make some of these ornaments please do let me know :)
Dziekuję za tutorial. Bardzo ładne jajka
Pozdrawiam
Dendrobium - thank you! :)
These are beautiful! Thank you for the inspiration! I found your blog late last night (I'm an insomniac) and I read it until my eyes were refusing to stay open... returning today and enjoying your posts immensely! Thank you! ~M x
It is so lovely to read this comment, Mem! I hope you'll continue to enjoy reading my blog :)
Thank you for this wonderful tutorial, my Easter eggs will look fantastic this year! (I admit I just glue the two sides of the egg together, as I can't make such nice, even whip stitches).
Have a wonderful Easter!
Thanks for your lovely comment, Anon! I hope you'll have lots of fun making the eggs :)
Post a Comment