Monday, 28 November 2016

All 8 Free Felt Christmas Ornament Tutorials

PLEASE NOTE: this project will be removed from my blog soon, after which it will be available as part of a printable pattern from my shops. Please make a copy of the instructions and templates if you'd like to save a free copy! :)

I hope you guys have enjoyed the series of free Christmas ornament tutorials I've shared over the past few weeks!

felt Christmas ornaments

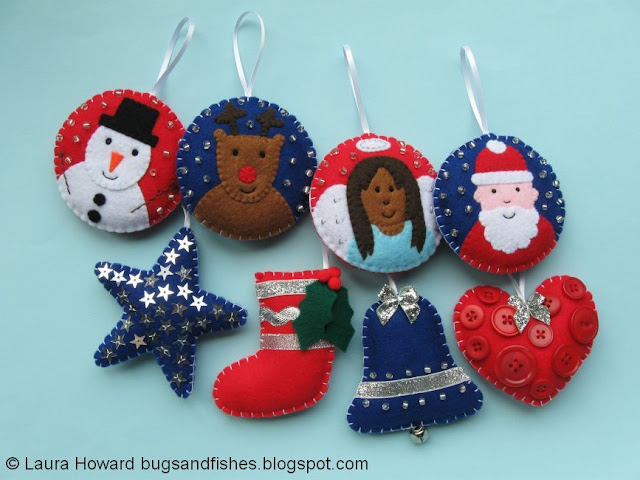
I thought it would be helpful to collect the links to all 8 designs so you can bookmark and find them easily for future crafting. Do let me know if you make any of these - or the whole set! :)

felt Christmas ornaments

1. Felt snowman bauble.

felt snowman ornament

2. Stripey stocking ornament.

felt stocking ornament

3. Felt reindeer bauble.
 
felt reindeer ornament

4. Sparkly Star Ornament.

 felt star ornament

5. Felt angel bauble.

felt angel ornament

6. Button heart ornament.

 felt heart ornament

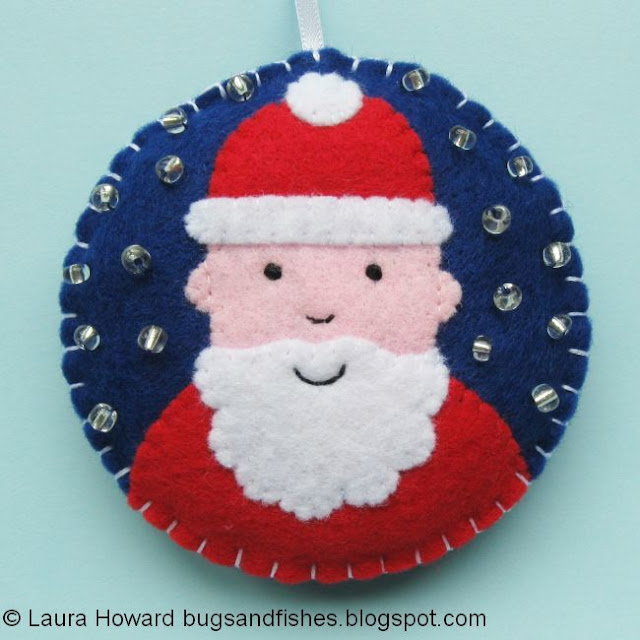
7. Felt Santa bauble.

 felt Santa ornament

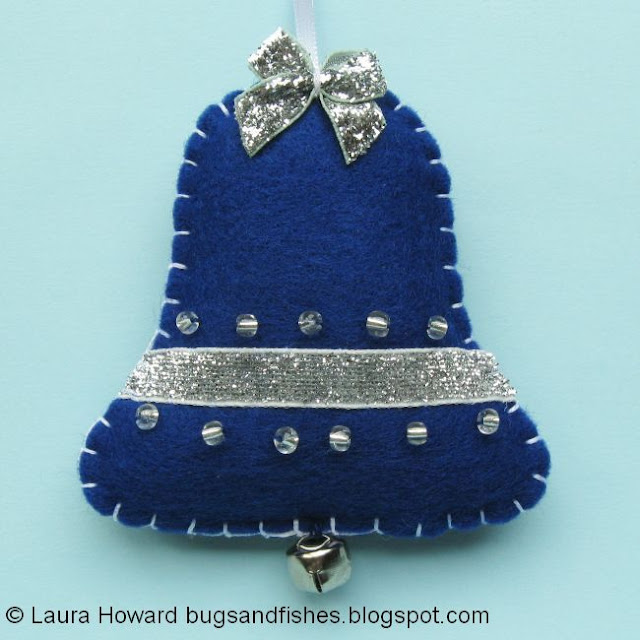
8. Jingle bell ornament.
 
 felt bell ornament


Fancy some more free tutorials? Subscribe to my newsletter for a monthly free pattern and visit my crafty tutorial archive for lots more free projects.

Visit my shop to buy my printable PDF sewing patterns:


Friday, 25 November 2016

Gift Wrapping Idea for Christmas: Wrap Your Gifts in Giant Boxes!

Last year we had a very fun family Christmas.

My mum and I hatched a plan to make everyone's gifts a surprise: we put each present in a HUGE box.


My dad and my sister were very surprised to see such a giant pile of gifts by the tree!

Each parcel was an exciting mystery package: no guessing what it could be by the shape or the size. Was it going to be the book you asked for? A DVD? Those earrings you saw on Etsy? A chocolate orange?


Some large rolls of cute wrapping paper cost us just a few quid (we bought ours from Wilko), and we saved up boxes from online deliveries and got some appliance boxes down from the loft (the box for the printer, etc). You could also use shoe boxes, office storage boxes or even buy a pack of moving boxes. 

I scrunched up newspaper to fill each box, and nestled the gifts in the centre so they wouldn't rattle about and there would be the extra fun of hunting through the newspaper to find the present. I used the biggest box for the smallest present, of course! For added sneakiness, you could put ordinary household objects in the boxes as well to disguise their weight.


The trickiest part of the plan was wrapping all those big boxes in secret on Christmas Eve and sneaking them into the lounge that afternoon when no-one was looking but luckily I managed it.


Just a few boxes was all it took for an extra fun and memorable Christmas - I highly recommend trying it with your family! This might not be the best idea to try with young children who may be disappointed that a big box doesn't mean a big gift, but as we're all grown up we loved it.

Wednesday, 23 November 2016

Oxford in the Springtime, Part One: Christ Church Picture Gallery & the Ashmolean

Time for a Nice Day Out flashback! Today I'm sharing some photos from a trip I took to Oxford this spring.

I always try to squeeze as much as possible into my day trips to Oxford, it's such a beautiful city and there's so much to see. My first stop of the day was...


... Christ Church Picture Gallery, which is housed in a purpose-built building within the college grounds. If you visit the whole college you'll pass the gallery on your way out but if (like me) you just want to see the art, you enter via the rather imposing Canterbury Gate at the back of the college...


... and the Picture Gallery is right there, on your left (complete with bicycles, of course, like every other building in Oxford!).


This gallery is one of the many, many places I'd probably never have heard of or thought of visiting if it weren't for my Art Pass. I waved my membership card, paid my discounted entry fee and proceeded to get rather absorbed in the gallery's petite but wonderful collection of art which I was lucky to have almost entirely to myself for most of my visit.

After that dose of peace and quiet and culture I headed back out into the busy city. There are so many interesting buildings squished together in the city centre - with famous sights and fascinating architectural details everywhere you look.


I popped into the Museum of the History of Science for a quick look round...


... then headed to the Ashmolean (Oxford's Museum of Art and Archaeology) to meet up with Polly for a cuppa and some more sightseeing.

I couldn't resist stopping to take photos of this churchyard I passed along the way - there were so many bluebells, and all the colour of the spring sky! So lovely. 


The Ashmolean is amazing, and free to visit (apart from special exhibitions). Whether you spend a few minutes there or many hours it's always an absolute joy, and the cakes in their cafe are very tasty (this is a very important part of the museum-visiting experience!). 


We checked out the Architecture in Miniature exhibition (very cool tiny versions of famous Oxford buildings), strolled through some of the other galleries oohing over all the interesting things, then had a cuppa and some cake before heading out to do some more exploring.

I'll share what we got up to (along with lots more Oxford pics) in Part Two, sometime soon! :)

UPDATE: click here to read about the rest of our day

Monday, 21 November 2016

Christmas Ornament Tutorial: Sew a Felt Jingle Bell

PLEASE NOTE: this project will be removed from my blog at the end of November, after which it will be available as part of a printable pattern from my shops. Please make a copy of the instructions and templates if you'd like to save a free copy before then! :)

It's time for the final ornament in the series - hurrah! Last but by no means least, today I'm sharing a tutorial for sewing a felt bell ornament that actually jingles.

felt bell ornament

This jingle bell ornament is part of a set of cute felt Christmas decorations I designed for docrafts Creativity magazine last year.

felt Christmas decorations

You can make the whole set of ornaments, or just mix and match your faves. As well as the bell I'm sharing today, you can also make a snowman bauble, a reindeer bauble, an angel bauble, a Santa bauble, a sparkly star, a stripey stocking and a button heart.

set of felt Christmas ornaments
felt bell ornament

To make the bell, you will need:

- templates (see the bottom of this post)
- royal blue felt
- royal blue and white sewing thread
- white embroidery thread (floss)
- a mini ribbon bow and matching ribbon (I used glitter bows and silver ribbon from the docrafts Create Christmas range)
- silver seed beads
- a silver jingle bell
- white narrow ribbon
- toy stuffing
- sewing scissors
- sewing needles and pins

felt bell ornament

To make the jingle bell:

1. Use the templates provided to cut out two bell shapes from royal blue felt.

2. Cut ribbon piece a few cm wider than the bell. Sew on with tiny white whip stitches (or line of running stitch at edge) folding over ends. When fold ends over, sew at back with small whip stitches sewing into the felt not through it.

3. Two rows of silver seed beads. Sew with double thickness of blue sewing thread. I used 5 beads for top and 6 for bottom row. Start row in centre to help get lines up neatly. Then bottom row sewn between gaps in top row.

4. Add mini bow with a few stitches in centre - to attach the silver bow I used white thread.

5. Cut a 15cm (6 inch) length of narrow white ribbon. Fold the ribbon into a loop and sew the ends to the top of the undecorated bell shape. Use whip stitch and blue sewing thread, sewing into the felt not through it.

6. Place the front and back bell pieces together so the ends of the ribbon are sandwiched between the two layers and the loop sticks out the top of the ornament.

Hold or pin the two bell pieces together and blanket stitch around the edge, using half strands of white embroidery thread and folding the bow forwards as you sew behind it. Start at the top right corner of the stocking, stitch most of the way round and leave a gap for stuffing.

Tip: sew along the bottom edge of the bell last so you have a straight edge open when stuffing the ornament. 

7. Add small pieces of stuffing to gradually fill the star, stuffing it lightly so it's evenly filled but still very squishy. Then sew up the gap with more blanket stitches and finish your stitching neatly at the back.

8. Add jingle bell. Double thickness blue thread. Sew in between layers so knot is hidden, then sew out. Sew through bell a few times to secure then finish your stitching at the back. 

felt bell ornament

This tutorial is for personal use only: you can use it to stitch as many felt ornaments as you want for yourself or as gifts, but please don't make any for sale. You may borrow a photo or two if you want to blog about this project, but remember to credit me and link back to the original source, and do not reproduce my entire post or share the pattern itself on your site. Thanks!

Enjoyed this free tutorial? Buy me a "coffee" and help support my blog!


Buy Me a Coffee at ko-fi.com

Subscribe to my newsletter for a monthly free pattern and visit my crafty tutorial archive for lots more free projects.

Visit my shop to buy my printable PDF sewing patterns:


Click here to view the template sheet, make sure you're viewing it full size then print it at 100%.

felt bell ornament template

felt bell ornament tutorial

Friday, 18 November 2016

Renegade Craft Fair London 2016

A couple of weekends ago I visited the always awesome Renegade Craft Fair. I've been to this fair for a few years running now - it's amazing.

With so many designers, makers, crafters and artists selling their wares in one place it's very hard to get out of the building without having accidentally spent all of your money on wonderful things.

It's also an excellent excuse to visit Brick Lane and explore the area


Here are just a handful of the lovely things that caught my eye at this year's fair...

Colourful textiles from Miesje Chafer:

 http://www.miesjechafer.com/
 
Fun and happy goodies by Ladybird Likes:
 
http://www.ladybirdlikes.com/

Super sparkles from Pup Tart:

http://www.puptart.co.uk/

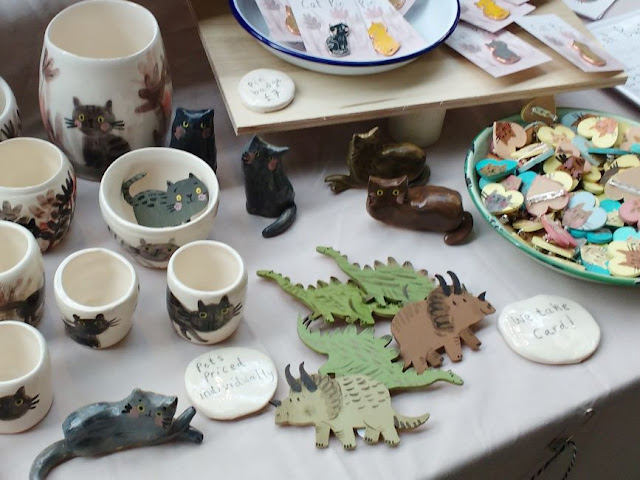
Kitty and dino cuteness by Emma Carlisle:

https://www.etsy.com/uk/shop/emmacarlisle

Charming prints by Rosemary Milner:

 http://rosemary-milner.co.uk/
 
Gorgeous mugs and pots by Duck Ceramics:

http://www.duckceramics.co.uk/

 Laser cut awesomeness by Finest Imaginary:

https://finestimaginary.com/

And (last but by no means least) fabulous patterns from The Pattern Guild:

http://thepatternguild.co.uk/

Aaaaand here's what I bought!*  As you can see, I've been stocking up on nice cards (you can never have too many nice cards to send).


Clockwise from top left: Chá com Letras, Sparrow + Wolf, Cactus Club, The Pattern Guild, & Cactus Club again.


*(Minus a couple of secret purchases I can't blog about because they're gonna be gifts, ssshhhhh).

Want even more shopping inspo? Check out my highlights from previous fairs! 

Wednesday, 16 November 2016

An Autumn Walk in Kensington Gardens

Is there anything nicer than a walk in a park on a sunny autumn day?


I was in London a couple of weeks ago to visit the Opus Anglicanum exhibition at the V&A (which was amazing, by the way!) and the weather was so glorious that I decided to walk to the museum via Kensington Gardens. 


"A quick walk through the park" soon turned into a long, leisurely stroll up and down and around and about, as I soaked up all the autumnal loveliness. 

Carpets of leaves, crunching underfoot.


Trees like flames.


The gleam of the low, warm autumn light.


Avenues of vibrant colour and bold shadows.


And those slightly scruffy edges you get in autumn as everything is beginning to fade and fall, the first bare branches re-emerging. 


 A truly excellent start to a Nice Day Out!