This tutorial originally appeared on The Village Haberdashery's blog and was inspired by a range of gorgeous paper pads they stock. Each pad includes 30 sheets of co-ordinating paper and card (15 sheets of each), which all have a grid of squares on the back so you can easily cut straight edges.
I chose to work with the marbled paper pad – aren’t these patterns lovely?
As you can see, as well as the detailed marbled designs there are also some plain sheets in soft, ombré colours. You could use the papers for all kinds of fabulous crafty projects, but I’ve put together a few simple ideas to get you started!
1. Greetings Cards.
I love sending handmade cards to my friends. Everyone loves a bit of proper post, and there’s nothing quite like a handmade card. Use simple shapes and geometric designs, layering patterns to create some stylish cards. Click here for the template sheet to recreate my designs, or draw your own.
Cut and fold a sheet of card to size (remember if you’re using the card from the pad there will be a grid of squares on the inside) or decorate some ready-made blank cards.
Use the card as a template to cut out a section from one of the ombré pieces. The subtle colour variations make a great backdrop for adding some bold shapes. Stick the paper to the front of the card with a glue stick, lining up the edges neatly.
Then cut out your chosen shapes and stick them in position. You can use layers of the plain paper to create frames for the shapes (like the heart) or just layer the patterned papers on top of each other.
If you want, you can use a fine pen to draw around the shapes to make them really stand out – but make sure you have a steady hand! (Can you spot where mine slipped?)
2. Envelopes & Notecards.
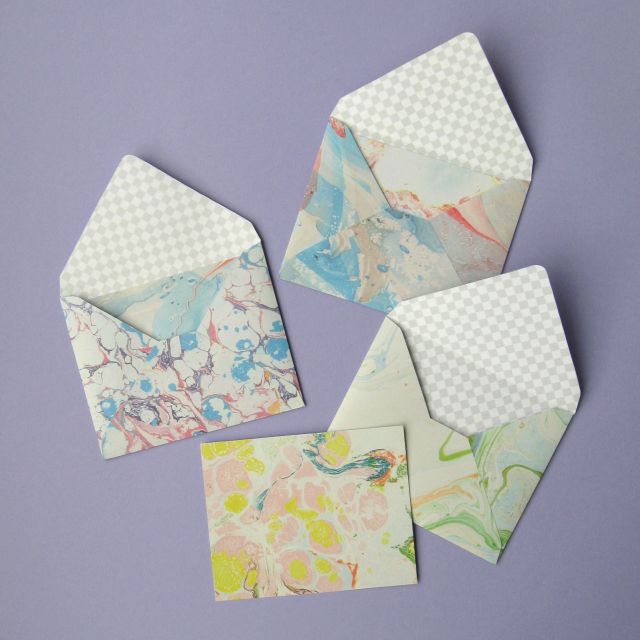
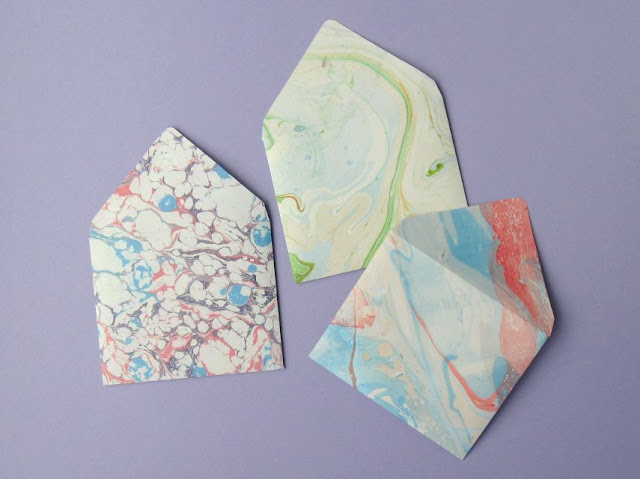
As an alternative to making handmade cards why not make some handmade envelopes? These are lovely to send but they also make a great gift: make a set of five or six envelopes with co-ordinating notecards, add some plain address labels and tie them up in a bundle with a bit of baker’s twine ready for gifting.
Find an envelope you like the shape of or search online for some printable envelope templates. If you’re going to be making lots of envelopes, I’d recommend gluing the shape to a piece of card (part of a cereal box would be perfect) to make a sturdy template.
Trace the envelope shape onto the back of one of the patterned paper pieces. Cut it out and use a ruler and one blade of a pair of scissors to carefully score along the fold lines. Fold the paper into an envelope shape and use a glue stick to secure the edges. You can use more glue to close the envelopes later when they’re ready to send, or add a couple of strips of narrow double-sided sticky tape to the edges of the flaps.
To make the co-ordinating notecards, just cut rectangular pieces of card slightly smaller than the envelopes so they’ll tuck neatly inside.
3. Gift Wrapping.
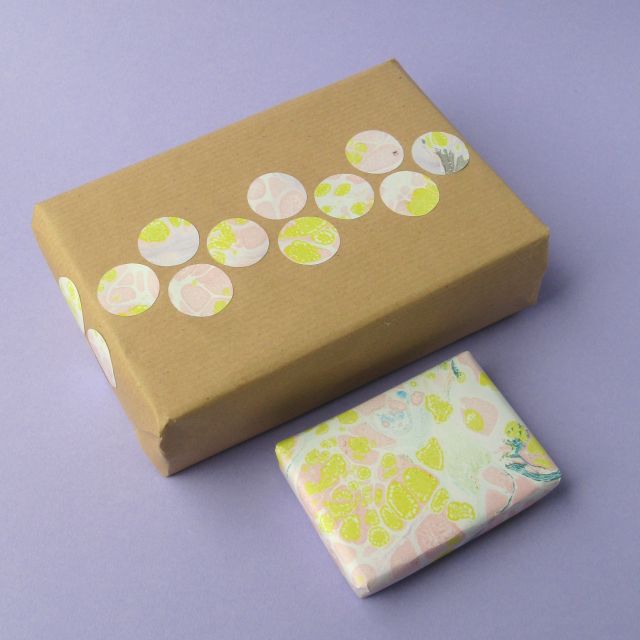
Pretty craft papers also make lovely wrapping paper! Use them to wrap small, special gifts or cut shapes from leftover scraps to create patterns on plain parcels.
I used the lid of a glue stick as a template to cut lots of identically sized paper circles, which I glued in a row across the parcel. You could cut different sized circles, glue them in rows or dot them at random, or explore different shapes like stripes and triangles. Get creative and turn a plain package into something fabulous!
4. Gift Tags.
Another great way to make use of scraps of pretty paper and card is by making gift tags. Cut out lots of different shapes, layer colours and patterns, and see what you come up with!
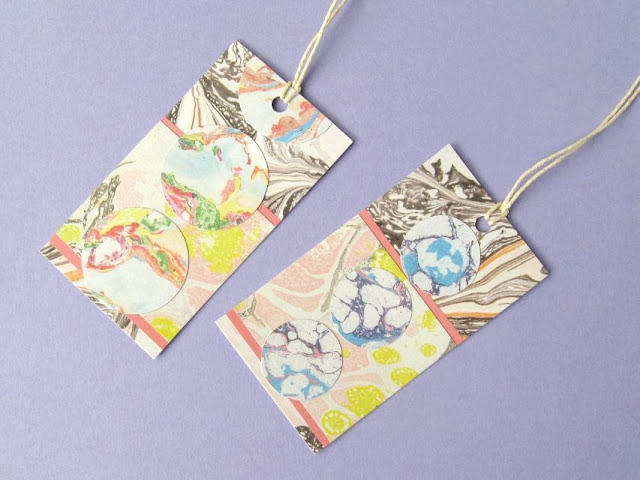
Cut out a rectangle from one of the card sheets, punching a hole near the top and adding some string, twine or yarn to create the tag (or just decorate some plain ready-made tags!).
I added bands of plain and patterned paper, cutting them slightly wider than the tag and trimming them neatly to size once I’d glued them in position. I then added some card and paper circles in contrasting patterns to complete the designs, punched the holes and added some string.
5. Paper Chains.
When was the last time you made paper chains? They are such fun to put together and make wonderfully colourful party décor.
Cut several sheets of the decorative paper into strips about 3cm wide (each sheet of paper makes 10 strips). Bend one strip so the two ends meet, securing them with a piece of clear sticky tape. Add a second strip interlinking with the first, and continue to build the chain mixing patterns as you go.
You can use one strip of paper per chain link, or make a chain like the one pictured with two strips placed together so the inside and outside of each loop is patterned.
6. Bunting & Garlands.
Bunting is a summer party classic! It’s so easy to whip up a length of bunting or a modern garland to decorate your space… then when the party is over it can be disassembled and the pieces returned to your crafty stash.
Use the templates provided to cut out lots of bunting flags or circles from paper or card. Use a large, sharp sewing needle to poke two holes in each piece (at the top two points of the triangles or at opposite sides of the circles).
Use the needle to thread the flags or circles onto a long piece of sewing thread, yarn or thin twine. Double up the circles (as they tend to spin when hung up) and double the bunting flags if the back of the bunting will be visible when you hang it.
7. Party Food Toppers.
Let your guests know what’s in your party treats with these colourful toppers. This is such a simple idea but a practical and pretty one and a fab way to use up small bits of lovely paper.
Using the templates provided, cut circles from the one of the less busily patterned card sheets to create labels for sandwiches, cupcakes and other party foods.
Add the important info in pen, and attach a cocktail stick to the back of each circle with a piece of sticky tape. You could also cut extra paper circles to scatter on the table-top for extra Instagram-ability!
8. Gift Boxes.
If you’re giving a small gift, make it extra special by making a gift box. These boxes would also be perfect for wedding or party favours. Scrunch up some pretty tissue paper inside the box then add your gift.
Use the diagrams provided as a guide to drawing the box templates (one for the box itself, and one for the lid). If you’re just making one box, you can draw the template directly onto the back of the decorative card. If you’re planning on making lots of boxes you’ll save time by making some re-usable templates you can quickly draw around.
Draw and cut out one box and one box lid. I’ve designed the templates so both shapes will fit onto one sheet of card, but you can mix and match the patterns as you like.
Use a ruler and one blade of a pair of scissors to carefully score along the fold lines. Crease all the folds then use a glue stick to add glue to the four flaps (on the patterned/colourful side of the card) and carefully assemble the box and its lid.
Follow the links to view and download the printable PDF templates:
- Greetings Cards
- Bunting & Garlands
- Food Toppers
- Gift Boxes
Enjoyed these free projects? Buy me a "coffee" and help support my blog!

P.S. Subscribe to my newsletter for a monthly free pattern and visit my crafty tutorial archive for lots more project ideas plus step-by-step tutorials.
Visit my shop to buy my printable PDF sewing patterns:









0 comments:
Post a Comment