Friday, 29 September 2017

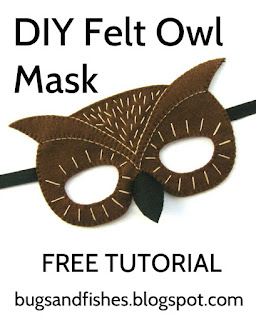
Felt Owl Mask Tutorial for Halloween

Today I'm sharing a free tutorial for sewing this fun felt owl mask, which is perfect for Halloween or for general "wanting to dress up as an owl, because owls are awesome" purposes.

felt owl mask
felt owl mask

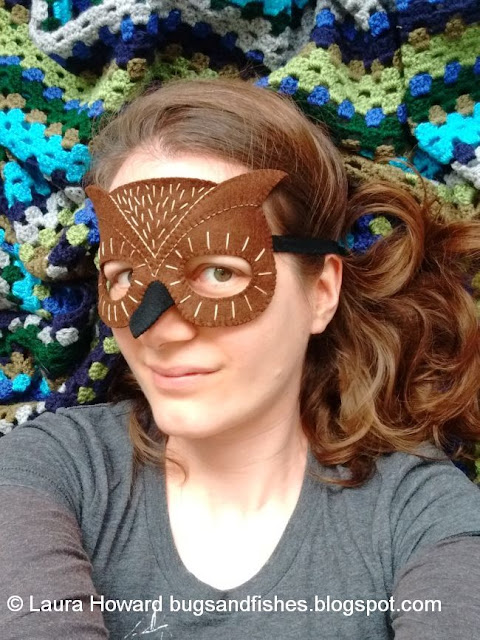
Added bonus: you get to enjoy these "Laura tries to take photos of herself wearing the owl mask without laughing" selfies.

felt owl mask
felt owl mask

This post is sponsored by Cloud Craft, who sell 100% wool felt and lots of other supplies for hand stitching projects: fabric, thread, embroidery hoops and tools, buttons and trims, sewing kits, and more!

https://www.cloudcraft.co.uk/

I love Cloud Craft's wool felt, it's great quality, holds stitches really well and doesn't stretch out of shape like some less sturdy synthetic felts or blends. It also meets European Toy Standards and carries the Oeko-Tex ‘confidence in textiles’ mark, so contains no nasty chemicals. You can pick the perfect felt colours for your project or get inspired by their lovely colour collections.

https://www.cloudcraft.co.uk/

I stitched the owl mask in this tutorial using 100% wool felt and other materials from Cloud Craft - follow the links to find each product in their shop!

You will need:

The templates provided at the bottom of this post
Dark brown felt - I used a 20 x 30 cm sheet of Walnut Whip
Black felt - I used a 20 x 20 cm sheet of Dog's Nose
Black and dark brown sewing thread
1 metre black ribbon (or a length of black elastic, if you prefer)
Light brown embroidery thread (floss) - I used DMC stranded cotton shade 3864
Sewing needles and pins
Sewing scissors

To make the owl mask:

1. Use the templates provided to cut out the following felt pieces: 2 x brown masks, 1 x brown feathers, and 2 x black beaks.


2. Place the feathers shape on one of the mask pieces as shown and pin it in place. Sew the feathers in position with whip stitch and matching sewing thread, sewing only the inside sections (the outside edge of the mask will be sewn later).


3. Time to start decorating the mask! For all the stitched decoration use half strands of light brown embroidery thread (so, for 6 stranded thread just use 3 strands). Begin by sewing along the edges of the feathers, sewing a line of backstitch flush with the edge of the felt to make the feathers stand out clearly.


4. Sew a series of radiating single stitches around each eye hole, as shown. Use the photo as a rough guide and try to sew the same number of stitches per eye.


5. Finish the decoration by filling in the top section of the mask with random single stitches, working from the bottom upwards to fill the space.


6. Cut two 50cm lengths of black ribbon. Position one ribbon end on the undecorated mask shape so it overlaps slightly above the eye hole, as pictured. Pin or hold the ribbon in place and sew it to the felt with whip stitch and brown sewing thread - take care to sew into the felt but not through it. Cut the unattached end of the ribbon at an angle to help prevent fraying.

Repeat to sew the other ribbon piece on the other side of the mask.


If you'd like to use a loop of elastic instead of ribbon ties, sew one end of a piece of elastic to the mask, trim the elastic to the size required and sew the other end to the other side of the mask.


7. Place the front and back mask pieces together, so the ribbon ends are sandwiched between them. Pin or hold the layers together and sew around eye holes. Use whip stitch and matching sewing thread, starting and finishing your stitching between the layers to keep the outside of the mask neat.


8. Sew around the outside of the mask with more whip stitches, sewing the layers together and sewing through the ribbon (or elastic) as you pass it.


9. Place the two beak pieces on top of each other and sew them together with whip stitch. Use a long piece of black sewing thread, starting your stitching in the centre of the curved edge. Hide the knot between the two layers, sew around the beak but don't finish your stitching / trim the thread yet!


10. Fold the beak in half along its length and line it up with the curve of the mask, as pictured. Using the same thread as before, sew the top edge of the beak to the mask with whip stitches. Sew out from the centre to one side of the beak and back again, then out to the other side and back so the beak is held in place securely. 


Congrats - you've now got a finished owl mask, ready for lots of Halloween fun!

felt owl mask
felt owl mask

DISCLOSURE: This post is sponsored by Cloud Craft, who sell 100% wool felt and other handpicked needlework supplies for modern making. Click here to visit their Halloween craft supplies shop.

Click here to open the template sheet in another tab or window. Make sure you're viewing it full size then print it at 100% - I've included a scale guide so you can check if it's printed the correct size.

felt owl mask templates


This tutorial is for non commercial use only: you can stitch as many masks as you like for yourself or as gifts, but please don't make any for sale. You may borrow a photo or two if you want to blog about this project, but remember to credit me and link back to the original source, and do not reproduce my tutorial or share the templates on your site. Thanks!

For lots more mask tutorials, check out my Patreon pattern library!

Fancy some more free tutorials? Subscribe to my newsletter for a monthly free pattern and visit my crafty tutorial archive for lots more free projects.

P.S. If you've been reading my blog for years, you might recognise this mask as one of the old designs I used to sell in my Etsy shop. I discontinued the owl masks years ago but still get a lot of emails about them, so I thought it would be fun to bring them back as a tutorial so you guys can make your own if you want! :)

felt owl mask

Wednesday, 27 September 2017

Destash Sale: This Sunday!

Hello! Just a quick post to let you know I'm planning an Instagram sale.

I'll be selling a whole bunch of craft books...


...plus some craft supplies, project samples, and a few other bits and bobs as well.

I'll be listing everything over on Instagram - lauralupinsells - on Sunday (1st October) from 10am (UK time).

You'll see the listings pop up if you follow my sale account (Instagram's algorithm permitting!!), but I'll also be posting about it on my main Instagram account - lauralupinhoward - so you'll be able to click over from there.

You can leave a comment on an item to claim it, but if you don't use Instagram don't worry! You'll still be able to browse all the listings, then you can send me a message via my contact form to let me know what you're interested in.

I'll be listing the price and UK postage of each item, but I'll combine the postage for each parcel and only charge what it actually costs to post (in the UK you can send a shoebox sized parcel weighing up to 2 kilos second class for just £2.90, hurrah!).

Monday, 25 September 2017

A Year of Wreaths: September Embroidered Oak Leaves Wreath

UPDATE: my September wreath tutorial is now available as a printable PDF pattern on my Patreon. 

Subscribe to get instant access to a growing library of PDF embroidery patterns and craft tutorials, and updates when I add something new!

 
Click here to see all 12 seasonal wreaths in this series!

-----

Nine months into our Year of Wreaths, it's time to celebrate autumn! 

https://www.thevillagehaberdashery.co.uk/blog/2017/a-year-of-wreaths-september-embroidered-oak-leaves-wreath-by-laura-howard

September's wreath tutorial features berry-red yarn, felt oak leaves, sparkly thread, and an embroidered line of poetry: the opening line of John Keats famous ode to Autumn, Season of mists and mellow fruitfulness...

https://www.thevillagehaberdashery.co.uk/blog/2017/a-year-of-wreaths-september-embroidered-oak-leaves-wreath-by-laura-howard


I am a teeny bit obsessed with this metallic thread! 

It's seriously shiny and really easy to stitch with - something that will come as a surprise if you've ever tried to embroider anything with metallic embroidery thread (so many knots! and so much stress! ugh!). This stuff is fab, I love it and kind of want to use it for everything.

https://www.thevillagehaberdashery.co.uk/blog/2017/a-year-of-wreaths-september-embroidered-oak-leaves-wreath-by-laura-howard


Subscribe to my newsletter for a monthly(ish) free pattern and visit my crafty tutorial archive for lots more free projects.

Friday, 22 September 2017

Adventures in Travel Blogging: A Trip to Bristol, part two

As promised, it's time for part two of my super fancy "let's pretend I'm a serious travel blogger!!" trip to Bristol (you can read part one here).

On this wonderful treat of a trip I was a guest of Mercure Hotels UK and stayed at their lovely central Bristol hotel, the Mercure Bristol Grand.  

Day two got off to an excellent start with a buffet breakfast. I can never resist a cooked breakfast but I have had so many incredibly sad cooked breakfasts in hotels over the years (cold beans, rubbery eggs, unripe tomatoes, ugh, so depressing). This was, however, the total opposite of a sad breakfast... a happy breakfast, I guess? Whatever. I would pretty much recommend this hotel based on this breakfast alone, it was well lush.


I also had tea and orange juice and fresh fruit and a really scrummy little pastry... and felt a little bit like I might burst from too much breakfast, but in a good way.

After breakfast, I checked out of my room and met up with the other bloggers on the trip ready for our tour of the city. The tour was led by Dan and Nina from Bristol-based blog Lifestyle District who had the difficult task of picking just a few Bristol highlights to share with us.

Regular readers will know that I used to live in Bristol (about 15 years ago) and now live just down the coast, popping to the city as often as possible on my days off... but there are huge chunks of the city I've not been to in what feels like forever, so I was really looking forward to seeing where Dan and Nina would take us.   

We started at St Nicholas Market, just round the corner from the hotel. Even though we were all still full from breakfast, the gorgeous smells of the food stalls had our mouths watering!


Next we headed to Bristol's harbour...


... popping into M Shed (the museum of Bristol's history) to visit the viewing gallery on the top floor, where you get some fantastic views of the harbour, the city skyline and the harbourside cranes.


We passed Colston Hall where a special mural was being painted to celebrate the venue's 150th birthday. We all took photos of the graffiti artist, he took some photos of us in return, then we walked on up the road...


... down the famous Christmas Steps and on to the wonderfully decorated Nelson Street, where you'll find creative hub The Island based in a former police station. 


Street art is an essential part of any visit to Bristol, so for the final part of our tour we headed up into Stokes Croft...


... to see the obligatory Banksy (you can't come to Bristol and not see a Banksy, it's practically the law) and to pose for a group photo


Then it was time to return to the hotel for Afternoon Tea - and lots of Instagram-ing, of course!


There was so much delicious cake! Scones and sandwiches too, of course (scones and cucumber sandwiches are an essential part of a fancy Afternoon Tea) but oh my goodness, the cake was so good.

 
I'm sure it will not remotely surprise you to learn that I ate a LOT of cake. As the event began winding down and people started bidding their farewells, I decided I'd better leave asap before I ate even more cake (theoretically I don't really believe in the concept of "too much" cake, but there really is only so much sugar I can eat before I begin vibrating like an oversized hummingbird) and headed homewards.

Huge thanks to the team at the Grand for the invite and hospitality, and to the guys at Lifestyle District for the tour!

Disclosure: as mentioned above, I was a guest of Mercure Hotels UK and received a free night at Mercure Bristol Grand and free meals during my stay, but this is not a sponsored post - I'm sure there are some lucky bloggers who get paid to blog about staying in lovely hotels but I am (sadly) not one of them. (A girl can dream though, right???)