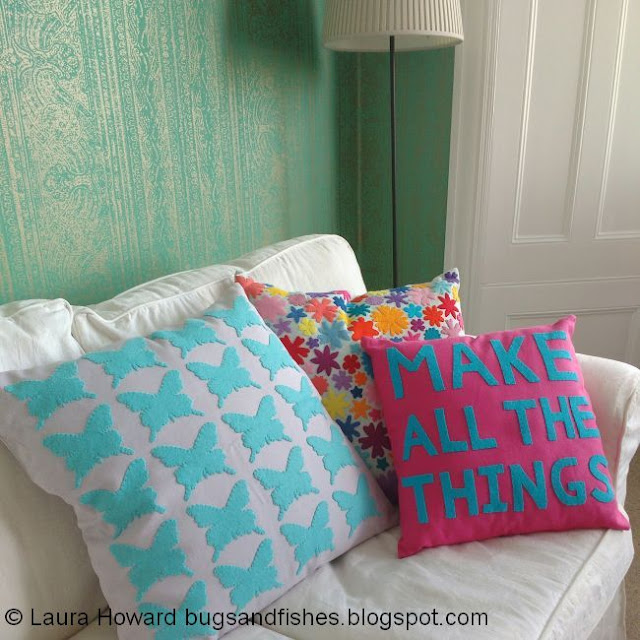
I decorated my cushion cover with 20 felt butterflies all in the same shade of aqua blue felt, but you could make every butterfly a different colour if you wanted to or create a rainbow or ombre effect with different shades across the cushion.
I love how these butterfly shapes are pretty but still quite minimal and chic. For a busier look you could always add detail with embroidery or other embellishments, using this version of the butterfly template to add a felt body as well as the outline shape.
The butterflies cushion is one of a series I've been making over the past few years to decorate my living room / studio space. I don't currently have a sofa in my new flat so I had to borrow someone else's lounge for these pictures... but hopefully these cushions will be adding a lovely pop of colour to my living space sometime soon!
Click here for the "MAKE ALL THE THINGS" cushion tutorial and templates. I'll be sharing the tutorial and templates for making the colourful floral cushion next week.
To make a butterfly cushion, you will need a cushion cover, some felt, sewing thread, scissors, a sewing needle, pins, and the butterfly template at the bottom of this post.
1. Resize the template to suit your cushion - you'll need a bigger or smaller template depending on the size of your cushion cover and the number of butterflies you want to add. Then use the template to cut out lots of butterflies from your chosen felt colour(s).
2. Arrange the butterflies on the front of the cushion cover and pin them in place. You may find a ruler helpful in getting them lined up straight. Take care to only pin them to the front of the cushion cover and not through all the layers of fabric.
3. Use contrasting sewing thread and large stitches to tack each butterfly in position, removing the pins as you sew each one. Make sure you only sew through the front of the cushion!
5. When all the butterflies have been sewn in place, remove the tacking threads then add a cushion insert.
For a no-sew version of this project, you could use fabric glue to attach the butterflies to the cushion cover. I'd recommend sticking one butterfly to a piece of scrap fabric first, to test how much glue you need to use and placing something like a piece of plastic or tin foil between the layers of the cushion to prevent the glue seeping through and sticking the cushion together.
Enjoyed this free tutorial? Buy me a "coffee" and help support my blog!

Subscribe to my newsletter for a monthly free pattern and visit my crafty tutorial archive for lots more free projects.
Visit my shop to buy my printable PDF sewing patterns:


0 comments:
Post a Comment