I love the 90s vibe of the current denim jacket trend - I was a 90s teen and denim jackets totally make me want to start listening to mixtapes, spend hours chatting on the phone to my friends, and maybe write a zine or two!
Whether or not you're a nostalgic 30-something like me, if you've got a plain and boring denim jacket you want to customise then you've come to the right blog post. I'll be showing you how to personalise your jacket with custom lettering, sequins, patches, embroidery and badges, creating a fun and colourful look.
This post is sponsored by StickerYou, where you can create custom die-cut stickers, labels, badges, temporary tattoos... and custom printed patches!

Custom patches are great for small businesses, clubs, and for creating things like wedding favours, but there are no minimum order requirements at StickerYou so you can also use the site to create totally unique patches to match your personal style. You can upload your own artwork or even photos to their online editor, or use StickerYou's selection of fonts and artwork to create your designs.
1. Lettering.
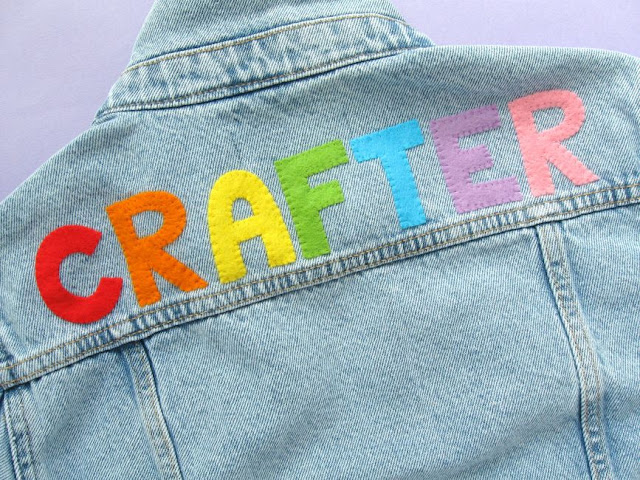
Use felt or fabric to add a nickname or other word of your choice to the back of your jacket - I decided to add the word "CRAFTER" to my jacket in bright rainbow felt letters. If you also want to join the crafter club you can use the templates provided at the bottom of this post to cut out your letters. To write a different word, either draw your own large letters on a piece of paper to create your templates or print the word of your choice in a very large font size.
If you're using fabric for your letters, back them with some iron-on interfacing to make them sturdier (and easier to handle when you sew them to the denim) and help prevent the edges from fraying.
Pin the letters along the top of the back of the jacket, using a tape measure or large ruler to help you position the middle letter in the centre of the jacket and to evenly space the other letters.
Sew the letters in position with whip stitch and matching sewing thread(s).
2. Sequins.
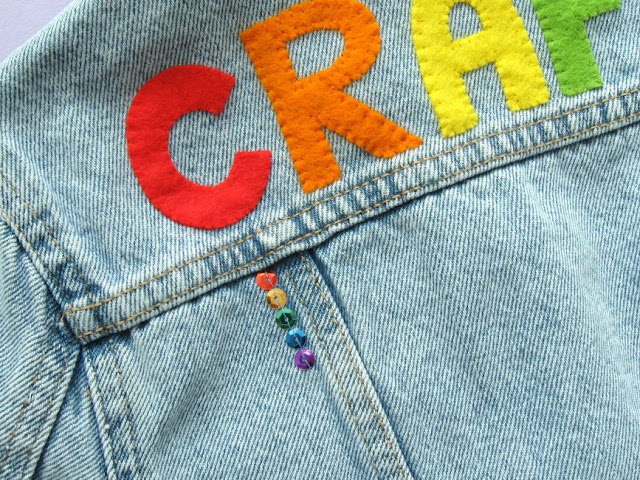
You can't beat a bit of sparkle! I decided to add a few lines of sequins to my jacket, using five bright colours to create a rainbow design. You could also use sequins to make sparkly shapes on your jacket, or to further embellish the lettering.
If you're just using sequins in one colour, use sewing thread to match the sequins. If you're using multiple colours like I did, use blue thread to match the denim.
I used two stitches per sequin, so the stitches formed a roughly straight line, following the lines of the jacket. If you're sewing decorative shapes with your sequins, use an erasable fabric marker to draw the shapes on the denim then use the lines as a guide when adding your sequins.
I stitched two long lines of sequins down the back of the jacket...
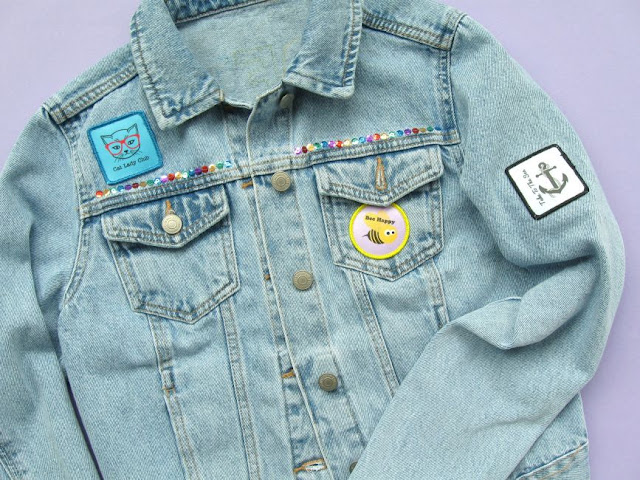
... one line along the front...
... and a mini sequin rainbow on each of the cuffs.
3. Patches.
Here are the custom patches I ordered from StickerYou (I love the idea of being in an actual Cat Lady Club, don't you?).
I found StickerYou's patch editor really easy to use, and was able to put together my three patch designs from their selection of images without any hiccups or computer rage (hurrah!). StickerYou are based in Toronto, Canada, so it took a little while for the patches to reach me via the international post but they were shipped very promptly and arrived in good condition.
When you've got your own patches ready to add to your jacket, decide on the placement of the patches and sew them in position one by one. I stitched two of my patches on the front and the third on the shoulder of my jacket. Use whip stitch and matching sewing thread and take care to only sew through one layer of the denim!
If you sew a patch to a pocket like I did, make sure you start your stitching at the top of the patch (and thus the top of the pocket) so that when you've sewn around the patch you won't have to reach too far inside the pocket to finish your stitching.
4. Embroidery.
There are so many possibilities when it comes to embroidering a denim jacket! You could go big and bold, or just add subtle interest with a few stitched details. I decided to roll with my 90s nostalgia and decorate the back of my jacket with a retro geometric pattern - choosing embroidery thread to match my rainbow theme.
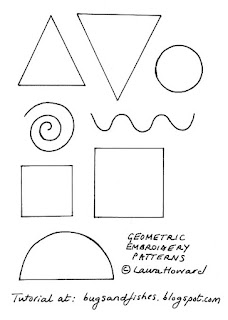
You can use the geometric patterns provided at the bottom of this post to decorate your jacket, sketch your own designs, or find some patterns you love in craft books or online.
Trace each pattern onto a piece of tissue paper with a fine pen. Use large tacking stitches to secure the tissue paper to the denim, then sew along the lines with your chosen embroidery thread. I used three of the six strands in my thread and stitched my geometric patterns with backstitch (for a bolder line, try chain stitch).
Once your stitching is finished, remove the tacking stitches then carefully tear away the tissue paper. I gradually filled the space in the central panel of the jacket with geometric shapes, creating a colourful abstract design.
5. Badges & Pins.
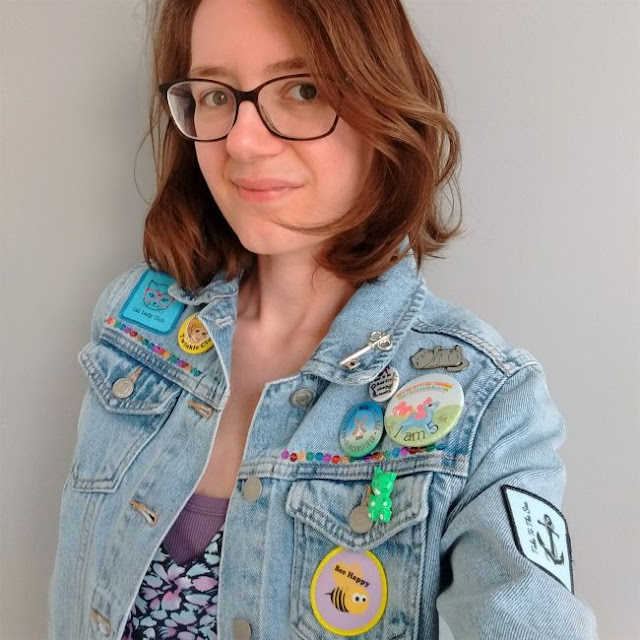
Last and by no means least, it's time to add some badges and pins! Denim jackets are perfect for showing off your collection of enamel pins, kitsch badges from your childhood, and any other fun pins you've picked up over the years.
I pinned a single badge on one side of my jacket...
... and a whole cluster down the other side, to create a pleasingly asymmetric look.
You'll need to remove the badges and pins whenever you wash the jacket, of course, but that just gives you a chance to mix things up and add in some new faves! I'd definitely recommend hand-washing your jacket once you've added the custom letters and other embellishments, to help keep your jacket looking at its best.
Click on the images to open the templates and/or embroidery patterns in a new window or tab. Download the image or make sure you're viewing it at full size and print at 100%.
DISCLOSURE: This post is sponsored by StickerYou, where you can create custom printed patches, die-cut stickers, labels, badges, temporary tattoos, and more.
Fancy some more crafty goodness? Subscribe to my newsletter for a monthly free pattern and visit my crafty tutorial archive for lots more free projects.









2 comments:
I like this jacket... great done... groeten uit Nederland.
Thanks, Elizabeth! :)
Post a Comment