ADVERTISEMENT: This tutorial is sponsored by Bostik, and is part of a series of crafty projects I'm creating to promote their range of adhesives. Click here to see all the posts in the series!
This is the second of a trio of Bostik-themed posts I'm sharing this week. On Monday I made fantastic festival hairbands with Bostik's Power Repair glue, on Friday I'll be getting creative with Blu Tack... and today I'm making cards with PVA Glue, Glu Dots, and Micro Dots.
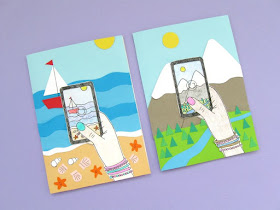
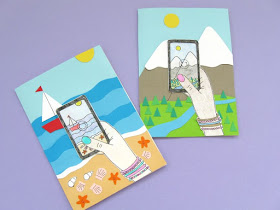
These fun travel-inspired cards would be great for sending to your social media loving pals! You can use the templates and printable provided to replicate my beach and mountain scenes or design your own travel scene then use the blank phone printable to sketch a mini version.
As well as making notecards, these designs would also be great for decorating a notebook cover to make a travel diary. You could also easily adapt this project to feature one of your own holiday photos! Simply print out a full size picture
for the background, then trim a smaller version to fit the phone screen.
You'll find the links to the PDF templates and printable at the bottom of this post. The templates are designed to be used with 5 x 7 inch card blanks. You can make bigger or smaller cards, of course, by printing the templates at different sizes, but remeber that you'll need to stick to the same proportions.
To make the cards:
1. Use the templates provided to cut out all the pieces from coloured paper or card, using the photos as a guide when choosing colours.
Turn each paper template over and draw around it with a pencil. Once you've cut out the shape flip that over so the pencil marks will be hidden at the back.
For the very small pieces (the shells, the starfish, the flag, and the trees) just use the drawings on the template sheet as a guide and draw your own shapes directly onto the coloured card/paper.
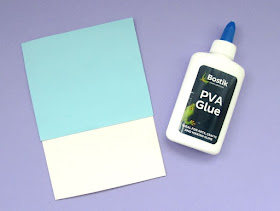
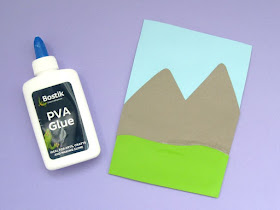
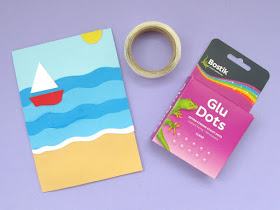
2. Begin building up the picture by sticking the largest pieces in position with PVA glue. Apply the glue evenly on the back of each card/paper shape and press them down firmly. PVA is quick and easy to apply and will allow you to reposition each paper piece slightly before the glue sets so you can make sure the edges line up neatly with the sides of the card.
For the beach scene, add the sky and the sand...

... then all the overlapping wave pieces, working from the top downwards. Use the photo as a guide when positioning these pieces.
For the mountain scene, add the sky...
... then the mountains...
... then the grass.
3. To attach the next set of shapes, I used Bostik Glu Dots. These mess-free permanent sticky dots come on a little roll and create a firm hold when they're pressed into position.
Because the edges of these card/paper pieces won't be stuck down (as they would be if you'd stuck them in place with glue) this helps give a sense of depth to the card.
Add the sun, boat and sail to the beach scene...
... and the sun and snow pieces to the mountain scene.
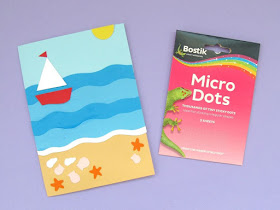
4. Now it's time to add the smallest pieces! For these I used a sheet of Bostik Micro Dots. You peel off the top sheet of plastic and press your shape onto the dots and then when you lift it off again it's become like a little sticker. Magic!
On the beach scene, add the flag of the boat and several shells and starfish to the sand...
... then add the river and an assortment of triangle trees to create a little mountain forest.
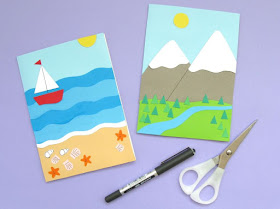
Your two cards will now look something like this:
5. Use a fine-tipped black pen and a ruler to add the mast of the sail boat and the line dividing the two mountains. Also add details to the shells and (if you want) little smiley faces to the starfish. Then turn the cards over and carefully use craft scissors to cut away any excess paper/card overlapping the edges (take care during this step - I accidentally cut away too much from the side of the beach scene! Oops!)
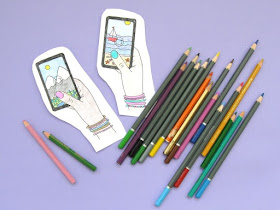
6. Next, use colouring pencils or felt tip pens to colour in the hands and phones. Make sure the colours on screen match up with the scenes on the cards.
7. Finally, carefully cut out the pictures (I left a very small bit of white all around each drawing so the outlines remained clear) and stick them in place on the cards. I stuck my paper pieces straight onto the cards with lots of Glu Dots but if I made these again I think I'd use the PVA Glue to stick them to some white card first to make them a bit sturdier, then cut them out again and use the Glu Dots to stick them in position.
And you're done!
DISCLOSURE: this post is sponsored by Bostik, who also provided all the adhesives I used to make the cards.
P.S. Fancy some more free crafty goodness? Subscribe to my newsletter for a monthly free pattern and visit my crafty tutorial archive for lots more free projects.










Cool one! I've never seen any snap shot cards before!
ReplyDeleteThank you! I'm really pleased with this idea and v proud of how it turned out :)
ReplyDelete