This week's projects all coordinate with the animals in the "On Safari" chapter... today you can make a tropical tree!
To make the tree you will need...
- the template sheet at the bottom of this post
- brown felt, approx. 2 x 3 in (5 x 7 cm)
- green felt, approx. 4 x 6 ½ in (10 x 16 cm)
- matching sewing threads
- spring green embroidery floss (thread)
- stuffing & a pencil or other stuffing tool
- needles, pins & embroidery scissors (great for cutting out small felt shapes!)
1. Use the templates provided to cut out two trunk shapes from brown felt, and to cut two tree shapes and one of each of the four leaf shapes from green felt. Cut the main leaf shapes first, and then snip the V shaped pieces from the edges afterwards.
2. Cut a length of spring green embroidery floss and separate half the strands (so, for six stranded floss use three strands). One by one, arrange the leaves in position on one of the tree shapes and sew each leaf in place with a backstitched line down the centre.
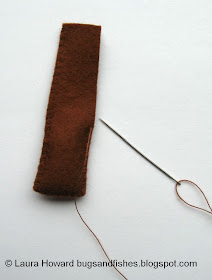
3. Place the two trunk shapes together and begin whip stitching around the edge with matching brown sewing thread. Stuff the trunk bit by bit as you gradually sew up the second side and leave the top quarter un-stuffed. Leave the top edge open.
4. Attach the trunk to the back tree piece as pictured, using whip stitch in green sewing thread and sewing into the green felt but not through it.
5. Place the front and back tree pieces together and use matching green thread to carefully whip stitch the back two layers together. Bend the front (snipped) leaves forward as you sew around the edge of the tree so the leaves remain attached to the tree only by their central stitched lines. Start your stitching at the top of the tree, stuffing it in sections as you sew around the edge. When the whole tree is stuffed and you’ve closed up the final gap, finish your stitching neatly at the back or hidden behind one of the snipped leaves.
Click here to view the template sheet in another window/tab, and print it at 100%.
This tutorial is for non commercial use only: you can use it to make as many felt trees as you want for yourself or as gifts, but please don't make any for sale. You may borrow a few photos if you want to blog about this project, but remember to credit me and link back to the original source, and do not reproduce my entire tutorial on your site. Thanks!
Please note: the Amazon links in this post are affiliate links.
Enjoyed this free tutorial? Buy me a "coffee" and help support my blog!

Subscribe to my newsletter for a monthly free pattern and visit my crafty tutorial archive for lots more free projects.
Visit my shop to buy my printable PDF sewing patterns:


Thanks, it´s very nice!!
ReplyDeleteThanks so much for these great tutorials.
ReplyDeleteCongratulations too on your book launch (though I know it was a while ago now). I'll definitely be asking for it for Christmas. x
Thanks guys!
ReplyDeleteI hope you'll enjoy the book if you get it for Christmas, Liz :)