Pages

Tuesday 24 March 2020

How To: Make Felt Covered Buttons

Sooo... we're all staying inside and making things for the next few weeks, then?!

If you're looking for crafty ideas to help yourself relax and pass the time, remember you'll find loads of free patterns and project ideas in my tutorial archive and my printable PDF patterns are still available as instant downloads over in my Etsy shop.

I've also got lots of fun projects in progress which I'll be sharing here on my blog in the coming weeks. First up: how to make awesome felt buttons!

Felt buttons are so much fun. I've made lots of them over the years with colourful felt scraps left over from other projects, and I thought it was high time I shared a "how to" with you guys so you can make some too.


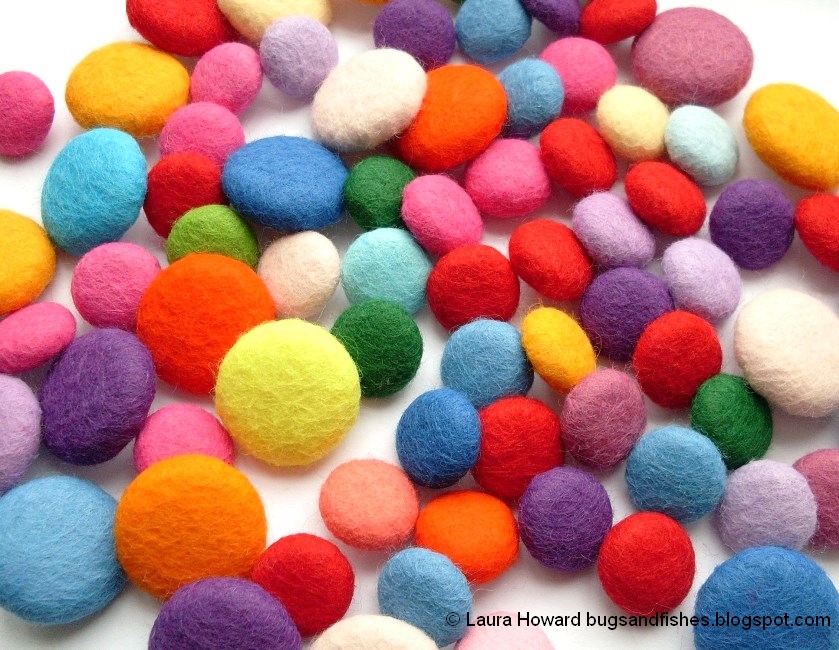
Felt buttons are, essentially, buttons covered in felt. You can use them to embellish all kinds of craft projects and they make fantastic centres for felt flowers (they'd look great with my fabulous flowers!). 


To make them you'll need some cover buttons in your chosen size(s) - I prefer plastic ones because they're cheaper but metal ones are also available. You'll find these for sale in online craft shops, Etsy, or in your local craft or haberdashery shop (when those re-open again! Gosh these are such weird times we're in, aren't they?).

You'll also need some felt, of course. Cover buttons are designed to be used with fabric, so thinner and more flexible felt works best. I usually use a soft wool/acrylic blend which looks lovely but is easy to stretch around the button shape.


If you're planning on making lots of buttons I'd highly recommend buying a button covering tool. Pressing the front and back of the cover buttons together takes a fair bit of force and the button tool will save you a lot of effort, as well as helping you make nice neat buttons.

I use the Prym universal button covering tool, it includes holes for five different button sizes (11mm, 15mm, 19mm, 23mm, and 29mm)... I've got a lot of use out of mine over the years! 


Your cover buttons will probably come with a template, showing you how large your piece of fabric (or, in our case, felt) needs to be to cover the button. The Prym tool came with a template, too.


Use the correct size template to cut out a circle of felt from your chosen colour.


To cover the button in felt, you need to wrap the felt around the front of the cover button then press the back of the button into position. The back clicks inside the front, holding the edges of the felt/fabric in place and giving you a lovely button ready to use.

The button tool is really helpful during this process! To cover a button using the tool place your felt circle over the correct sized hole in the tool then add the front of the button on top, facing down.


Carefully press your button and the felt into the rubbery shape. The felt will be pushed up around the button, as shown.


Squash the edges of the felt down towards the centre of the button with your fingers.


Put the back cover button piece in position then use the hard section of the button covering tool to press it firmly in place.


Your finished buttons may look slightly different if you use a different style of button to mine, but here's how the back of my button looked:


And here's the front. Mmm... buttony goodness...


Now just sew your finished button to your chosen project, as you would with a normal button.

Caution: making felt buttons is slightly addictive! :)

Enjoyed this free tutorial? Buy me a "coffee" and help support my blog!

Buy Me a Coffee at ko-fi.com

P.S. Subscribe to my newsletter for a monthly free pattern and visit my crafty tutorial archive for lots more free projects.

Visit my shop to buy my printable PDF sewing patterns:

Saturday 21 March 2020

Stay Inside & Make Stuff

UPDATE: this pattern and tutorial is now available in my Patreon pattern library.
 
Subscribe for a small monthly fee and you'll get access to a growing library of PDF patterns and tutorials, with an email whenever I add a new project. You can cancel any time. 
 

---
 
 http://eepurl.com/dvfYO1

Hello! I hope you're doing okay? These are weird, scary times, huh?

This is just a very quick blog post to say that I'm going to be self-isolating to take care of my dad over the coming weeks/months and won't be making any trips to the Post Office any time soon. So my weekly sales are paused, and I've removed all the handstitched samples from my Etsy shop (my printable PDF sewing patterns will still be availavle from my Etsy and Folksy shops).

I'm hoping that this extra time spent at home will mean I'll get a whole bunch of new patterns in my shops soon (especially now we're starting to get good light for taking photos!). I'm also going to work hard catching up with the freebies for my newsletter subscribers, and I've got some fun stuff planned for here on my blog, too, which I hope you'll enjoy if you're stuck at home for a while.

In the meantime, I thought I'd re-release my "Stay Inside and Make Stuff" embroidery pattern for my pattern newsletter subscribers, as it feels super appropriate for this time of social distancing! (Plus I feel guilty about having not sent out a new pattern in ages - sorry guys!).

The pattern also includes templates for making a felt applique version of the floral wreath, and a "Go Outside and Get Inspired" embroidery pattern (I'm trying to get out at least once a day for a walk at the moment and am feeling very thankful for all the signs of spring in my neighbourhood).

http://eepurl.com/dvfYO1
  
Take care of yourselves xxx

Tuesday 17 March 2020

Felt Chicken & Egg Easter Ornaments Tutorial

Make some cute felt chicken and egg ornaments this spring with this easy sewing tutorial, now available on my Patreon as part of a growing library of crafty PDF patterns and tutorials.

 
Felt ornaments aren’t just for Christmas!

Decorate a Spring or Easter display with these cute felt chicken and egg decorations – they’d look fab hung from doorknobs, or from a cluster of budding twigs in a vase. I think they'd also make lovely gifts.

I used three pastel colours to make my ornaments (pastels for spring is such a classic look!) but you could go bolder or choose more realistic chicken and egg shades. A whole garland of chickens in different colours (maybe a rainbow??) would look awesome.


You could also use the templates to sew felt chicken brooches (in my opinion you really can’t have too many fun felt chickens).


P.S. Subscribe to my newsletter for a monthly free pattern and visit my crafty tutorial archive for lots of free projects.

Visit my shop to buy my printable PDF sewing patterns:


Tuesday 10 March 2020

Lucky Pants! Fun Embroidery Pattern

Hello friends!

The latest project in my "oooh, I wonder if any of my old designs would make cute embroidery patterns?" series is this fun rainbow LUCKY PANTS embroidery pattern:


Years ago I used to make and sell silly little felt underpants badges (click here for the free tutorial to make your own!)...


... and I made a colourful bit of lucky pants themed textile art, too! I had that piece very much in mind when designing my lucky pants embroidery pattern.


You'll find the lucky pants embroidery pattern over on my Patreon.

Subscribe for a small monthly fee and you'll get access to a growing library of PDF patterns and tutorials, with an email whenever I add a new project. You can cancel any time.   

Click here to check out my Patreon page and sign up!


I stitched most of my lucky pants design with backstitch, using three strands from six-stranded embroidery thread (floss). It's possible that I only used two strands for the lettering but I have helpfully forgotten to write this down! (Oops). I also added a single French knot for the dot of the exclamation mark.

The pattern is designed so you can stitch the lines in six rainbow colours, but you could use different shades if you'd prefer. I stitched the lettering in black and the pants themselves with sparkly gold thread. Metallic embroidery thread can be a bit of a faff to stitch with but it's totally worth it, just take your time. For extra sparkle, why not add some sequins?


I stitched the design in a 5 inch embroidery hoop then framed it in a 4 inch hoop so the embroidery goes right up to the edge of the hoop. If you decide to do this, learn from my mistake and make sure you don't leave any knots right at the ends of the lines as they'll bulge against the wood of the hoop and make your finished piece look less neat.


Missed the earlier designs in this series?


Click here for the folk flowers embroidery pattern, and click here for the cute owl embroidery pattern.


P.S. Subscribe to my newsletter for a monthly free pattern and visit my crafty tutorial archive for lots of free projects.

Visit my shop to buy my printable PDF sewing patterns:


Tuesday 3 March 2020

Daffodils Headband: Felt Spring Flowers Tutorial

Get crafty with felt flowers with today's free tutorial!


This colourful felt daffodil headband (or hairband, whatever word you prefer!) is fun and easy to make and would make a fab addition to a spring outfit.

The templates are from my felt daffodils wreath tutorial. Even if you don't fancy making the whole wreath, the felt flowers are perfect for using in different spring craft projects like this one.

https://bugsandfishes.blogspot.com/2019/03/march-felt-daffodils-spring-flowers-wreath-tutorial.html

Both of these tutorials originally appeared on The Village Haberdashery's blog - visit their shop for lots of crafty goodness!

To make this cute and colourful felt headband you will need:

* The template sheet from the daffodil wreath tutorial.
* Orange and yellow felt.
* Orange stranded embroidery thread (floss).
* A plastic headband / hairband / Alice band.
* Yellow sewing thread
* Sewing scissors
* Embroidery scissors (these are great for cutting out small or fiddly shapes!)
* Sewing needles and pins
* A glue gun and glue
* A heat-proof mat for the glue gun
* Newspaper to protect your workspace from any glue drips
* Optional: pinking shears 

To make the headband: 

1. Use the Narcissi templates from the daffodil wreath templates to cut out the following felt pieces: ten yellow petal pieces, five orange trumpet pieces and five orange circles.

When you cut each trumpet cut along three sides of the template with sewing scissors and along the remaining (long) side with pinking shears – just above the edge of the paper template. If you don’t have any pinking shears you could use embroidery scissors to cut a zigzagged edge, or just cut a straight edge.

2. Follow steps 3, 4 and 5 from the daffodil wreath tutorial to sew the trumpet and petals together.


3. Use a glue gun to stick the flower pieces to a plastic headband: first the petals, then the trumpets. Start with the central flower and work outwards, adding a small amount of glue to the felt pieces and pressing them in place very carefully.

IMPORTANT: take care when working with the glue gun as the glue gets very hot! Always place it on a heat-proof mat when not in use, and use newspaper or other scrap paper to protect your workspace. Work slowly, squeezing the gun with care to control the amount of glue you’re using and keeping your fingers out of the way of the hot glue.


Cute, huh? Now it's time to go take some daffodil selfies...

Enjoyed this free tutorial? Buy me a "coffee" and help support my blog!

Buy Me a Coffee at ko-fi.com

This tutorial is for non commercial use only: you can use it to make as many headbands as you want for yourself or as gifts, but please don't make any for sale. You may borrow a couple of photos if you want to blog about this project, but remember to credit me and link back to this page on my blog, and do not reproduce my entire tutorial / share my templates on your site. Thanks!

P.S. Subscribe to my newsletter for a monthly free pattern and visit my crafty tutorial archive for lots more free projects.

Visit my shop to buy my printable PDF sewing patterns: