Pages

Friday, 29 April 2016

Banners, Buntings, Garlands, & Pennants!

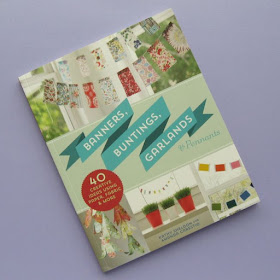
Way back in 2014, I was busy behind the scenes making lots of things from felt, card and other crafty supplies. Now here we are in 2016 and I can show you what I was making... yay!

The projects I was working on are part of a new book called Banners, Buntings, Garlands & Pennants. It's published by Lark Crafts and comes from the same team who brought you 'Tis the Season to Be Felt-y, Felt-o-ween and lots of other titles.


It's lovely to finally see the finished book, and to see all the awesome projects in it. They're all so fun and colourful!


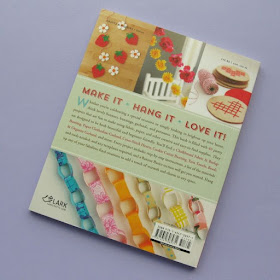
As you might have guessed from the title, the book includes lots of different designs for making banners, bunting, garlands and pennants. There are 40 beginner-friendly projects to choose from: some made with paper & card some with fabric & felt and others with crafty supplies ranging from yarn to shrink plastic to seashells.

Each project has step-by-step instructions, and there's a short guide at the front of the book that covers all the techniques you'll need to know.

Wanna see my projects? :)

I made Mini Gumdrops...


... Yarn Tassels...


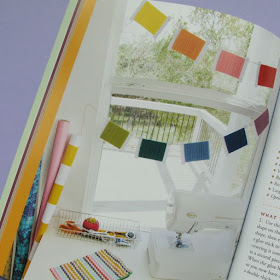
... Rainbow Bobbins (perfect for a craft room!)...


... a Paper Clothesline Garland...

 
... an Autumn Garland of felt leaves and pinecones...


... and some Cross-Stitch Hearts.


Banners, Buntings, Garlands & Pennants is out now! It's available from Amazon USA, Amazon UK, the Book Depository, and many other bookshops. Please note: The Amazon and Book Depository links in this post are affiliate links.

When I went to put my copy of the book on the shelf, I realised it's the tenth book I've worked on with the folks at Lark Crafts. It's kind of awesome seeing them all together! Maybe you have some of these on your bookshelf too?


and, of course Banners, Buntings, Garlands & Pennants

Wednesday, 27 April 2016

A Trip to Seville: Plaza de España

Time for another virtual visit to Seville!

On our final day in the city, we visited the Plaza de España.


This is a large, semi-circular space, built in the 1920s for an international exhibition (world's fair) held in the city. It's now mostly government buildings and, of course, is a big tourist attraction.

The Plaza de España is located at the edge of the Parque de María Luisa (Maria Luisa Park). We got a little lost and ended up walking through quite a bit of the park to get the the Plaza. It was lovely walking down these shady avenues on such a hot day.


The Plaza itself is huge and very theatrical. I've never been anywhere quite like it. Apparently it was used as a location in one of the Star Wars prequels which seems very fitting as this is a very fantastical space.


There are buildings all around the curve of the semicircle, with archways and balconies galore.


In front of the buildings is a curved canal, where you can rent charming little rowboats  The canal is crossed by four bridges decorated with colourful ceramics.


Aren't they lovely? There are also 48 alcoves (one for each of Spain's provinces) decorated with ceramic tiles- you can just make them out in this photo.


Sadly I was feeling a little under the weather on the last day of our trip, so we didn't spend as much time as we'd hoped looking round this unique space but I'm really glad we got the chance to see it.

This might have been our last day in Seville, but I've still got more photos to share with you guys soon. In the meantime, if you missed it, you can read about my visit to Seville's Metropol Parasol, aka "the mushrooms".

Monday, 25 April 2016

Follow Me on Instagram (Yay!)

So, I have finally joined the modern world and got myself a smartphone. My previous mobile was a Nokia 3310 so this is a bit of a step-up for me technology-wise!

Learning how to use all this new tech is slightly breaking my brain and is making me feel really rather old, but I'm getting there slowly.

I was very pleased to discover that the phone case I made for Mollie Makes is a perfect fit.


Now that I've got a smartphone, I can finally start using Instagram - hurrah!

This is not the only reason I switched to a smartphone, of course, but (I'm not gonna lie) it was one of the reasons! I really miss the good old days of Flickr when it was a busy, buzzing place filled with creative people sharing interesting images... and Instagram seems like it has that same vibe, and seems to be where my crafty friends are all hanging out these days.

Basically, I've been feeling a bit left out of the fun happening over there and I'm delighted to be able to join in :)

https://www.instagram.com/lauralupinhoward/

I'm posting on Instagram as @lauralupinhoward - follow me for the usual mix of colour and craftiness.

P.S. I'll still be blogging, of course, and I'll make sure to do round-ups from time to time of my Instagram snaps so you won't miss out if Instagram isn't your cup of tea.

Friday, 22 April 2016

How To: Make a 3D Flower Picture with Felt & Fabric

I love flowers, you love flowers, everyone loves flowers, right? (Even if you're allergic, you've gotta admit they look nice!)

Today I'm sharing a "how to" for making a frame-able posy of felt and fabric flowers.


The 3D flowers are designed to be mounted in a box frame, with a tag attached on which you can write a phrase or message of your choice. This project originally appeared in docrafts Creativity magazine a couple of years ago, and was made using felt, fabric, buttons and other supplies from the docrafts range. 

I used a mix of felt and fabric to create my flowers, but you could use two shades of felt instead if you'd prefer. You can use any colours you like for making the flowers: select your shades and mix and match them throughout the posy. Placing contrasting colours together (e.g. blue fabric on pink felt) will help make the details of each flower pop!


You will need:

- the templates provided at the bottom of this post
- a selection of pretty fabrics (quilting cotton is ideal)
- co-ordinating felt
- co-ordinating buttons
- matching sewing threads
- green felt
- green sewing thread
- iron-on interfacing
- an iron and ironing board
- a gift tag
- some bakers twine
- a box frame*
- sewing scissors
- sewing needle and pins
- a pen (to write your message on the tag)
- sticky tape
- double sided tape
- craft scissors
- sturdy white card

*I used a frame sized to fit an 8 x 10 inch (20 x 25 cm) photo. If you’re using a different size frame you can resize the templates or make a different number of flowers to create a larger or smaller posy.

To make the picture:

1. Iron your chosen fabric to remove any creases. Cut a piece of iron-on interfacing that's large enough so you'll have room to cut out the five or six fabric pieces for one flower - don't cut out the petal shapes yet! Apply the interfacing to the back of one of your chosen fabrics, following the manufacturer’s instructions.

Repeat this step for each of the flowers.

Tip: applying the interfacing will help prevent the fabric edges from fraying. If you're using felt instead of fabric, skip this step.

2. Use the templates provided to cut out the pieces for each flower in the quantities shown. Each flower is made up of one felt flower back and a set of felt and fabric petals.

3. Follow the flower instructions (below) to make all four flowers, arranging them in a bunch to fit the frame.

4. Write your message on the tag. Then cut a length of twine, knot it onto the tag and tie it in a bow around the flower stems. Trim any excess twine.

5. Open up the frame and remove the card mount. Turn the mount over and line up a piece of white card to fit the mount (I used a piece of A4 card). Stick the card in place on the back of the mount with tape, then turn the mount over.

6. Arrange your posy on the backing card. Then, starting from the centre and working outwards, secure the posy and tag with pieces of double-sided tape.

To make each flower:

1. Place the fabric petals on top of the felt petals.

2. One by one, sew the petals to the backing circle so the petals slightly overlap.  Use running stitch and thread to match the fabric, sewing two thirds of the way up each fabric petal. Sew up the petal and then back down, filling in the gaps to create a continuous line of stitching.

3. Add a contrasting button to the centre of the flower, sewing it securely in place with a double thickness of the same thread.

4. Cut a narrow piece of pale green felt for the flower stalk – this should be approximately 1.5 cm wide and as long as you need for each flower’s stalk.  If required, use the template provided to cut a leaf from matching green felt.

5. Fold the long felt piece and pinch the fold between your fingers, sewing the edges together with whip stitch and matching thread. Your finished stalk will be slightly curved. If you want to add a leaf, sew it to the stalk with a couple of small stitches, hiding the knot at the back.

6. Sew the top of the stalk to the back of your flower, using whip stitch and sewing into the back of the flower but not through it. 

Tip: to make sure your posy will fit your frame, arrange the pieces as you go along using the frame’s mount as a guide.

Click here to view the template sheet, make sure you're viewing it full size then print it at 100%.


This tutorial is for personal use only: you can use it to stitch as many flowers as you want for yourself or as gifts, but please don't make any for sale. You may borrow a photo or two if you want to blog about this project, but remember to credit me and link back to the original source, and do not reproduce my entire post or share the pattern itself on your site. Thanks!

Enjoyed this free tutorial? Buy me a "coffee" and help support my blog!

Buy Me a Coffee at ko-fi.com

Subscribe to my newsletter for a monthly free pattern and visit my crafty tutorial archive for lots more free projects.

Visit my shop to buy my printable PDF sewing patterns:

Wednesday, 20 April 2016

A Trip to Seville: The Mushrooms

A couple of years ago, I took a short trip to Seville with my mum. I'd never been to Spain before and was enchanted by the beauty and character of the old city. I took loads of photos during our trip and then (as they so often do) they just sat in my hard drive gathering virtual dust.

This Christmas I finally got my photos edited so I could make a photo book of our trip for my mum - it was a surprise gift and a big hit! And now I am finally getting around to blogging about my trip. I hope you guys will enjoy the photos, and maybe they'll inspire you to take a trip of your own to Seville?

First up, one of the newest additions to the Seville skyline: Metropol Parasol, know locally as "las setas" (the mushrooms).


The mushrooms are a modern, wooden structure built in what used to be a car park but is now a public square. In the basement you can visit some Roman ruins (which were discovered when the city first decided to redevelop the car park) and up the top you'll find a restaurant.


The main attraction though is the walking route all around the top of the structure, from which you get some fabulous views out over the city.


Brash, modern designs like this are not everyone's cup of tea - especially in such a historic setting - but I rather love the quirky, organic shape of the mushrooms and the contrast between old and new.

I also love going up high and getting an overview of a new-to-me place and Seville was looking really gorgeous in the sunshine!


Slightly different to my usual Nice Days Out, huh?

I'll share some more photos from our trip sometime soon :)

Friday, 15 April 2016

How To Video! Sew a Felt Elephant Family

Some fun news: CICO Books (who publish my books) have launched a craft channel on YouTube called MAKE. They'll be sharing crafty ideas at the start of each week with #MAKEonMonday, as well as behind-the-scenes videos with the authors and other bits and pieces.

This week's video features a project from my second book, Super-Cute Felt Animals: a tutorial for sewing a cute mini elephant family from felt.

https://youtu.be/mNGq-7hUXYA

Click here to view the video on YouTube.


The video takes you through all the steps of making your own felt elephant (or baby elephants!) and you'll find a link underneath the video where you can download the free template sheet.

You can subscribe to the YouTube channel here or follow CICO Books on Twitter or Facebook to get notifications of their new videos and other news.

The felt elephants family is one of 35 projects from Super-Cute Felt Animals: lots of cute felt animals that fit in the palm of your hand! The projects are divided into six chapters - In the Woods, On Safari, Under the Sea, On the Farm, In the Garden and At Home - and each one has illustrated step by step instructions and full size templates so you can get crafting straight away.

Super-Cute Felt Animals is available to buy from Amazon UK, Amazon USA, the Book Depository, and many other bookshops.

http://www.amazon.co.uk/gp/product/1782490582/ref=as_li_qf_sp_asin_tl?ie=UTF8&camp=1634&creative=6738&creativeASIN=1782490582&linkCode=as2&tag=bugandfis-21

P.S. When the book came out I shared a series of free projects to mix and match with the designs in Super-Cute Felt Animals. You can find all the tutorials here.

Please note: the Amazon and Book Depository links in this post are affiliate links. 

Tuesday, 12 April 2016

A Short Walk along the Thames: Tate Britain to Westminster

Last week my mum and I took a trip to the Dulwich Picture Gallery to visit their Astrup exhibition. This was excellent - so many gorgeous paintings and beautiful woodcut prints, and all by an artist I'd never heard of until this exhibition was announced.

You can watch a short video about the exhibition here and read about a previous trip of mine to Dulwich here.

After viewing the exhibition, visiting the shop and having a quick look round the main gallery (I especially love this painting in their collection) we headed back towards central London for lunch. A short train and Tube ride later and we were at Tate Britain - they do very tasty lunches here and it's always nice to have an excuse to pop in and look at the art!

Tate Britain doesn't have the flash of its younger, bigger sister Tate Modern but it's free to visit and has some wonderful art (including many of my all time faves)... and the building itself is pretty nice too.


As it was a nice sunny afternoon we decided to walk along the Thames to Westminster and catch the Tube home from there, as I'd (shockingly) never walked along this bit of the river before. It turned out to be a lovely little walk and (like so many places in central London) absolutely jam packed with history.

We both admired this interesting-looking building... which Google informs me is the headquarters of the Security Service, MI5! The MI6 building is just over the river, too.


A little further along the road you come to Victoria Tower Gardens, which are home to a very decorative memorial.


The Buxton Memorial commemorates the emancipation of slaves in the British Empire in 1834. It was originally located in Parliament Square but was moved to Victoria Tower Gardens in the 1950s. There are also a couple of interesting statues in the park, including one of the suffragette Emmeline Pankhurst.


You get great views from the park of the Palace of Westminster (home to the Houses of Parliament), after whose looming Victoria Tower the park is named.


Looking up river you also get a great view of Westminster Bridge and the London Eye.


The Palace of Westminster probably needs no introduction but it really is a fabulous building, all Victorian Gothic splendour.


Westminster Abbey - just over the road - is similarly impressive. When I mentioned to my mum that I'd never been to the Abbey she was positively appalled, so I guess we'll be planning a day trip there sometime soon!


At the far end of the Palace there's the Elizabeth Tower with it's famous clock and the bell, Big Ben, which chimed three as we were walking through the park (Bong! Bong! Bong!).


The whole area is swarming with tourists, of course (most of whom are all trying to get a selfie with the clock in the background!) but don't let that put you off.

The buildings are truly wonderful in person (so much detail!) and whenever you see Westminster on the telly you can think "I've been there!" (not gonna lie, I find this hugely satisfying when I spot places I've visited).

All in all, a very nice end to our day out!